
PS3 RetroArch – Play all the consoles on your PlayStation 3 – Sega, Nintendo, Atari, Commodore
5th January 2025
How to Install DLCs on your modded PlayStation 3
22nd January 2025How to recover permanently deleted files on your computer
We’ve all been there. You think you’ve finished with a file, you delete it, you empty the recycle bin and then you need the file. Or you delete the wrong folder, or you format a usb stick, or one of hundreds of other situations where your work is lost. But it’s not always lost for good. There are a number of ways you can get your files back. So let’s go through the process.
Important Note
As soon as you notice you’ve lost the data STOP.
When you delete a file the data stays on the disk, but the place where it’s saved gets marked for reuse. If you then save other files to that same disk you can overwrite the old file data. At this point you won’t be able to get it back, or at least not all of it.
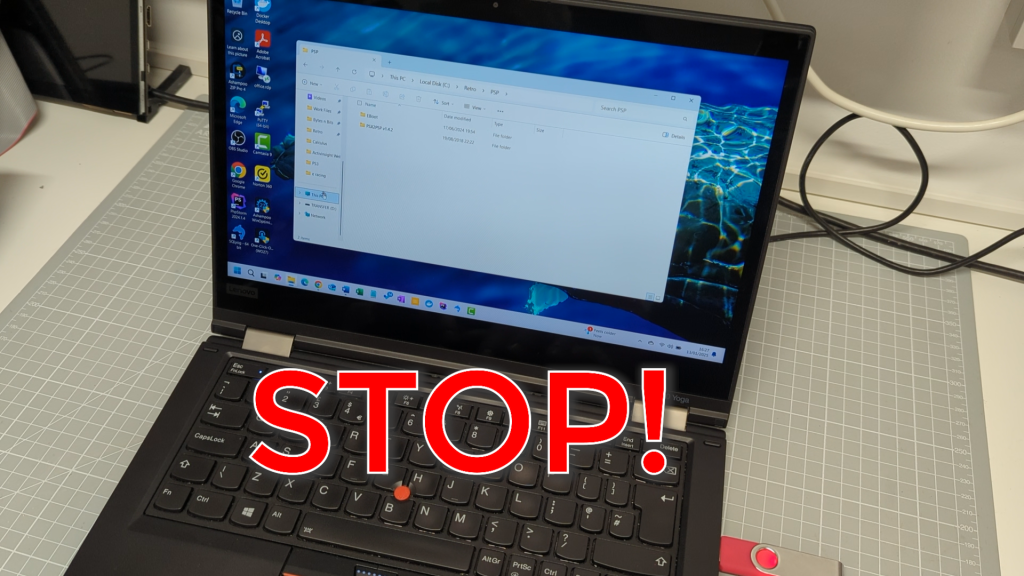
If you’re in the middle of researching how to recover your data and it was on your system hard drive, in other words the same drive as your Windows or Mac operating system is on, or if you’ve only got one hard drive then immediately shut down your computer. As you use your computer it will automatically be creating temporary files, downloading updates and so on. All of these can overwrite your lost files meaning they will be gone forever. Then use your phone or another computer to continue watching this video.
Simple Solutions First
Before we go into the data recovery part don’t forget that there may be some built in safety on your computer. Again if your deleted files were on your system hard drive don’t turn on your computer.
When you click to delete a file on one of your hard drives it usually goes into some sort of recycle or trash bin. The file hasn’t yet been deleted and your operating system, either Windows or MacOS or Linux, will keep the file safe for a few weeks before deleting it for good. Your recycle bin usually appears as a folder on your desktop. Just open it up and you will see your recently deleted files. On a Windows computer just right click a file or folder and select the restore option. This will put the files back to where they came from. Unfortunately USB drives don’t have this feature so if you delete a file on one of these you’ll have to use the full recovery method.
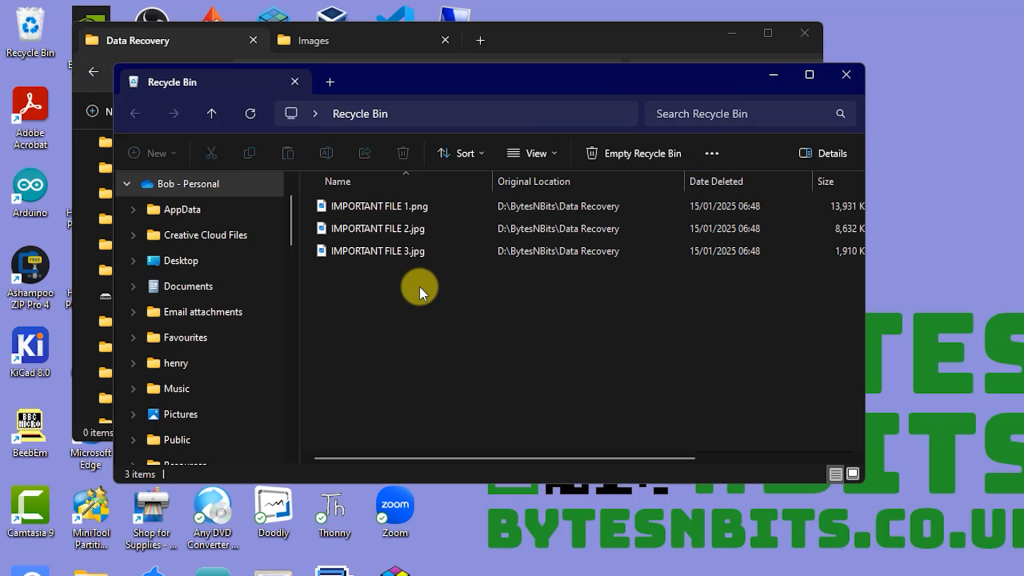
If you’ve emptied your bin then again you’ll need the full recovery method.
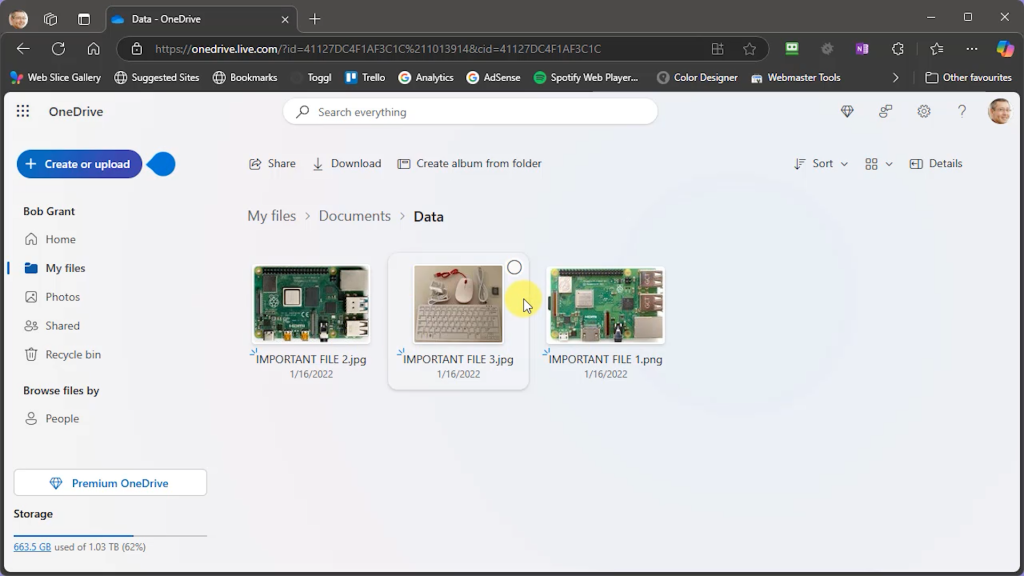
You might also be running some sort of cloud storage application such as Microsoft’s OneDrive. These applications keep a copy of your files on remote cloud servers. If you delete a file from your PC, even if you clear the recycle bin, OneDrive will keep a backup copy for about 93 days. To get the files or folders back you’ll need to log on to the OneDrive website and then go to its own recycle bin. You can do this from any computer, phone or tablet. From there you can select and restore files and folders as you need. Once restored your PC will be able to synchronise and pull the file back onto your local computer.
Data Recovery App
So what if you’ve tried the simple tools but the file has gone? Don’t worry. There are still some solutions we can try.
For this we’ll need the help of some data recovery software. The application I use is the Minitool Data Recovery app. This has a free version that you can use to recover up to 1GB of data, so if it’s just a few files you won’t have to pay anything. If you’ve got more data to recover they have a number of paid options depending on how often you think you’ll need to use the software.
As I mentioned before the most important part is not to use the disk drive that your lost data was saved on. As you try to install the app it will warn you about this. You mustn’t install onto the disk drive that you’re trying to recover data from. If you only have a single hard drive installed as your system disk and the data is on that, you’ll not be able to use the computer as normal so you’ll need to create a bootable USB drive with the data recovery app on it. This option will need you to buy a licenced copy of the software and I’ll cover that at the end of the video. You can also take the hard drive out of your computer and connect it to another computer and recover the data there.
If you don’t have access to a second computer you can try using your machine to do the recovery. Make sure you have a USB drive available and plug that into your computer. Then download the app onto your USB drive and install it onto the USB drive. We’re trying here to keep the activity on the main system disk as low as possible. You can then run the app and try the data recovery.
So now that we have the software installed let’s take a short look at what we’re trying to do.
How Does Data Recovery Work
In simple terms a disk drive works by saving the data in your files into blocks of storage space within the drive. Where these blocks are placed is stored in a database on the drive called the file allocation table.
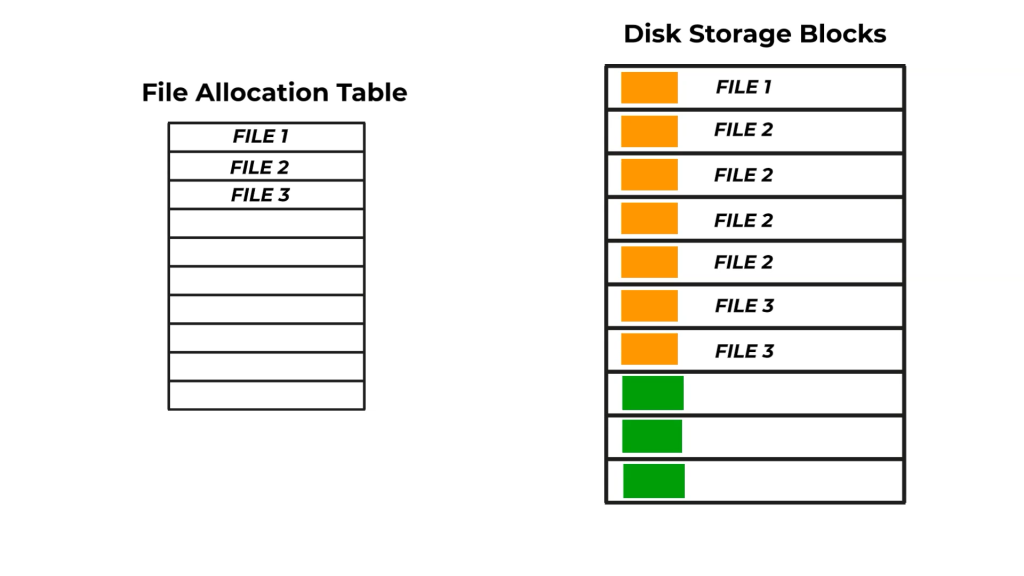
When you delete a file using the normal delete function all your computer does is to remove the entries for your file from the file allocation table database. This marks the used blocks as free but most importantly it leaves the data stored in those blocks where it is.
To recover a file we just need to work out which blocks were used to store it’s data and then put them back in the correct order to rebuild it. This process is why we need a specialist application as there is no way we can manually scan the thousands of disk sectors and blocks to reconstruct this data.
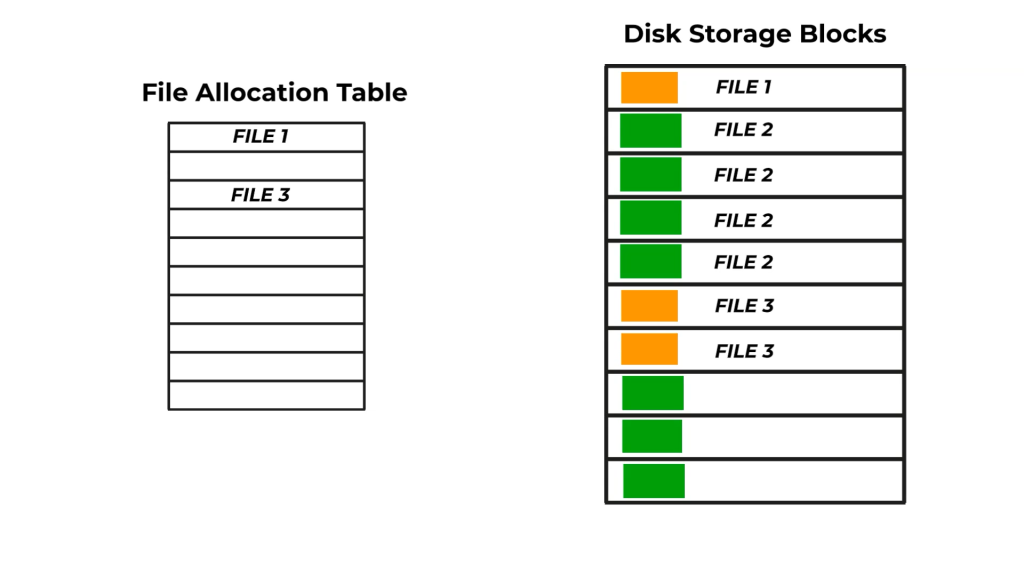
So now that we know what’s going on let’s look at getting our files back.
Recovering Deleted Files Not On Your System Drive
When you first start the app it will scan your attached drives and list them out as a number of partitions. Partitions are effectively parts of your various disks that have been set up as individual drives. Some have letters attached to them. These will be the drives you see in your normal file explorer program. Some will have no drive letter and these will normally be hidden from view.
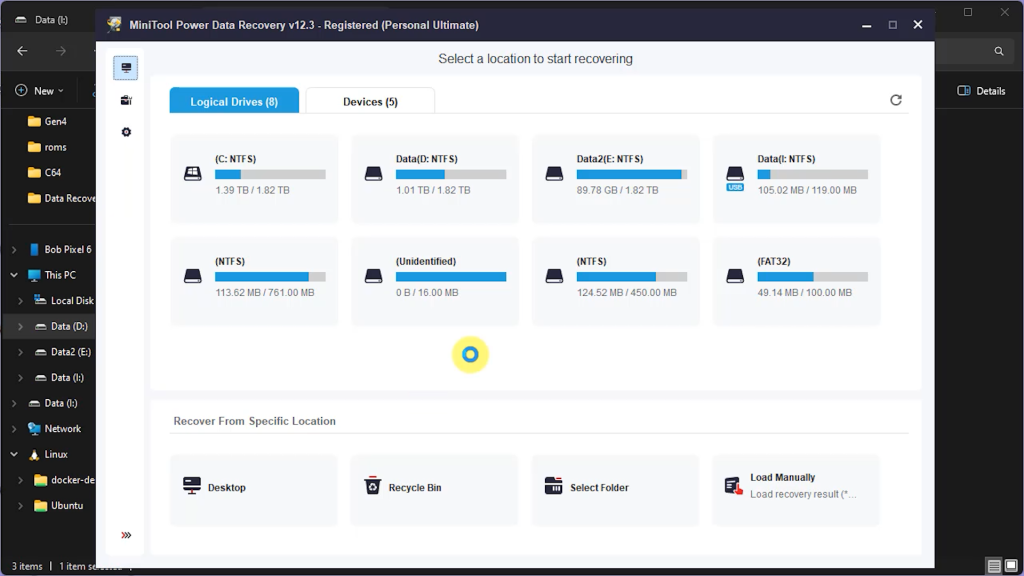
You can either scan a complete drive, which will take a long time, or browse for the folder where the file used to be. If you know where it was this option is much faster. Simply select your starting point and the software will kick into action.
This is the part where you’ll have to wait for the software to look at all the free sectors and blocks on the drive. Remember that when the file is deleted it gets removed from the database of files on the drive. The app is now scanning the surface of the drive to check every free block to see if it used to belong to a file. Once it finds data it will then try to identify the other parts of that file and rebuild its own version of the file allocation table so that it can resurrect your deleted information.
As the scan progresses, you’ll see a list of files building up under the Deleted, Lost and Existing sections.
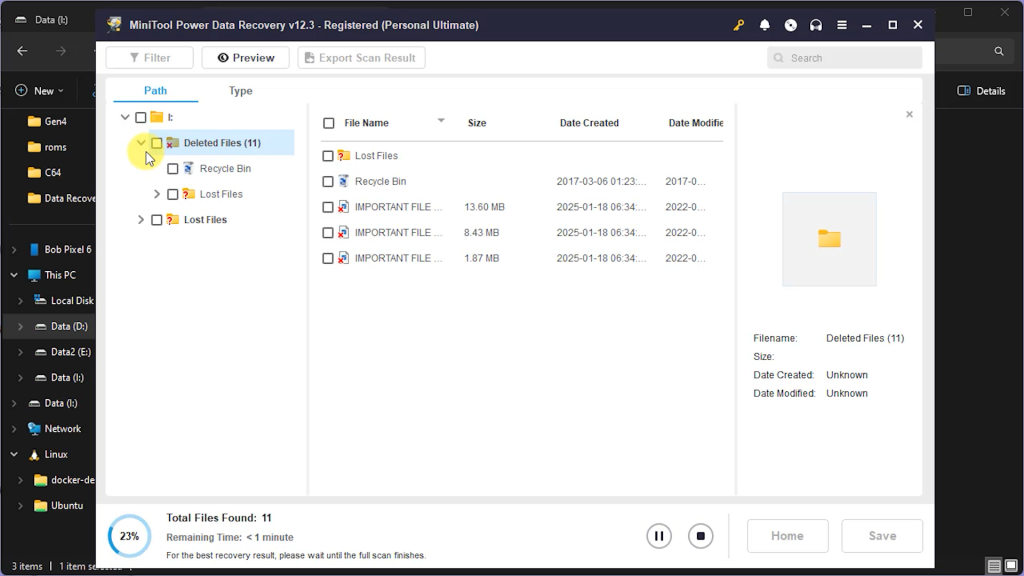
Keep your eye on the deleted section to see if your file pops up.
If the scan completes and your file isn’t found then there’s still an outside chance you can get back at least some of the data, but you’re going to have to manually go through the lost and broken files to see if anything there can be salvaged. To be honest though this is going to be a very long process with a low chance of success.
Hopefully though you’ll find the file listed as I have here. Again, I can’t stress enough how important it is not to mess with any other files on the drive until you’ve run the scan and retrieved the deleted files.
All that’s left now is to restore the file. You can stop the scan if it’s still running and simply right click the file and restore it. Make sure you save it to a different hard disk or USB drive so as not to mess with the missing file data. If you’ve got any other files or folders to retrieve, then just select those and restore them as well.
Hopefully you’ll now have your files fully restored.
System Drive Recovery
So what if the files are on your system drive?
As we saw earlier using the computer as normal will create files on your system drive that can destroy the lost data.
One option is to take out the hard drive and attach it to another computer. You can then treat it as a secondary hard drive and run the data recovery on that computer without any worries.
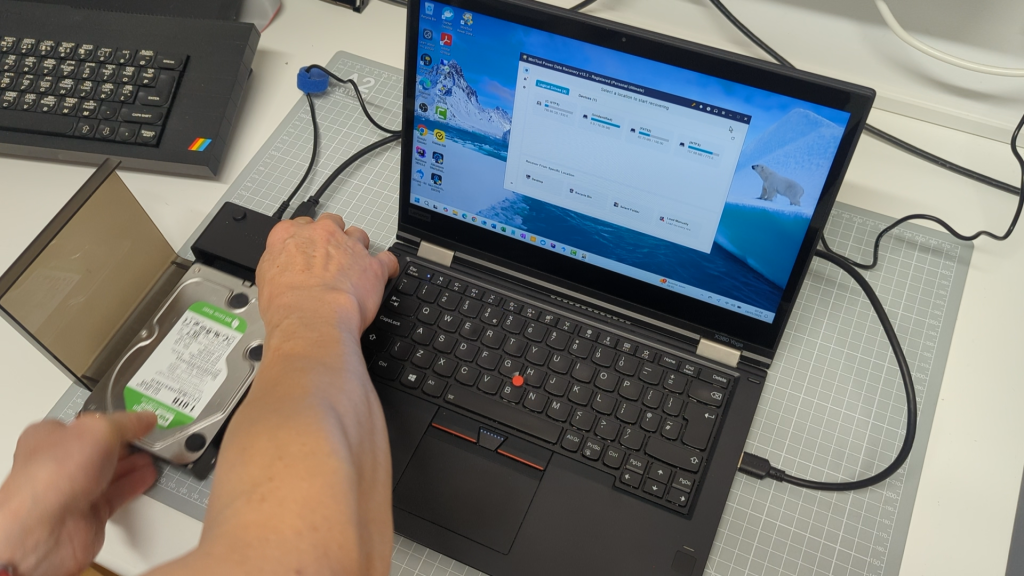
Otherwise we need to start the computer using a different drive so that it does its automatic file creation on that, keeping your system drive data safe. We’ll create a USB bootable drive for this. Again you should run this on another computer to be as safe as possible so you’ll need to install the Data Recovery software on that computer.
As I mentioned this option is only available on the paid versions of the software. You may also find that when you try to follow my instructions that the software complains about it now having the full code downloaded. Just follow the instructions when that message pops up to get hold of the full package.
With the full software installed you now need to attach a USB drive to the computer and click the CD icon.
This will open the WIN PE media tool. Click on the options button and you’ll see a screen asking about drivers. Don’t worry about this too much. Just click the Detect Drivers button and the software will put together a working package for you. If you fully understand what you’re doing you can adjust the settings, but for most of us the defaults will work.
Click the next button and You’ll now need to select the type of boot media you want to make. We’re working with a USB Flash drive so select that. If you prefer to make a bootable CD or ISO file you can also do that here as well.
You’ll see the warning message appear telling you that it’s about to destroy all the data on your USB drive. Please do make sure that this is OK as you probably won’t be able to recover that data and you’ll end up going around in circles.
Click the OK button and the drive will be built.
Once that’s finished we’re ready to boot up the computer with the deleted files.
You first need to work out how to get to the initial boot menu on your computer. Have a look on the internet for your make of computer and boot menu. For example on my test machine I’m searching for a Dell Optiplex 7010 boot menu and the results are showing me that a need to press the F12 key as the computer boots up.
So now plug the USB drive into your computer. Turn it on, and start slowly tapping the boot menu key (about twice per second). It should give you a different boot screen and say that it’s starting the boot menu. You can stop pressing the key.
You’ll now get one of two situations.
If you can see an option for the USB drive, or USB bootable media, etc., that’s the one we want. Select it and the system will continue booting.
If you can’t see the option you’re probably in what’s known as secure boot mode which is designed to stop you accidentally booting from random USB drives. We need to turn this off. You should see some sort of option to change your boot mode. Select this and then select the one that mentions Legacy Boot Mode.
The computer will probably restart so again press the Boot Menu button until you can get to the USB boot drive option. Once we’ve finished all of this you’ll need to go back into that boot mode section and turn it back to secure boot mode.
Either way you should now see the Minitool app appearing.
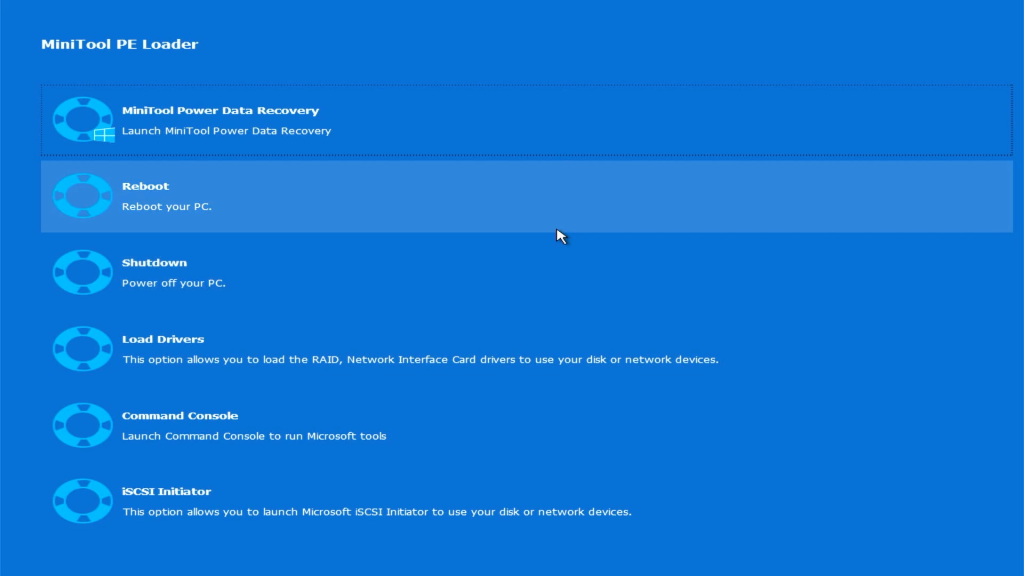
On this first screen we need to select the option of the Data Recovery tool and this will then frop you into the application as before. You’ve not got as many options available in this version and you’ll have to scan the full drives to get at your deleted files. But again keep your eye on the deleted files section as the scan progresses to see if your files pop up. As soon as they do you can stop the scan and restore the data.
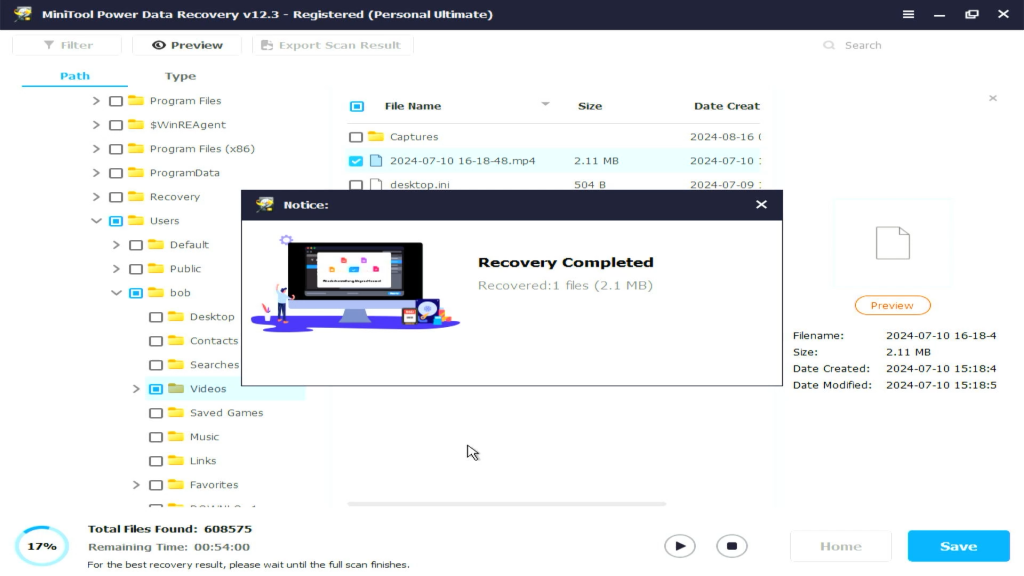
Once you’ve finished click the red button on the top right corner to close the app, remove the USB drive and then reboot the computer.
Hopefully you’ll now have all your files back safe and sound.


