Atari ST emulation on your PC – Standalone Hatari and LaunchBox integration
14th January 2022
Installing Atari ST Emulation in RetroPie Using a Pi Zero 2W, 3, 4 or 400
17th January 2022Commodore Amiga Emulation in RetroPie Using AmiBerry on the Pi Zero 2W, 3B+, 4 or 400
The Commodore Amiga was one of the ground breaking home computers from the second half of the 1980s. Launched in 1985 it was powered by a 16 bit Motorola 68000 processor with upwards of 256KB of RAM. It had a mouse based, graphical, windowed, multitasking operating system called AmigaOS, and hardware accelerated graphics and sound capabilities using custom co processor chips. Compared to the standard, 8 bit computers of the day this was a true leap forward in performance.
And best of all the gaming industry took full advantage of the upgraded hardware.
So this makes the Amiga a great machine to emulate and you can do it with your Raspberry Pi running Retropie. In this video I’m going to be using a Raspberry Pi Zero 2W. I’ve overclocked mine to 1.4Ghz just to give it a little extra power, so if it works OK here it will work fine on the 3B+ and anything newer.
If you haven’t seen my videos on setting up Retropie or overclocking the Pi Zero 2 then check out my tutorials.
So lets boot up Retropie and get our Amiga games running!
Installing Amiberry
The Amiga emulator we’ll be using is Amiberry. This isn’t installed by default so we’ll have to manually install it through the Retropie setup screens.
From the main Retropie menu go to the Retropie section and then select Retropie Setup. Once that opens up select the Manage Packages option followed by Optional Packages. A list of extra software will pop up so find and select Amiberry. On the installation menu you can install from a precompiled version which is the quickest, but doesn’t always use the latest version, or you can install from source. This will download and build the lastest software but will take about 10 to 15 minutes to complete.
Once you’ve finished the installation back out to the main Retropie menu and reboot the system.
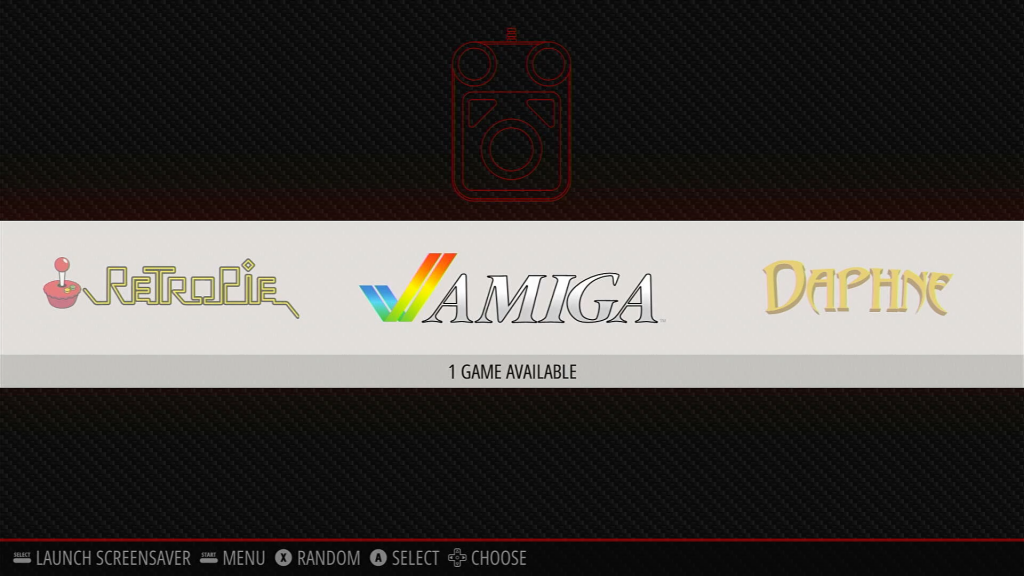
Amiberry should now be installed on your Raspberry Pi. To check it’s all gone OK you should have an Amiga option in Retropie with 1 game showing. Selecting Amiga should show a Start Amiberry listing and if you select that you should be able to get to the Amiberry setup screen.
This screen lets you set up how Amiberry works. You can select the model of Amiga you want to emulate and a whole range of other options. It’s possible to use your gamepad to navigate around but I’d advise connecting a keyboard and mouse. The whole amiga experience will be easier with these connected anyway.
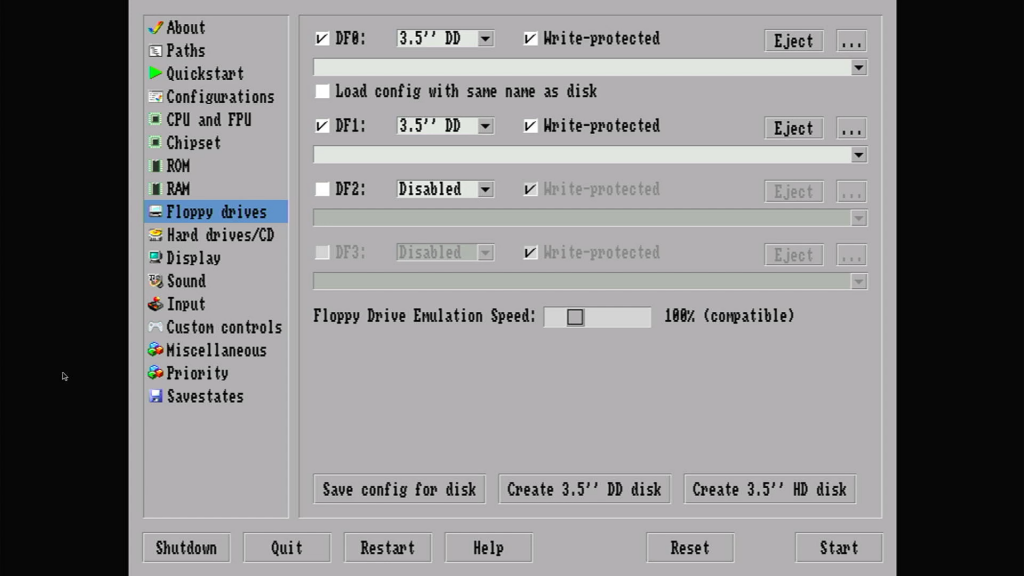
For now leave all the settings as they are and just click Quit to get back to Retropie.
Installing the BIOS Files
The emulator is now installed and working, but we’ve got a few more steps to complete before we can play any games.
Each of the Amiga models used a different version of the operating system depending on the hardware configuration for that model. Amiberry is shipped with a basic BIOS file that will get you up and running, but it’s not ideal. So we’ll need to get hold of and install a set of BIOS ROMs so we can accurately emulate the various Amiga Models.
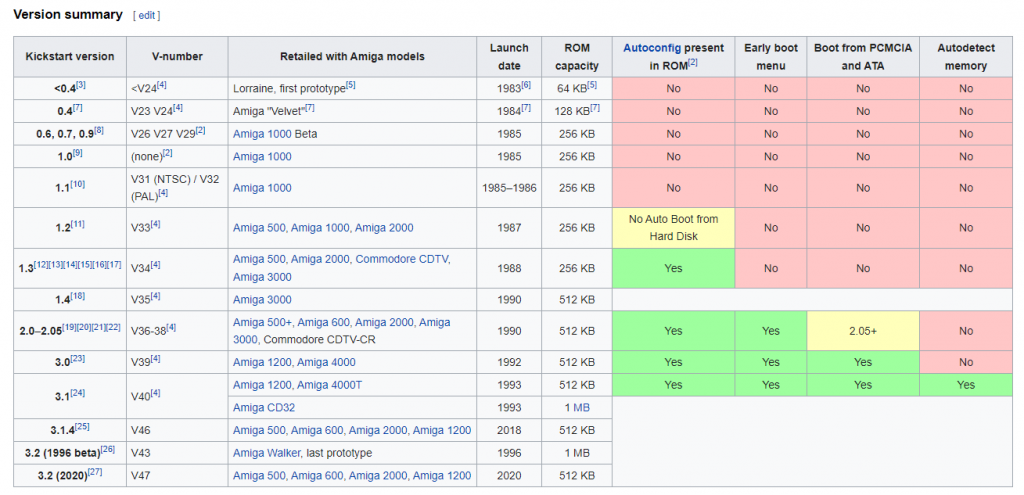
These ROMs are available for sale from Amiga Forever who are a legitimate source. Their Value edition has the main 1.3 ROM set that will get you going but their Plus edition has the full set of ROMs if you want to explore the platform a bit more.
Of course these files can be downloaded elsewhere. Unfortunately, I can’t tell you where to get them. Downloading copyright software is illegal so please bear this in mind. As usual, a quick search on the Internet will uncover their location. Look for Amiga Kickstart BIOS files and Google will reveal the locations. archive.org is usually a good place to find what you’re after.
If we have a look at the Retropie documentation for the Amiga you’ll see a list of the BIOS files we need.
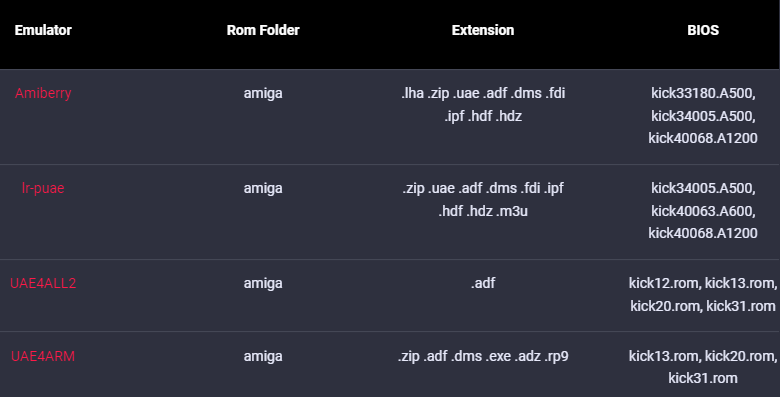
To install them you simply need to copy them to the bios folder in your Retropie SD card. If your Raspberry Pi is connected to your home network the easiest way to do this is to open up the \\retropie share folder and copy the files over the network. Otherwise power down the Pi and just put the SD card into your computer and copy the files as normal.
Installing Amiga Games
Now that we’ve got the BIOS files in place we need some games. Again, looking at the Retropie documentation you’ll see the file extensions that Amiberry supports. Some of these formats are for single floppy disk images, others try to combine the whole game set into one file.
Amiga games were generally distributed on floppy disks, or at least the rigid 3.5 inch versions which could hold a bit over 800KB each. Some needed multiple floppies that had to be loaded into the disk drive one by one as the game loaded or progressed. If you do download individual floppy disk images you’ll have to follow this process.
Individual Game Disks
So here I’ve got images for all 3 disks for Alien Breed. To get the game to run I need to copy these into the amiga folder in Retropie. If I put them in their own sub folder it will keep all the files for this game in one place.

If I then restart Emulation Station, or reboot if you prefer, I’ll see the game listed in the Amiga section. Unfortunately the games won’t run from the Emulation Station menu. You need to use the Start Amiberry option to get to the Amiberry control screen. Again, a keyboard and mouse will come in handy here. If you go to the Quickstart panel you can select the type of Amiga in the model dropdown and then any extra configuration on the machine. The Amiga 1200 with 4MB of RAM is a good starting point. Make sure that you click the Set Configuration button to make your changes take effect.
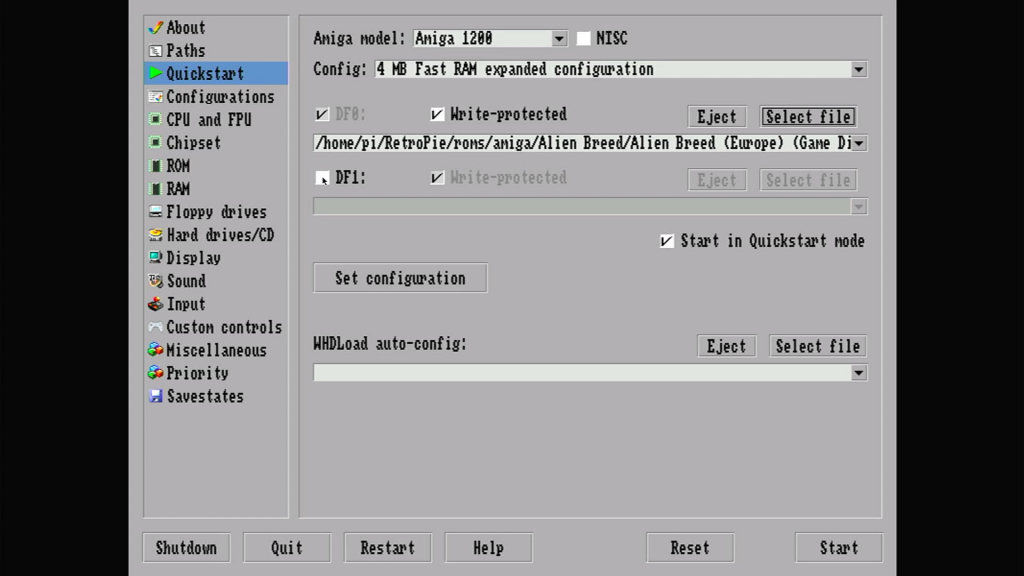
The DF0 and DF1 sections represent the floppy disk drives. Click the select file button for the DF0 drive and find the first disk for the game. You’ll probably find the file selector is not in the right folder, so use the .. option to back up the folder structure until you find the home folder. Then select home, the pi user, Retropie, roms, Amiga and finally your game folder. Select the Disk 1 image and that should then be loaded into your floppy disk drive.
You can load the second disk into the DF1 section, but I find that sometimes that makes the game fail, so I’ll play safe and just put the single disk into the machine.
We can now click the start button to boot up the Amiga.
After the splash screen the system will eventually call for the second disk. Press the F12 key on your keyboard to get back to the Amiberry screen. Now select Disk 2 for the DF0 drive and click resume.
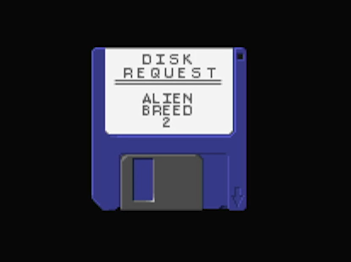
Games will often use the fire button (B) on your gamepad or space or the mouse button to continue the game load. For this game I’m pressing the B button.
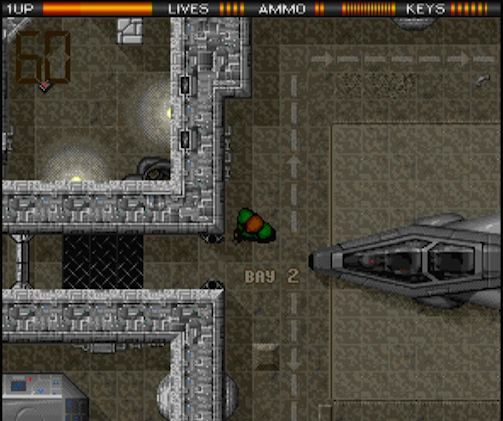
And we’ll then get to the actual game.
Floppy disk images come in a number of formats. IDF files tend to be copies of the original and quite often they still have all the copy protection code in place. If I try to run this copy of Zool I’ll get to the protection screen where I need a special cardboard wheel that came in the game box. So I’d need to find out how to get around this protection before I can play the game.
The best workaround here is to find a hacked version of the software with the protection code removed. These tend to be .adf files. Again Google can help you out here.
Using WHDLoad For Easier Amiga Emulation
Using single disks can be a bit awkward, having to go into the Amiberry config screen and loading in image files. A second option is to use WHDLoad packaged games. Amiberry supports this file format where the whole game is packaged up as a single archive file. These usually include modifications to bypass the copy protection along with a number of other patches to fix any emulation issues. The files basically set up a number hard disk images on your emulated Amiga with the game software installed and ready to go.
Again you’ll have to search around for these. Ideally the games will come ready packaged as an LHA archive. This is the native Amiga compressed file format and you’ll need this to get the game to run. Sometimes you’ll also find the game packaged as a zip or hdf file. To be honest I haven’t worked out how to use these yet. I’ve tried extracting the files and simply packaging them up as .lha archives but that doesn’t really work. This will be something to play around with I guess.
Playing WHDLoad Game Files
Once you’ve got a WHDLoad file you can transfer that over to the Raspberry Pi Amiga ROMS folder, reboot and you should have a new game listed in RetroPie. The great thing about the WHDLoad packages is that they will usually run directly from the Emulation Station menu.
If they don’t, use the Start Amiberry to get to the config screen. On the Quickstart page select an appropriate Amiga model setup, but this time load the disk image into the WHDLoad auto-config section. Start or Reset the Amiga and the game should boot up.
Getting Games to Work
As you try out games you’ll find that they don’t always run on all models. As we saw with the BIOS ROMs there are a few variations on the software as well as the machine specs.
In the Amiberry config I found that an Amiga 1200 with 4MB of RAM running Kickstart 1.3 works well with most games. Some will need a different setup but look for the game details online and you should get hints as to what model is needed to run the game.
Again a bit of trial an error to get things going is part of the fun of emulation!
Conclusion
So that should give you access to the full range of Amiga games. As we saw, it’s not as easy as emulating a console as there are so many variations on Amiga models. But with a bit of trial and error, and with the help of the many Amiga forums, you should be able to get your fill of the amazing games for this platform.

