Mod your PlayStation 3 with Flash Writer – full installation tutorial
27th August 2026
Ultra easy PS4 hack – web browser exploit for 11.50 to 13.00 firmware
1st September 2026
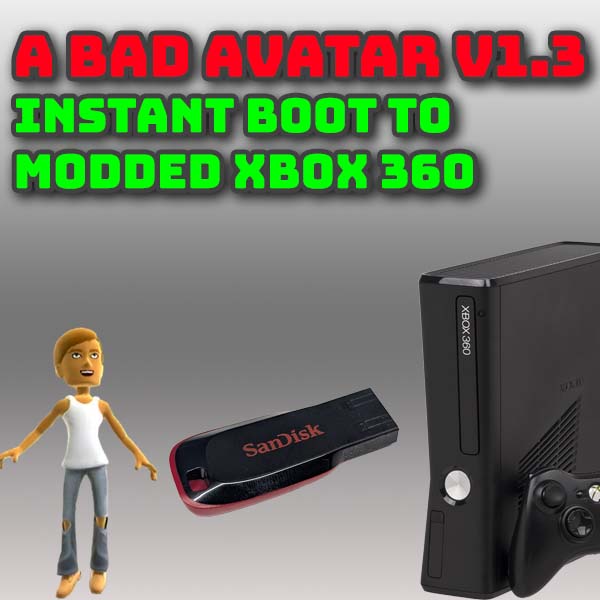
Mod your Xbox360 with just a USB drive – Bad Update V1.3
The latest V1.3 release of Bad Update now exploits your Xbox360 console in just a couple of seconds and is almost 100% reliable giving you a modded console every time. These improvements make this technique a real alternative to the full RGH3 hard mod but with absolutely no soldering. All you need is a USB drive and a few downloaded files.
So let me show you how to set it up on a stock Xbox360.
Already Using Bad Update or Bad Avatar?
Just a note before we get started. If you’re already using Bad Update or Bad Avatar you don’t need to go through the whole setup process. You can upgrade both to this version of Bad Update by just swapping out a few files. Make sure to subscribe to my channel and check the links in the description to watch my update video.
Setting Up
First off we need to get a few things set up to run the exploit.
The Bad Update code needs a specific version of the Xbox firmware. To check your console you need to need to go into the Settings, System and Console Settings and then select System Info near the bottom of the list. This will display your current dashboard version on the right. At the time of making this video Bad Update needs version 17559 which is the latest release. If you’re installing the exploit and are on a higher dashboard setting then you’ll need to check the Bad Update repository to make sure it’s compatible with your version. If you’re on a lower version then you’ll need to run an update.
Updating the Dashboard
We’re not going to use the normal Microsoft update as we can’t guarantee it will install the version we need. We’re going to install the update using a USB drive.
At this point it’s worth considering what USB drive you’re going to use. The Bad Update files are going to be stored on this USB drive and it will need to be attached to the console while you’re using the exploit. You can also use the USB drive or a USB hard drive for your Homebrew apps and even your game files. Games do work best from your internal hard drive, but if you’re low on space this is a great way to get some instant storage.
For my setup I’m using a 64GB USB stick. I’ll be storing my homebrew apps on this but will store my games on my internal hard drive.
Plug your USB drive into the Xbox and go back to your System Settings menu and then select the Storage option. If you’ve used the USB drive before in the Xbox it will show as a USB drive, otherwise, like me, you’ll see an uninitialized drive. Highlight it and then look at the button options in the bottom left. If the drive is already Xbox ready you’ll have a Y button. Use that and then format the drive. Otherwise press A to format the drive. Remember that this process will wipe your drive clean so make sure there isn’t anything on the drive that you need to keep.
This gives us a correctly formatted USB drive that will work with our console. We now need to download our firmware.
https://digiex.net/threads/xbox-360-dashboard-system-update-2-0-17559-0-download-with-avatars.16047/
Back on our computer we need to go to this forum post, and I’ll put this link into the video description. If you now scroll down a bit you should see a link to download the 17559 version dashboard. Download this to your computer. This will be an archive file so you’ll need to extract its contents out to a folder on your PC.
If we now look inside this folder you’ll see the actual update code folder. This needs to be copied over to the root of our Xbox USB drive.
Sometimes you may have an issue where the USB drive that was formatted by the Xbox shows as full. If you have this error just format the drive in your computer as an FAT32 drive and try the copy process again.
Update the Console
Once that’s copied over we need to take the USB drive back to the Xbox. Make sure you’re on the main dashboard and plug in the USB drive. The console should see the update file and offer to restart to install it. Just select Yes and let it run through the update process. This will be in two stages with a reboot in the middle. Just wait until you see the main dashboard again.
Go over to the Settings page, then System Settings and console info and you should now be on the right dashboard version. We can now use our updated console to reformat the USB drive to ensure it matches our new firmware so go back to the System Settings, Storage, select the USB drive with the Y button and then format it. This gives us a fully cleaned drive formatted to the latest dashboard version.
Our console and USB drive are now ready for the mod.
Downloading Bad Update
We need to go back onto our computer and you’ll need that USB drive plugged into it so we can build our exploit code package.
First off we’ll need the Bad Update exploit code itself.
https://github.com/grimdoomer/Xbox360BadUpdate
If you head over to the main github repository you’ll find loads of information about the project along with the full instructions for what we’re about to do. Please do have a look through this to get an overview of what’s going on and to get a feel for how much work has gone into creating this great software mod.
But we need to get the code files, so head over to the latest releases section, and then in the latest release post download the Bad Update Retail zip file. I’m saving this into a Bad Update folder on my hard drive so that I can keep all my files together in one location. We are going to be downloading quite a few blocks of code and we’re going to have to modify some of them so I do advise getting your files organised.
At the moment I’m installing V1.3. There may be newer versions by the time you watch this video but for all the software we’ll be using today just download the latest releases and they should all install in exactly the same way. I’ll make sure to keep the links in the description updated to the latest versions.
Once we’ve downloaded the archive file we can extract it into its own folder so we have access to the actual files we want. Once extracted we can then delete the downloaded archive.
For each of the archive files we’re going to download during this preparation you’ll need to extract them to get the required files into their own folder. So if I don’t show that for each file just assume that’s what I’ve done.
What Game to Use
Bad Update uses a real game file for the exploit entry point. We basically open the game and if it contains a certain block of code the exploit can take control of the console. The Rock Band Blitz demo contains this exploitable code so we can simply download a copy of that from this Digex page. Again make sure you extract the archive file.
https://digiex.net/threads/rock-band-blitz-xbox-live-arcade-download-delisted-from-xbla.15780/
Replacing the Default Payload
We also need some supporting software to set up the Xbox. The first is a package called XeUnshackle. When the Bad Update exploit succeeds in gaining control of the console it needs some base level code to replace the official menu system so we can then run our Homebrew apps and control the Xbox. XeUnshackle replaces the default payload package that comes with Bad Update with one that provides a lot of extra features and compatibility enhancements. This really lets us start to make full use of the modded console. Again, there’s lots of info on the GitHub page so do have a look through that.
https://github.com/Byrom90/XeUnshackle
Essentially XeUnshackle allows you to run DashLaunch plugins which allows a Bad Update exploited console to do most of the things that a fully RGH hacked console can do. It’s also going to let us boot into our custom dashboard so we can get straight to playing our games. But we’ll talk about that as we install it.
Head over to this GitHub repo and go into the releases section and download the latest version. Again this will be in zip file format so make sure to extract the files into their own folder.
Applications
That gives us everything we need to run the Bad Update exploit. But once we’ve got that going we will need some Homebrew applications to let us take full advantage of the modded console.
XEXMenu allows us to do some base level tasks such as browsing our files and launching other apps. So head over to this forum thread and download the Live version which will allow us to run it from our USB drive.
The very first thing we’ll need to do once we get up and running is to back up our system NAND data. This code is essential if we ever need to recover our console after something bad happens. Without it you could well end up with a bricked Xbox360. We need the Simple 360 NAND Flasher app that you can download from this website.
https://www.consolemods.org/wiki/File:Simple_360_NAND_Flasher.7z
Finally it would be great to have some sort of dashboard to manage our games and give us a great looking games launcher screen. There are a few different apps you can use but I’m going to use the Aurora app. So pull up this webpage and download and extract the linked file.
http://phoenix.xboxunity.net/#/news
Preparing the Files
So that’s all our downloads sorted out. If you look in your download area you should now have a number of extracted folders for each of the files we downloaded.
We now need to build these into our USB drive.
To make this easier I’m going to open up two explorer windows, one set to look at the files in my PC, one for the USB dive. This will just make it easier to show you where the files and being moved to. We do need to be able to see hidden files and file extensions so make sure these are turned on from the View, Show menu in File Explorer.
First we’ll deal with the Bad Update files.
Open your extracted folder and inside there you’ll find Rock Band Blitz folder. Open up the folder and simply copy everything to the root of your USB drive. If you get any messages about overwriting files just say yes.
Now we need to install XeUnshackle. Open up its extracted folder and you should see this set of files. There is a readme file in this package which does give you a lot of information. If you’re planning on running a stealth server or more than just playing games then please do have a look through. There are certain aspects of the package that you need to be aware of. But for most of us we can just get on with the installation.
Again all we need to do is to copy everything onto the root of the USB drive. This will ask about overwriting files so you must say yes. This will replace some of the Bad Update files with XeUnshackle versions which is what we want.
Next we’ll copy over the Rock Band Blitz files. If you open up the extracted folder you’ll find a Contents folder, then a 16 0s folder and then the Rock Band Blitz package. If you’ve played around with a Jtag or RGH modded system you’ll be familiar with the GoD style format for games.
If I look in the same location on the USB drive we’ll find the GoD package folder created by the Bad Update package. We need to merge these two folders so drag the Rock Band Blitz package folder into the 16 0s folder on your USB drive. This now gives us the game files for Rock Band Blitz with a game save file from the Bad Update package. It’s this save file that will make the game trigger the exploit.
Now we’ll install the downloaded XeXMenu package. Open the extracted folder and you’ll probably find two archive files in here. We want the LIVE version so extract those files into their own folder. Inside that you’ll find a C0DE9999 folder. This too needs to be copied over to the 16 0s folder on the USB drive.
Now it’s time for the actual Homebrew applications. For this we can go to the root of our USB drive and create an Apps folder for our Homebrew apps. This just keeps them all in one place.
All we need to do then is copy the Simple 360 NAND Flasher folder and the Aurora folder into this Apps folder.
That’s our USB drive ready to go. So lets take it over to our Xbox360 and plug it in there.
Protecting from Bans and Blocks
We’re now ready to run the exploit.
First though we need to make sure that our console and accounts aren’t going to get blocked by Microsoft. If your console connects to the Microsoft Live servers once Bad Update has been installed you do have that risk of being banned. So before we start you need to disconnect from your network.
If you’re using an ethernet connection unplug it. If you’re on WiFi you’ll need to go to the settings page, Network settings and then forget your WiFi connection. This will make sure that the console can’t access the Microsoft servers. From this point on it’s best to leave the console offline. As we’ll see in a moment we will be able to reconnect to download game covers and so on, and XeUnshackle will block the console from connecting to the Live servers. But Bad Update is a non persistent mod which means that when the Xbox first boots up it will be in full retail mode. If it tries to connect to the Live servers any protection from your Bad Update code won’t be active.
If you do enable your network, which you can safely do to get title updates and cover art in Aurora, then make sure to turn it back off again once the downloads have finished.
Checking Before the Exploit
We can check that the USB drive is working by going to our Settings page, System and then Storage Devices. You should see the USB drive listed. If you have 2 USB drives attached make sure you unplug the other one so you only have the Bad Update drive attached.
Next we need to make sure that no Rock Band Blitz data is on the console as this will interfere with the exploit. Back in the Storage menu we need to check in the internal storage. So look on your hard drive and go to Game and Apps section and then look for any Rock Band Blitz content. I’ve not got any here but if you do you can either just select it with the Y button and delete. Of if you want to save the data click on the Move option and copy it to your USB drive. This will save your game data into a folder in the Content, 16 0s folder. You’ll then need to move it off the USB drive and save it on your computer. If you’re not sure which folders are your game data just look at the timestamps on the folders. Because the Xbox 360 is offline it will set the date to some time in 2005. So those are the folders you’ve just moved off the console.
Now we need to create a new profile on the Xbox. This is going to be a local profile so it won’t be connected to Microsoft Live. Open up the guide menu and create a profile. You can store it wherever you like, but since all our Bad Update stuff is on the USB drive I’m going to save it there. Give it some name you’ll recognise as the Bad Update profile and then complete the process. This is the profile we’ll be using to work with our exploited console.
If you want you can set this profile to be the one automatically signed in when the console boots up. On the guide menu go to settings and then profile. Then select sign in preferences and set this account to auto sign in.
Run the Exploit
So finally we’ve cleaned our console, we’re offline, we’ve got our USB drive attached and we’ve got our Bad Update profile signed in.
This is going to be the starting point for any time we need to enable the mod. So if you power off the machine or it crashes, reboot, sign in to this profile and go from here.
Use the main menu to go to the Games section.
Scroll through until you find Rock Band Blitz and launch it with the A button. At the start screen just give it 10 seconds or so to initialise itself.
On the Xbox press A to start the game. As this is the first time I’ve run the game it’s asking me where to put the save file. I’m going to select the USB drive and press A. Bad Update will start the exploit and hack the system.
Success!
This process is now so much faster than before and so much more reliable.
The exploit has worked and the Xbox has booted up the XeUnshackle payload. At this point it’s giving us the opportunity to save some important files about our console. As this is our first boot make sure you press the X button to save the console information and then the Y button to save the bootloader file. These will be saved to your USB drive.
With those saved press the back button and you’ll drop into the normal dashboard.
Backup Your NAND
We can now start to run our Homebrew Apps.
Go over to your games menu and then find XexMenu. Run that and you should drop into your first homebrew app.
XeXMenu is sort of like a base file and app navigator. You can use the left and right bumper buttons to move between storage areas and then the d-pad to select items. So find your USB drive and then select the Apps folder, or whatever you called your homebrew apps directory.
Inside there you should see Aurora and Simple NAND Flasher. Select Simple NAND Flasher and then select the Default.xex file to launch it.
This will start to examine your console and generate some files for you. The CPU key is stored in the cpukey.txt file that will be saved in the Simple NAND Flasher folder.
We can then press the X button to take a backup dump of the NAND data. This too will be saved to the USB drive so let’s make sure that’s all safe. Press any button to exit the app and you’ll drop back into the main menu. Log out of your profile so we can unplug the USB drive and then take it back to your computer.
On there navigate to the USB drive, Apps and Simple NAND Flasher. Here we need to copy the cpukey.txt and flashdmp.bin files somewhere safe. These files are very important. If you damage the NAND data in your console in the future it will stop working. You will only be able to fix it if you have these files. These are specific to your console so you won’t find anything suitable online. If you’re just playing games you’re very unlikely to break the console but just in case keep these files safe.
We can also then go back to the root of the USb and then into the BadUpdatePayload folder. In there you’ll find a ConsoleInfo.txt file and then a bootloader file with your motherboard type in the title, so for my Trinity based Xbox I’ve got Trinity-1bl. Again these files need to be safely stored with the others.
With that all backed up it’s time to play some games.
Launching Games
Since we’ve got the USB drive in our PC let’s drop a game on there to test our system.
Probably the most used feature of a modded Xbox 360 is to play games from legally obtained backup files. You can either make these yourself from your game disks or find them elsewhere. If you do go online please do make sure you check any copyright regulations in your region as mostly these files are still legally protected.
Either way you’ll need to format your game files into some sort of package that the Xbox can use. This is quite a big topic so I’ve made a video on how to do this. Please do have a look at that for full details on the different ways you can transfer games and how to do it. For this video I’m going to use a Game on Demand or GoD package that I’ve created from a game ISO file. Again all of this is covered in detail in my playing games video.
The GoD package is exactly the same as the Rock Band Blitz package we downloaded earlier. It’s identified by its title ID and all we need to do is copy the whole folder into the 16 0s folder in the Content folder on our USB drive.
So we can now take the USB drive back to the Xbox360.
Plug in the USB drive and log back into your Bad Update account. Go to your games menu and launch XeXMenu again.
This time we’re going to go to the Apps folder on the USB drive and find Aurora. Inside there launch the Aurora.xex file.
You should now be into the Aurora Dashboard.
Aurora allows us to scan our storage areas for playable games. At the moment it’s probably not scanning anywhere so we need to tell it where we keep our games.
Click the start button to get into the settings page and then go to the Content option. Under Manage Paths we need to add a path. Each path we add tells Aurora about a folder where it should look to find games. Select the Change button. You now need to navigate to your USB drive and then the Content folder.
Our games are in the 16 0s folder so highlight it and then press Y to select it.
Next you have to specify how deep into the folder Aurora will scan so we can set this to 3.
Next click save and that’s now added our USB folder to the scanned paths.
If you do save other games or other game formats in separate folders you will need to add those paths into Aurora before it will find your games. I’m also going to add my Apps folder so that I can launch those from Aurora as well as in a bit I’ll show you how to use Aurora as your default dashboard.
If you now click the Scan Now button Aurora will go off and find the games. I also tend to leave the AutoScan function on so Aurora will always be checking for new games as I load them.
Back out to the Aurora dashboard and you’ll see place holders for your games and apps. We’ll see how to get some artwork in a second but for now you should be able to scroll through the titles until you find your game and then launch it.
So that’s our system working now so we can exploit the console, load up our homebrew and launch our games from backup files. The last thing we need to do is a bit of tidy up and making things run more smoothly.
Finishing Off
We saw that Aurora looks a bit boring without any cover art but we need to go online to download that. Luckily the XeUnshackle payload we installed has some of DashLaunch’s functionality built into it. Part of that is an Xbox Live blocker which allows the console access to the Internet but blocks any attempts to connect to Microsoft.
So let’s power down the console as we’ll need to reset it after these next edits and take the USB drive back to our computer.
On the root of the drive you’ll find a launch.ini file. This is the settings file for XeUnshackle. You’ll need a text editor to edit it so you can use Notepad, or, if you install an app called Notepad++ you’ll get better code highlighting like you see here.
There are a number of settings you can change. Each settings has a full description of what it does and how to use it. Please only make changes to settings if you know what you’re doing.
We want to check that the Microsoft Live blocking is active so scroll down until you get to the liveblock setting. It should be on by default but if not just set it to true.
Next it would be good if our console dropped straight into Aurora when we run the Bad Update exploit. To do this look for the Paths section in the ini file and then find the Default setting. This is probably blank so it will just drop you into the normal dashboard.
We need to specify the path to our Aurora xex file. If you look at your USB drive the path will be \Apps\Aurora\Aurora.xex. Back in the ini file we also need to specify the drive so our full path will be
Usb: \Apps\Aurora\Aurora.xex
We can then save the file and take the USB drive back to our console.
So boot up the Xbox360 and log back into your Bad Update account. We’ll again need to activate Bad Update so go over to the games section and launch the game. It will run through the game start screens, then activate the exploit and once you get through the XeUnshackle screens you should drop straight into Aurora.
We now need to get to the settings app. From inside Aurora you can use the guide button to get back out to the main dashboard. From there we can go to the Network settings and reconnect to our WiFi or just plug in an Ethernet cable. Again because Bad Update is active that Live Block setting in XeUnshackle is protecting us.
To get back to Aurora press the guide button again and it should be the top option.
Once Aurora starts you can go to the settings screen by pressing the start button and then in the Assets section click the download button to download all the box art and game assets. Back on the main launcher screen you should see the artwork loading and turning Aurora into a great game display system.
Conclusion
So that is V1.3 of Bad Update installed and working and giving you the fastest and most reliable Xbox360 software exploit so far. It’s still not quite as good as a full RGH3 hard mod but it’s getting close and if you have a non hardware mod compatible console it now gives you access to the full features of a modded console.
As you’ve seen we’ve only just scratched the surface of what your console can now do. Make sure you subscribe to my channel and check out my Xbox playlist. There I’ll show you how to rip your own games, install games from backup files, play original Xbox games on the Xbox360, install emulators to play arcade games and other retro consoles and so much more.