Upcycle your old laptop. Turn it into a DOSBox gaming PC
19th February 2022
Make LaunchBox portable – put your whole installation on a USB stick
27th February 2022The easiest way to install MAME and get your arcade games working
One of the great things about using emulation for your retro gaming is that you can play all of the great arcade machines directly on your PC. Emulators use the actual code that was used to run the arcade cabinets so the games you play are completely true to the originals.
MAME is the best emulator for arcade games but it can be a bit tricky to get it installed, configured and able to run your games.
At least that was until now.
LaunchBox is one of the best front ends for your retro game collection. The latest release, version 12.7, includes an automatic MAME installation where you simply need to supply a ROM set, and LaunchBox will download the correct version of MAME, install it for you, load and catalogue all of your games, download all the game information and artwork and then allow you to browse through your whole collection with just a double-click needed to play any game.
It really can’t get any simpler than this to get a full set of arcade games onto your PC.
So let’s see how it works.
Getting Hold of MAME ROMs
The biggest hurdle in building your MAME installation is getting hold of a full ROM set. I’ve already made a video which explains what MAME ROMs sets are so pleased to have a look at that tutorial for a full explanation.
In summary a full ROM set is an collection or ROM files that contain all the code for all the arcade games. Games in MAME share some blocks of code so one game might rely on another game being present before it has enough information to run. This means that downloading single MAME games doesn’t always work as some of the code might be missing. Using a full ROM set simply means you have everything you need.
As usual I’m not able to tell you directly where to get hold of these files but a simple Google search will get you heading in the right direction.
MAME Versions
One of the big confusions when setting up MAME is making sure that the ROMs you download match with the version of MAME you install.
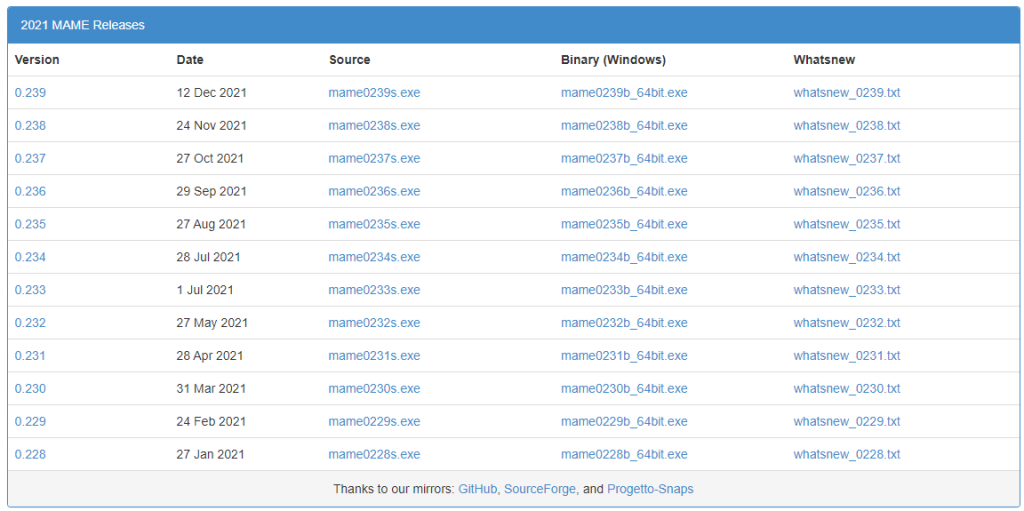
MAME is continually being updated and ROMs are continually being tweaked to make the games run better. This means that it’s best to use a ROM set that matches your version of MAME.
LaunchBox is going to make this process much simpler. Getting hold of a full ROM set is most difficult part in this process so whichever one you managed to get hold off LaunchBox will automatically match it as it installs MAME for you.
As I make this video the latest version of MAME is 0.240. So searching for a MAME 0.240 full ROM set is probably your best starting point. Quite often it can be hard to find the very latest version so simply start working backwards, 0.239, etc until you find one.
These Are Big Files
Full ROM sets are upwards of a 50 GB download to do be aware that you will need to be able to leave your machine running for quite some time, depending on the download speed.
Again, please do have a look at my MAME ROMs video for more information.
Quite often the file you download will be a single archive file with all the individual software archive files contained within it. You need to extract the individual game archives from this outer single archive file for LaunchBox to be able to complete the import process.
Installing LaunchBox
Once you’ve got hold of a full MAME ROMs set the hard work is done. All we need to do now is install LaunchBox and run its MAME import process.
To download LaunchBox just go to the LaunchBox website.
https://www.launchbox-app.com/
Click on the download now button and then fill in your email address to have a download link emailed to you. Once you receive the email just click on the download link and your download will start.
Once that’s finished downloading locate the file and double-click it to run the install program.
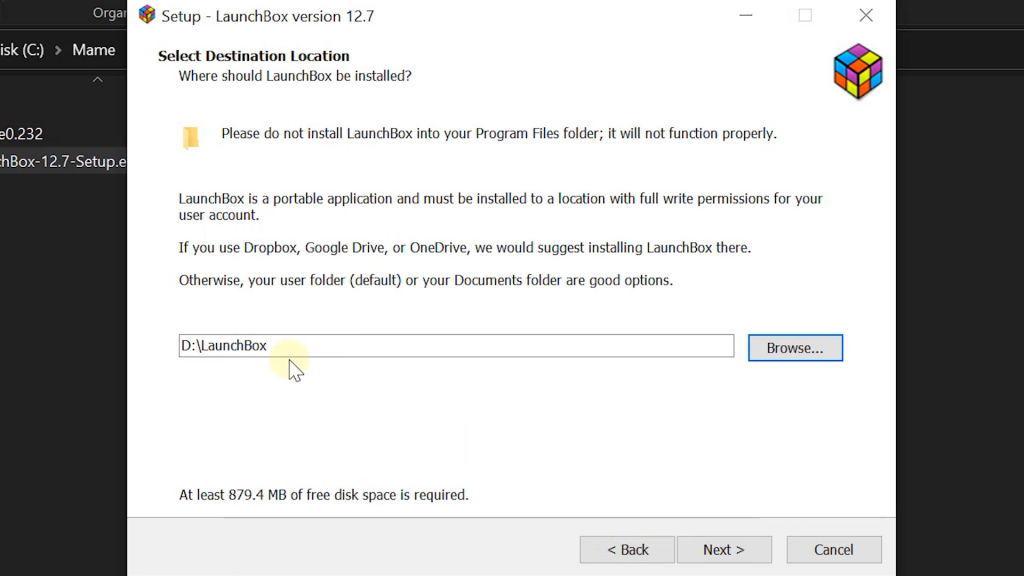
The only thing I would advise changing during installation process is the LaunchBox folder. I prefer to put this in the root folder of one of my hard drives rather than in my user area. There’s no technical reason for this but I feel it just makes things easier if I want to transfer my entire LaunchBox installation to another computer. But more on making LaunchBox portable later.
LaunchBox also requires a couple of extra bits of software which it will ask you to allow it to download and install for you.
Once the LaunchBox installation is finished you’ll need to reboot your computer, but then we are ready to build our arcade machine.
Installing MAME And Importing Your Games
This is where the magic is going to happen. Previously we would have to install MAME manually, link it up to our LaunchBox application and then attach our games.
When you first run LaunchBox it will recognise that you have no games loaded so will offer you a few choices. We want to import a full MAME ROM set so we can select that option to start the wizard.
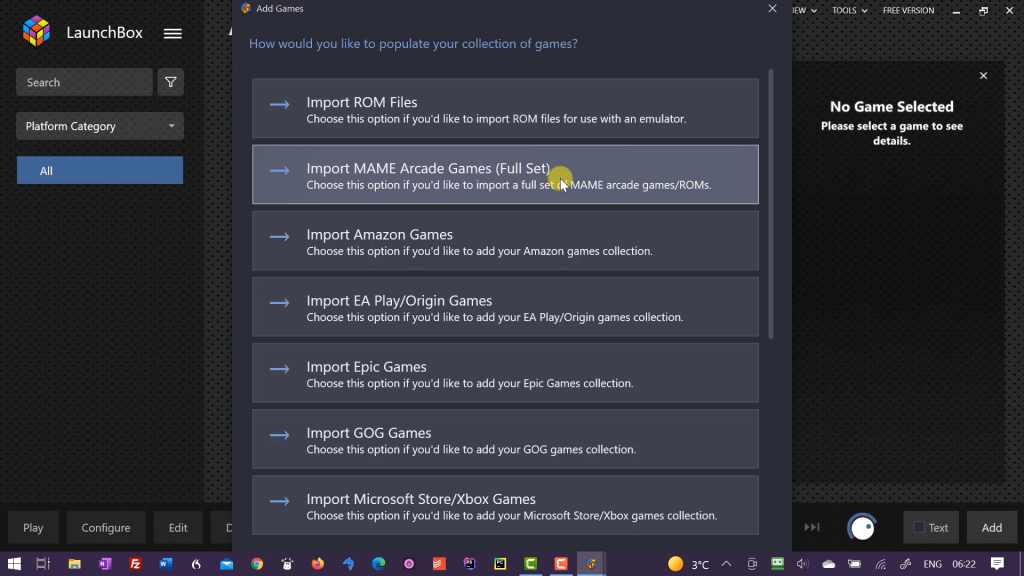
If you’ve already bypassed this menu you can just go to the LaunchBox menu, tools, import, import MAME full set.
First you get to choose what you want to call this collection of games. The default is Arcade which makes perfect sense but you can change it to whatever you want.
Next you need to tell LaunchBox where your MAME full ROM set is. So just click the browse button and locate your folder where you’ve saved your downloaded games ROMs. The wizard will try to identify which version your ROM set is, but if it’s not able just use the drop-down list to select the version of MAME that you need.
The next screen is where we can ask LaunchBox to set everything up for us. As the top option says it will automatically install and configure MAME. If you’ve already got a version of MAME installed or you want to do it yourself then use either of the other options.
Selecting the first option will get LaunchBox to download, install and connect the correct version of the MAME emulator, as well as configuring it so that it’s ready for you to play the games. All of the manual tweaking will be done for you.
Once MAME is ready LaunchBox will ask you to connect to the High Score tables. This is completely optional, but if you want to compare your game scores with other users you’ll need to set up an account and connect it here. To be honest it’s not something I’ve tried.
Next the wizard will ask if you want to download game metadata. This is information about each of the games like publishing dates etc. Make sure you select this option.
The next stage allows LaunchBox to gather artwork for the games. LaunchBox uses a graphical front end to display your game collection. It needs to download box art, cabinet images, gameplay pictures and so on to make the whole retro gaming experience. My advice is to check all and let the installer find as many items as it can. This does of course increase the setup time to a few hours (yes hours) and size of the installation, but it’s well worth the effort.
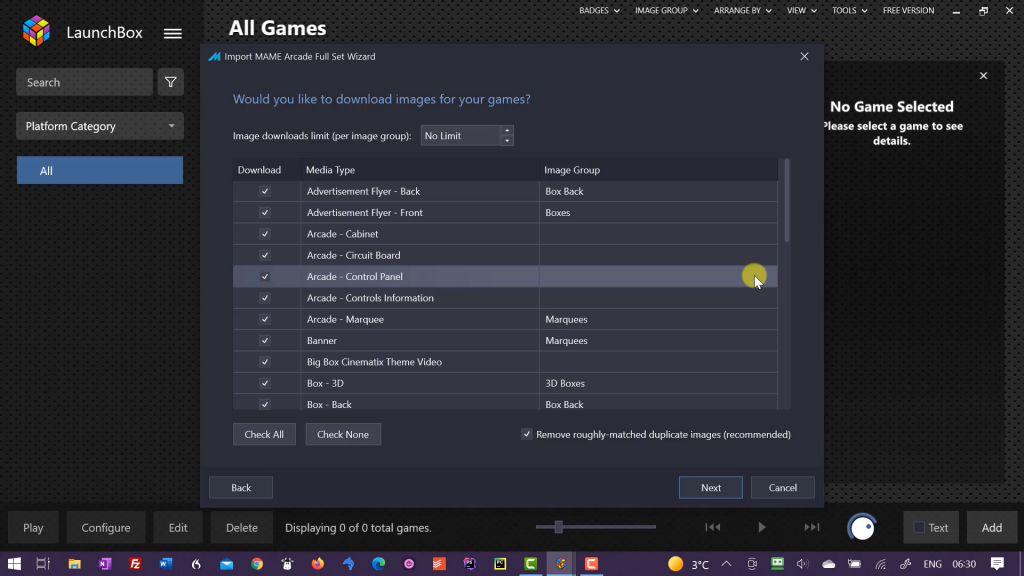
If you just want to get the games up and running as fast as possible select check none. You can always run this image scraping process at a later date.
EmuMovies is a website that allows you do download short video clips for the games along with other artwork. You do need to have a paid subscription account for this, but it will then show short video clips of each title as you browse your collection. Again this does take quite some time to complete and will drastically increase your installation size.
The next stage sets up how LaunchBox will filter and catalogue your game collection.
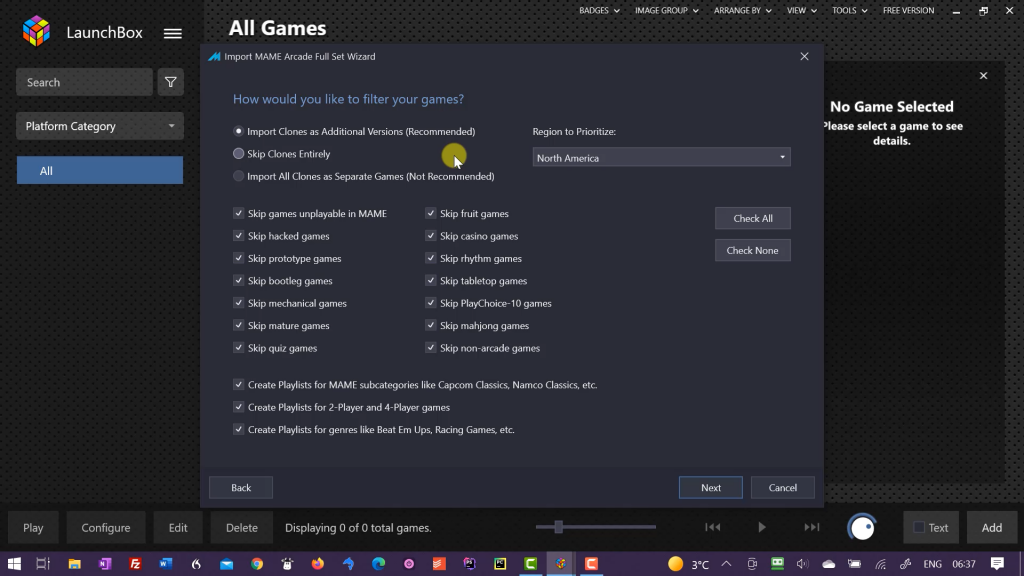
Clones are different versions of the same game. The recommended setting is to import them as additional versions. This means that the game listed in your collection will be the original, with the other versions still available but hidden so they don’t clog up your collection. You can still play these versions by entering a single game’s setup. Mostly this is fine but there are a few that will throw you. For example PacMan is actually a clone of the original Japanese game PuckMan. They are the exact same game just branded differently.
Back to the import wizard you can prioritise a specific region. If LaunchBox has a choice it will use this version in your game list.
The next section lets you skip certain types of games. Usually you’ll want to leave these all ticked, but if you want to include specific types you can.
The last section tells LaunchBox what game categories to create to help you manage your collection. There are literally thousands of games in a full MAME ROM set. These playlists will make it easier to browse through this library to find hidden games that you’ve never heard of. My advice is to keep all of these checked and let LaunchBox start the cataloguing process. As you find your favourite games you can create your own playlists.
Almost there now!
On the next screen LaunchBox reads through the files in your ROM set to identify the games. After a few seconds you’ll see a full list appear with the game name and associated file. You can scroll through to have a look but you need to press the Finish button to start the full import process.
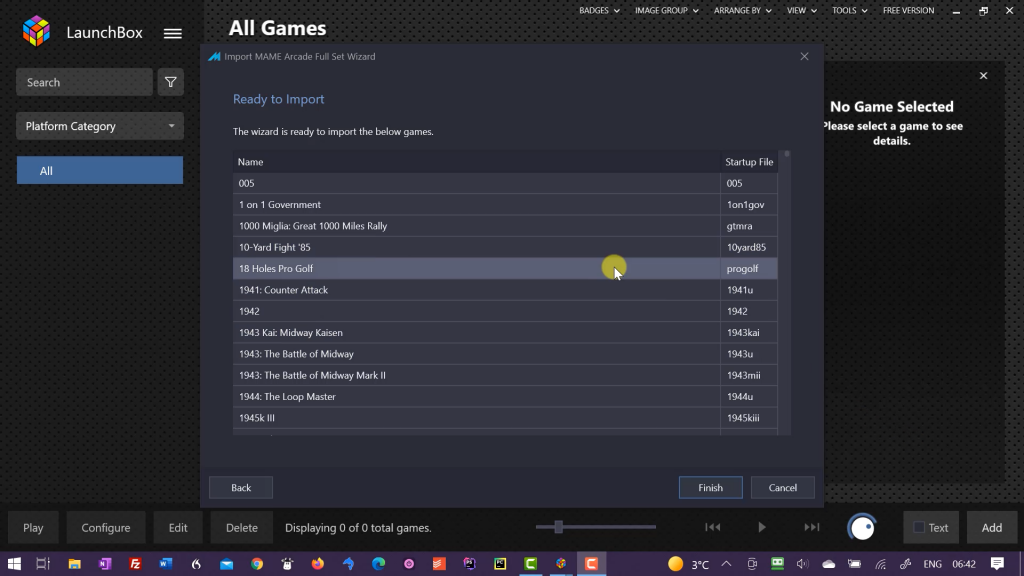
If you’ve selected to import game images you’ll need to leave this running for a few hours.
If you’ve skipped images the process will take a few minutes but you won’t get any nice pictures in the game browser.
Play!
Once the import process is complete you should have a few thousand arcade games waiting for you to play them.
Expand the Arcade section on the left hand menu to see the playlists. You can browse through these, browse the whole list or use the search box to find the game you want.
Single click any game to get some details about it. Again, if you’ve imported images you’ll see artwork and screen shots.
Then double click a game to play it.
This will start up MAME, load the game, switch to full screen and you’ll all set for some fun!
What Next?
So that’s LaunchBox installed with a full set of MAME arcade games.
If you’ve not used LaunchBox, or it’s paid for brother BigBox, you’re in for a real treat. Not only can it manage your arcade games, but also any console, computer or handheld that you want to emulate. You’ll need to install some extra emulators for these, but that’s for another video.
I hope you’ve found this useful. This really is the easiest way to get up and running with arcade game emulation. Don’t forget to check out my channel and website for more projects. Make sure to subscribe to my YouTube channel to get my latest videos as I publish them.


