
Web Control Panel – Non Blocking Web Server Using Asyncio and Dual Cores – Raspberry Pi Pico, ESP32, Arduino
10th April 2023
DOSBox Full Installation, Game Download and Setup – Everything you need to start DOS gaming
11th May 2023Native DOS Gaming with Sound – FreeDOS + SBEMU on a portable USB drive
A while back I made a video showing you how to turn an old laptop into a native DOS gaming PC. This used FreeDOS, a freely available version of MSDOS, as the base machine. Whilst this worked great to get the old DOS games up and running, because of a lack of DOS drivers for slightly more modern sound hardware we were left with silence during gameplay. This was a real shame as the games ran at perfectly well but had lost a lot of their appeal due to the silence.
But recently, March 2023, was the release of SBEMU. This is a sound driver that bridges the gap between FreeDOS and the AC97 sound hardware found in post DOS machines. From the DOS end it behaves as if there is a Sound Blaster Pro card installed but uses the modern hardware to generate the sound.
So in this tutorial I’ll show you how to install SBEMU and then go on to create a bootable USB drive that creates a portable DOS installation that will turn any PC into a DOS gaming machine.
Getting the Software
FreeDOS can be downloaded from https://freedos.org. We want the full USB image.
This allows you to burn an installation USB drive that’s perfect for installing onto a dedicated PC. But we want to make a portable installation. So we can’t directly use this image as it formats the USB stick to a 512MB hard drive no matter how large the actual USB drive.
To get around this we need to download Rufus from https://rufus.ie. This allows us to create our own bootable DOS drives onto which we can install the FreeDOS software.
But to get the FreeDOS software we need to be able to extract the files from the downloaded USB image file. For this we nee a package called 7-Zip from https://www.7-zip.org.
Finally we’ll need the SBEMU code from the GitHub repository at https://github.com/crazii/SBEMU. Go to the tags section and then find the latest release. From there download the pre complied .zip archive.
Building the USB Drive
To build the USB drive we first need to use Rufus to create a bootable drive that uses the whole USB stick. Run the rufus.exe file and you’ll see the Rufus interface.
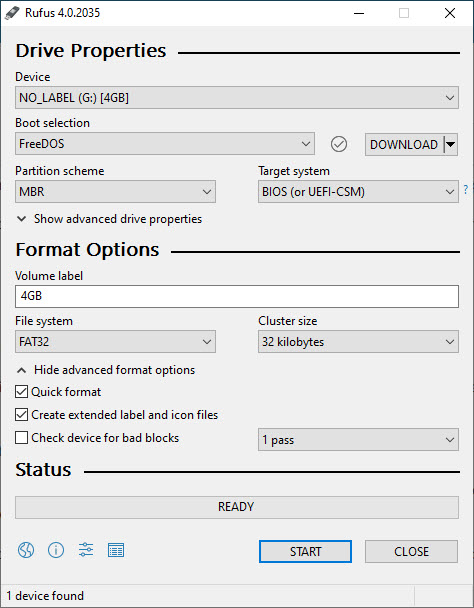
Select your USB stick and then select FreeDOS as the media type. Select DOWNLOAD to get Rufus to download the code we need. Name the volume and then specify the FAT32 format type with a 32KB sector size. We can then generate the US drive.
We now have a bootable DOS USB drive. But this only has the very basic files needs to boot. We need to install FreeDOS.
Navigate to the FreeDOS download and extract the files. If you’ve installed 7-zip you should be able to right click on the .img file and open the archive. Inside you’ll see a whole range of FreeDOS files. We now need to copy everything apart from COMMAND.COM and KERNEL.SYS to the root folder of the USB drive. That’s now created a FreeDOS installation disk.
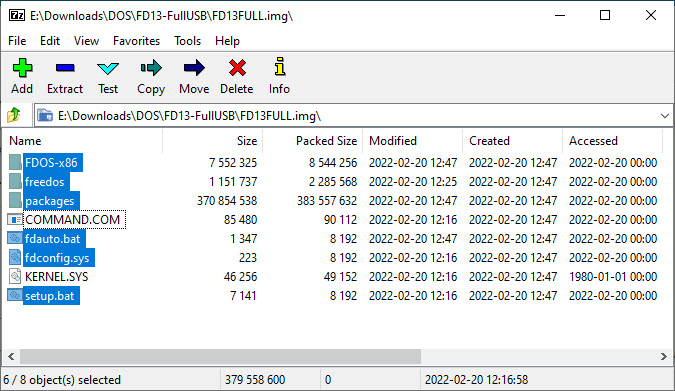
To stop the drive from trying to install FreeDOS onto our hard drive each time we simply need to rename the SETUP.BAT file to anything else. In the video I just use _setup.bat.
Installing SBEMU
We now need to install the SBEMU package.
If we open up the archive file we downloaded earlier we simply need to copy all the files to the root of our USB drive. One of the files is a text file with the installation instructions, so open that up so we can copy the code.

The first file we need to edit is the fdconfig.sys file. This tells DOS what drivers to install at startup. At the moment there’s probably already a memory manager installed, so delete the line that loads himem.sys and replace it with the DEVICE=jemmex.exe line from the installation instructions. Make sure you save the fdconfig.sys file and close it.
!COUNTRY=001,858:\FREEDOS\BIN\COUNTRY.SYS
!LASTDRIVE=Z
!BUFFERS=20
!FILES=40

DOS=HIGH
DOS=UMB
DOSDATA=UMB

DEVICE=\jemmex.exe

SHELLHIGH=\FREEDOS\BIN\COMMAND.COM \FREEDOS\BIN /E:2048 /P=\FDAUTO.BAT
We now need to edit the fdauto.bat file to get the PC to load the SBEMU code. With the file open simply add the remaining commands from the installation instructions to the end of the file. Note that these just need the commands without any quotation marks.
@echo off
SET DOSDIR=\FREEDOS
SET LANG=
SET TZ=
SET PATH=%dosdir%\BIN

SET DIRCMD=/P /OGN /Y
rem SET COPYCMD=/-Y

rem SET TEMP=%dosdir%\TEMP
rem SET TMP=%TEMP%

if exist %dosdir%\NLS\NUL set NLSPATH=%dosdir%\NLS
if exist %dosdir%\HELP\NUL set HELPPATH=%dosdir%\HELP

if not exist %dosdir%\bin\uhdd.sys goto NoUHDD
DEVLOAD /H %dosdir%\bin\uhdd.sys /s5 /h
:NoUHDD

echo.
call CDROM.BAT

rem FDAPM APMDOS
rem DOSLFN

goto SkipLBACache
if not exist %dosdir%\bin\lbacache.com goto NoLBACache
vecho /g
verrlvl 1
LBACACHE.COM buf 20 flop
if errorlevel 1 goto NoLBACache
if not exist %dosdir%\bin\tickle.com goto NoLBACache
TICKLE.COM
:NoLBACache

:SkipLBACache

SET OS_NAME=FreeDOS
SET OS_VERSION=1.3
SET AUTOFILE=%0
SET CFGFILE=\FDCONFIG.SYS
alias reboot=fdapm warmboot
alias reset=fdisk /reboot
alias halt=fdapm poweroff
alias shutdown=fdapm poweroff

if exist %dosdir%\bin\fdnet.bat call %dosdir%\bin\fdnet.bat start
if exist %dosdir%\bin\fdassist.bat call %dosdir%\bin\fdassist.bat

if not exist SETUP.BAT goto Done
:RunSetup
vecho /k0 /p Done processing startup files /fCyan FDCONFIG.SYS /a7 and /fCyan FDAUTO.BAT /a7/p
vdelay 1500
CALL SETUP.BAT full

:Done
if exist %dosdir%\bin\cdrom.bat call %dosdir%\bin\cdrom.bat display
if exist %dosdir%\bin\welcome.bat call %dosdir%\bin\welcome.bat

jload qpiemu.dll
hdpmi32i -r -x
sbemu
We’re now ready to go!
Booting to DOS
To boot your target PC to DOS you’ll need to get to the boot menu as the machine starts. This simply involves pressing the right key on the keyboard as the machine turns on. Usually there is a message on the boot screen that tells you what the key is, otherwise do a search for your PC. Most machines have a specific key to get to the boot order, but if yours does not simply go into the main BIOS settings and set the boot order from there.
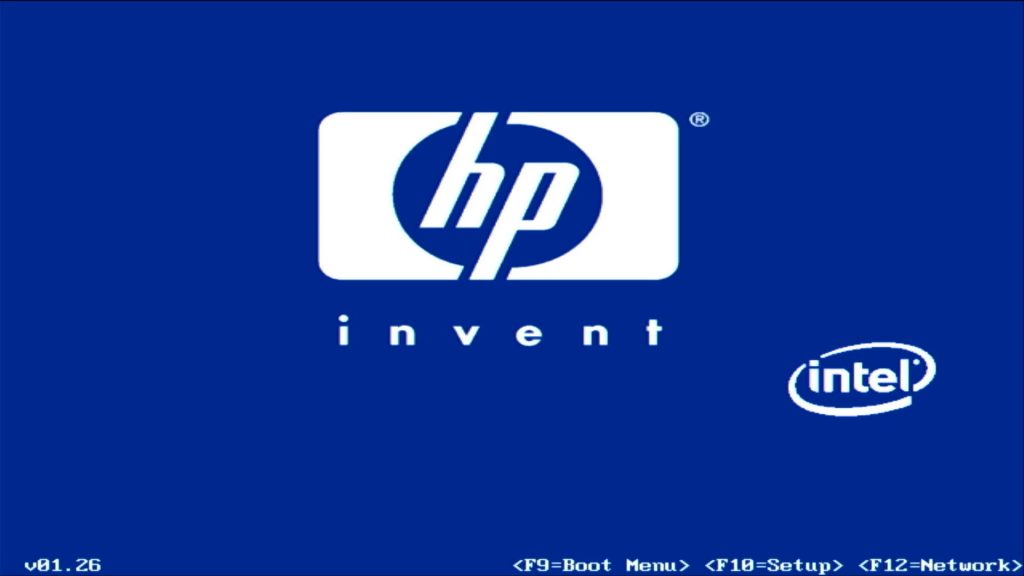
When you now boot up you machine and select the USB drive as the boot device you should drop straight into DOS.
Hopefully you’ll also get a message showing that SBEMU has been loaded with a list of the device settings for address, IRQ and DMA. Make a note of these numbers as you’ll need them when installing some games.
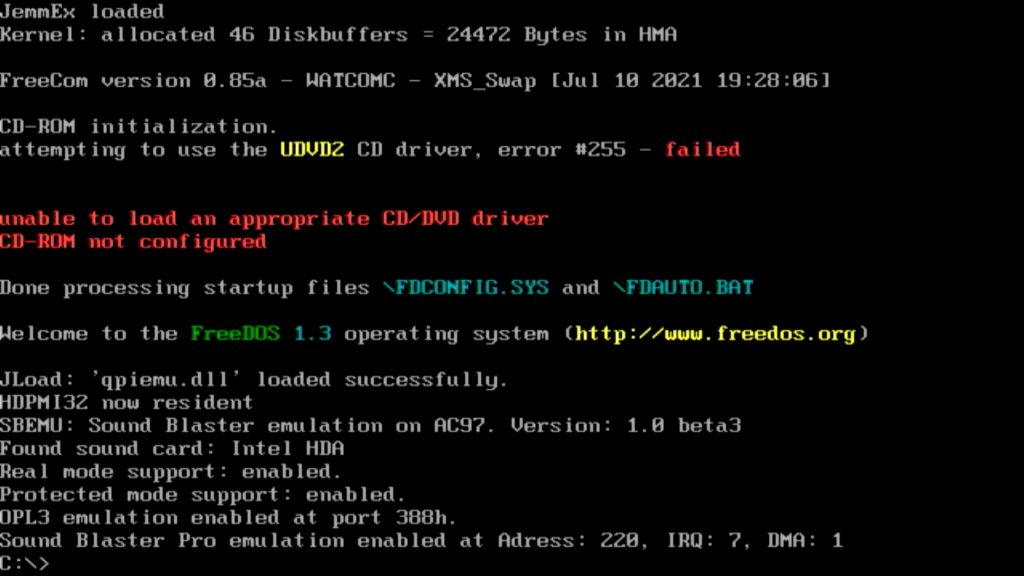
If all’s gone well you now have a DOS Gaming PC!!
Installing Games
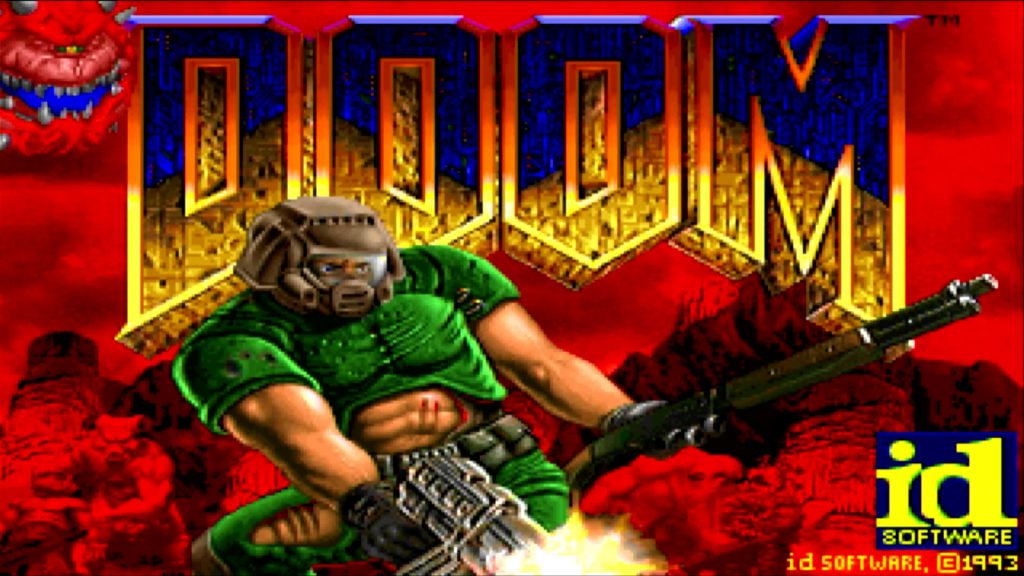
To get a game onto the PC we simply need to copy the installation files onto the USB drive. Let’s use Doom as a test.
For this you’ll need the Doom game code. Have a look online. It’s not hard to find.
We can then copy the files onto the USB drive by putting it into a Windows PC. I like to keep my downloaded game files in a separate folder so in the video I create a downloads folder and then copy the files into a doom folder inside that.
If I then boot up the DOS machine I can use the dir and cd commands to navigate into the Doom folder. The dir command again will list the files and I should see an install file. Run that and Doom will install itself onto your USB hard drive – remember the USB stick is the main drive C for our DOS machine, the actual hard drive inside the computer is not used.
During the installation you’ll be asked about the sound hardware, but Doom should auto select the values matching your setup.
After that Doom is ready to go, hopefully with full sound.
What Next?
From here you have a full DOS gaming PC to play with. You’ll probably want to install a mouse driver. CuteMouse (you’ll find the install files in the FreeDOS\base folder under ctmouse) will allow you to use a PS/2 mouse. USB mice are a bit harder to get up and running but dosusb is the package to have a play with.
Compatibility and Stability
The SBEMU package is still very new, still in Beta testing as I write this. As such it’s not perfect. You will find that some games will crash, not load, need the sound driver removed, etc.
This will get better as the software matures.
The Best Solution?
Is this the best solution for DOS gaming?
If you want to build a dedicated native DOS computer, but don’t have access to a real Sound Blaster card then this is the way to go. It’s not yet perfect, but it’s going in the right direction.
If you just want to play DOS games and aren’t worried about it not being a ‘real’ DOS computer I’d have a look at DosBox. I’ll be making a full installation video on that very soon.
Having said all that the ability to boot up into a DOS system is great fun. Trying to get the machine to work is part of the attraction where you’ll have to fiddle with hardware setups, etc. This was a real pain in the arse when we were doing it for real back in the 90’s, but now it feels more like a fun challenge.
Enjoy!


