Make LaunchBox portable – put your whole installation on a USB stick
27th February 2022
Pi Pico SPI LCD Driver Using RAM Frame Buffer – ILI9341 and ST7789
12th April 2022Wii Gaming on Your PC – Full Wii Remote and Sensor Bar Integration
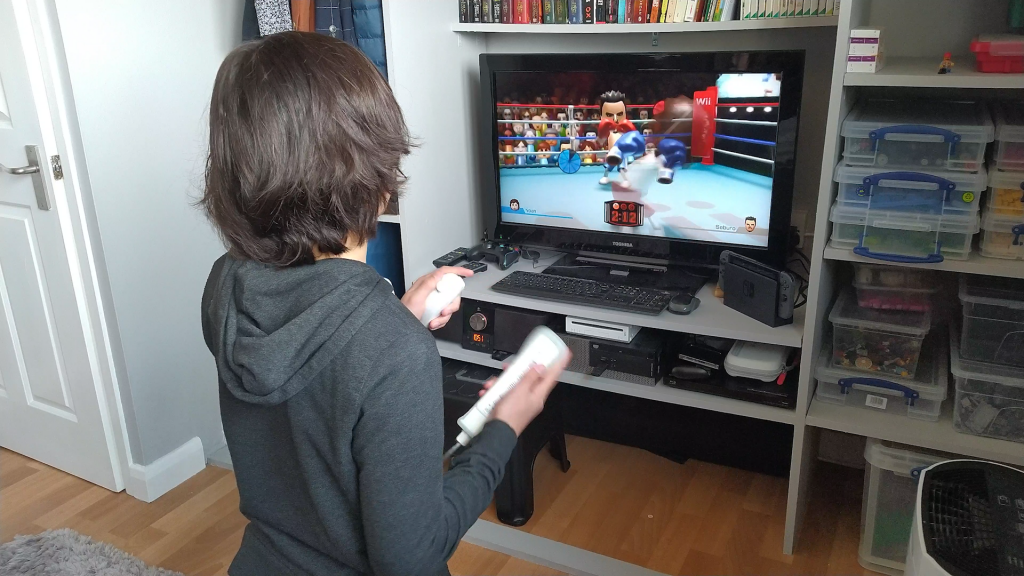
I was recently putting together a sort of media centre for my son’s bedroom, moving up an old TV, and DVD player and noticed that we’d still got our Nintendo Wii plugged in round the back. This got me thinking if it’s possible to play some of the old Wii games using an emulator.

If you’re not familiar with the Nintendo Wii, it was the first console to use motion sensing on its controllers to allow the machine to sense the orientation of the handset. It also had an innovative infra red camera system so it could also see where you were pointing the handset and to give some basic 3D spatial measurements. Basically there was a sensor bar that you placed either above or below the TV screen. This had infra red LEDs at either end of it which the camera at the end of the Wii remote was able to see. Measuring the distance between the IR sources gave a measurement of depth, and the position and alignment of the dots in the camera’s field of view told the Wii where the remote was pointing and what rotation angle it was being held in.
All of this meant that the Wii was able to combine traditional button and joystick controls with motion and pointing inputs to create some very original gameplay.
So in this video I’m going to show you how we can emulate the complete Wii experience using your PC. For this you are going to have to buy some specialist parts as your normal controllers just won’t give you the full experience. There are some games you can play with something like an Xbox controller, but you’ll be missing out on the whole point of gaming on the Wii.
Parts You’ll Need
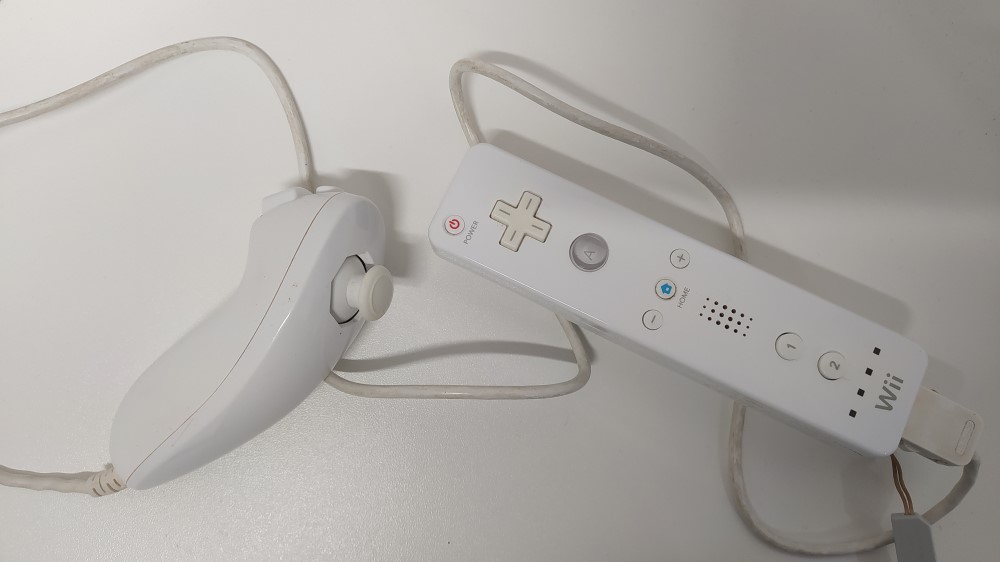
To get a full Wii setup you’ll need a Wii remote (called a Wiimote) with the Nunchuk attachment and a USB powered sensor bar. Your PC needs to have Bluetooth so if you haven’t got that built in you’ll need a Bluetooth dongle.

You can easily pick up Wii remotes on Amazon or eBay for around £30 to £40 including the nunchuk which add some extra buttons and an analogue joystick. Original Nintendo devices are more expensive but as long as you get a fully compatible remote it should work fine
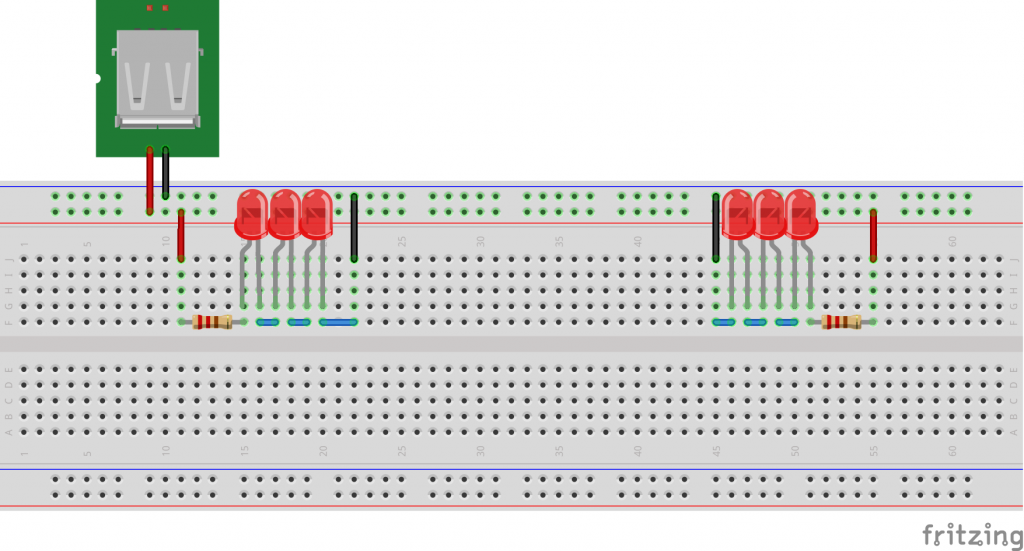
The original Wii sensor bar works off a 19V power supply from the back of the Wii console so you won’t easily be able to reuse this. You can build your own by simply connecting up a few IR LEDs to an old USB cable. Make sure you use 940nm LEDs and put at least 3 at either end of your bar.

To be honest though, by the time you’ve bought some LEDs, hacked up your USB cable and made a mounting bar for the whole thing you’re probably better off just buying a ready made one. They are only about £10 for a professionally made bar that looks exactly like the original and comes with a neat mount so you can easily place it where you need to.
If you go to Amazon or eBay you’ll see the cheaper, simple, USB sensor bars but you’ll probably also come across the more expensive Mayflash Dolphin bars. These come in at just under £30 and offer quite a few more features than the simple LED only bars. Having said that, if you’re just using the Wiimote to play Wii games I can’t see too big an advantage in the Mayflash bar so I’ll be sticking to the simpler option in this video.
For all these parts please check the links below to easily get hold of them from Amazon and eBay.
Amazon
Sensor bars : https://amzn.to/3DByGkb
Wii Remotes : https://amzn.to/3x34pcw
Installing the Dolphin Emulator
Now that you’ve got all the bits we need to get the emulator up and running.
The Dolphin emulator lets you turn your PC into both the Wii and the GameCube. The Wii was fully compatible with GameCube games so the two system are very closely related.
The emulator can be downloaded from
On the home page you’ll find the download link which will take you to the downloads page. For Dolphin you want to install the latest Development build. The stable releases are a few years old and will not work with many of the resources you’ll find online so please avoid these.
The download is a simple archive file and you just need to extract all of its contents to a suitable folder on your hard drive. If you’re using LaunchBox put it in a Dolphin folder in your Emulators folder to make sure that it keeps everything portable. You’ll then have to attach it to your LaunchBox installation but I’ll cover that in another video.
Once you’ve extracted Dolphin you’re ready to go!
Wii Games
As usual you’re on your own when it comes to getting hold of Wii games. If you’ve got some dumps of your original game disks these will work great otherwise Google will help you find almost any game you’re after. Note that you’ll not be able to use the original game DVDs in your PC. If you have some DVD’s there is a way to hack your Wii console to make your own backup files but it can be a bit involved. I will be covering hacking the Wii in a later video so do make sure you subscribe to the channel to get that as soon as I publish it.
When you get hold of Wii games you’ll find they come in a range of formats from plain ISO dumps to compressed nkit files. Dolphin is very good at handling most formats so you’ll find pretty much everything will work OK.
If you find a file that Dolphin can’t recognise first make sure you’re using the latest Dev build but if that doesn’t work see if you can find the game from another source.
Try to put all your games into a Wii games folder. Dolphin needs to be told what folders you’re using for your games files so having them in the one place will make it easier. Again if you’re using LaunchBox use the Wii folder in the Games folder.
Running a Game in Dolphin
When you boot up Dolphin it won’t know about any of your games. First we need to tell it where the game files are stored.
Click the Config icon and then select the Paths tab. Click the Add button and find your Wii Games folder. Once you close the setting dialog you should then see a list of games build up inside Dolphin.
These games are now ready to run!
Setting Up Your Wiimote and Sensor Bar
To get your controller connected to the PC you need to click on the Controllers icon on the Dolphin main screen. In this dialog box you can leave the GameCube controllers as they are, but we now need to set up the Wii remotes section.
Make sure you’ve selected Emulate Bluetooth adapter and set at least the Wii remote 1 dropdown to RealWii Remote. If you have more Wii controllers you can add these later as I suggest getting a single remote set up first so we know everything can talk together.
If you’ve got a balance board you can see there is a checkbox to connect that. Again in this first setup I’d leave it off.
You also want to check Enable Speaker Data. The handset has a small speaker built into it that the console can send some sounds to.
You want to leave the Connect Wii Remotes for Emulated Controllers unchecked but do check the Continuous Scanning box so that Dolphin will actively search for Wiimotes.
Once you’ve got that selected press the 1 and 2 buttons on the Wii Remote and it should start flashing it’s blue LEDs at you. This means it’s in pairing mode.
After a 10 to 20 seconds it should vibrate and show a single blue LED. This means it has successfully connected to you PC.
If it doesn’t connect press 1 and 2 again and also click the Refresh button on the Dolphin emulator if it’s not greyed out. Sometimes it just takes a couple of goes to get it all connected. And by the way do make sure your Wii console if you have one is turned off, or out of range otherwise you’ll end up connecting to that instead.
Lastly we need to set a few Wii config settings. Again click on the Config icon and then select the Wii tab. The top section should all be set up but you can make changes here for different games.
The important bits are at the bottom. Usually you’ll place your sensor bar along the top or bottom edge of your screen. Here we can tell Dolphin where you’ve put it so it can adjust to make the pointing feel more accurate. You can also adjust the sensitivity, so if your tracking is patchy you can fine tune it for better performance.
You can also adjust the handset speaker volume and turn on and off the handset rumble feature.
Emulation Settings
The last bit of preparation is to set the emulator settings.
Click on the Graphics icon and select the General tab in the dialog.
In the basic settings try the Vulcan backend first. Make sure you’ve got the right GPU selected and then tick the Start in Fullscreen box. This should be all you need, but as you can see there are a whole lot of other tweaks you can make to get the best out of your PC hardware.
If you’re on a more powerful machine you can change the display render quality on the enhancements tab to get smoother graphics, or, as I prefer, leave them at native resolution for a more authentic console feel.
Once that’s all set up it’s time to play the games!
Playing Wii Games
You’ve already done all the hard work. All you need to do now is select a game and click Play.
Your game should start up in full screen and your Wii remote should work as if you were sat in front of a real Wii console.
Have Fun!
Conclusion
So that’s a fully working Wii running on your PC. It’s taken a bit of extra hardware but the Wii is such a unique playing experience I think it’s more than worth the small outlay. If you’ve got some old Wiimotes lying around you’ve only got to shell out for a sensor bar and this will give you access to the full Wii catalogue so you can sample some of the games you missed first time around.


