
Wii Softmodding – Hack your Wii and play games from USB
27th December 2023
GameCube on the Nintendo Wii – Play all the games with Nintendont
5th January 2024Play Wii Games From Your USB Drive with USBLoaderGX – Wii Homebrew
The Wii is a great gaming platform, especially once you have softmodded it and installed the Homebrew Channel. If you haven’t hacked your Wii already please make sure you have a look at my Homebrew installation video.
Homebrew allows you to install a range of third party applications that can turn the Wii into a powerful retro gaming console You can install a wide range of applications including a full set of emulators for almost all the pre-Wii machines and computers. But probably the most common use of softmodding to allow you to play Wii and GameCube games from backup files stored on a USB drive.
That’s what I’ll be showing you how to do in this tutorial.
USB Loaders
The idea here is that we take a game disk image file, either one that we’ve created ourselves, or one that we’ve obtained elsewhere, and get the Wii console to load it as if we’d put the real game disk into the console. We store these files on a USB drive attached to the Wii so these applications tend to be known as USB Loaders.
The loader we’ll be looking at is USBLoaderGX.
Preparing for USBLoader GX
To start with you’ll need to have installed Homebrew onto your Wii and installed cIOS 248-251 as per my basic Wii Homebrew installation video.
You’ll also need a USB drive for your game and data files. This can be a USB thumb drive or a USB enabled hard drive. I’d recommend an SSD drive with a USB adapter as you’re going to end up with a lot of big game files. Wii games are a couple of GBs each.
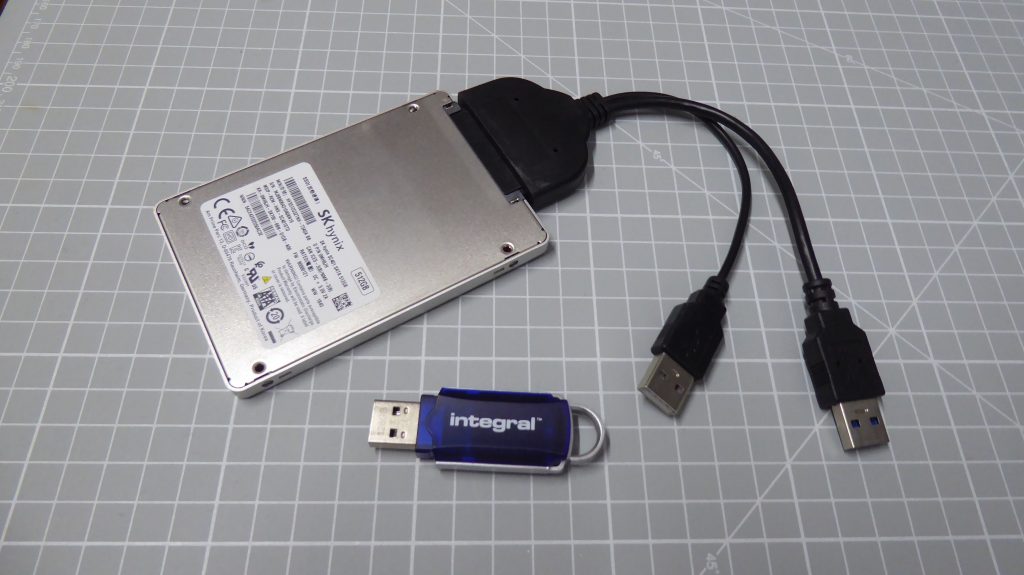
To make your USB drive compatible with the Wii it must be formatted as an FAT32 drive and I recommend a 16KB cluster size. Again please look at the previous video to find out how to do all of this.
Downloading UBSLoaderGX
To install USBLoaderGX we need to download a few pieces of software and setup a USB drive.
To get hold of the application you just need to browse to https://oscwii.org/library/app/usbloader_gx.
Once there simply scroll down and download the zip file to your PC. Once we’ve got all the software assembled we’ll install it onto our Wii SD Card in one go.
Next we need to download Wii Backup Manager from https://www.gamebrew.org/wiki/Wii_Backup_Manager. This application helps us correctly format our game files so that the loader can identify and run the games correctly. The one I’m using here is a Windows only app but you can find links to Mac and Linux versions on the Wii Hack Guide page.
Next we’ll want an easy way to launch our Loader from the main Wii menu screen rather than having to go into Homebrew each time. To do that we need to install a WAD file that will link directly to the app. Go to https://wiidatabase.de/downloads/kanaele/usb-loader-gx-forwarder-wii/ and download the WAD file.
We then need an application to help us install the WAD file. We’ll use YAWMM. Go to https://oscwii.org/library/app/some-yawmm-mod and download the app zip file.
Finally we need some game files. As usual I can’t tell you directly where to get these files but there is a lot of helpful information on Vimm’s Lair (just search online for it). Just make sure you are aware of your local copyright laws as most of the software you’ll find is still under licence, so unless you are backing up your own game disks you could be breaking those laws. The files need to be in WBFS format, or as raw ISO file dumps. You can use other Dolphin emulator file formats but they will need to be converted before we can use them.
Installing the Apps
So we’re now ready to install our apps.
You’ll need your Homebrew SD card from your Wii and the USB drive you’ll be using for your game files.
We’ll start with the Homebrew SD Card.
Go to your downloaded files and open the USBLoaderGX zip. Inside that you’ll find an apps folder. Just copy this onto the root of your SD card and it will integrate with the apps folder already there. That’s USBLoaderGX installed!
Next we need to install the YAWMM app in the same way. So, open the zip folder and copy over the apps folder.
We now need to copy over the WAD file. This needs to be in a folder called wad on the root of the SD card. So make a new folder, rename it to wad and then copy the wad file into the new folder.
That’s all the app files ready to go.
We now need to create our USB games drive. This is where our Wii Backup Manager app comes into play. First make sure your USB drive is connexcted to your PC. Then, on your PC, simply extract the Wii Backup manger files to their own folder. If you then open that folder you’ll find a few .exe files. Run the 32 or 64 bit version that matches your PC.
This will open up the application.
Click the Drive 1 tab and then select your USB drive from the dropdown list. If your drive is newly formatted you’ll get a message telling you there is no wbfs folder. Just click to get Wii Backup Manager to set it all up for you.
Next we need click the File tab, and then Add, Files. You’ll get a file browser prompt so just find your game files and select them.
You should now have a list of games and Backup Manager should have identified them and added their game Ids. Now we need to click the Transfer Tab and select Drive 1 to transfer the games files to the USB drive.
It will take a bit of time for that to run, but once it’s finished you should be able to see your neatly filed games on your USB drive. This folder and filename formats help the USB Loader identify each game file so that it can download game box art and other media files.
We’re now ready to put this all together on the Wii!
Setting up the Wii
Put the SD card back into the front slot in the Wii and plug the USB drive into USB port 0 on the back of the console. USB port 0 is the one closest to the edge of the console.
Boot up the Wii and go into the Homebrew Channel.
You should now have a couple of extra apps showing in your list.
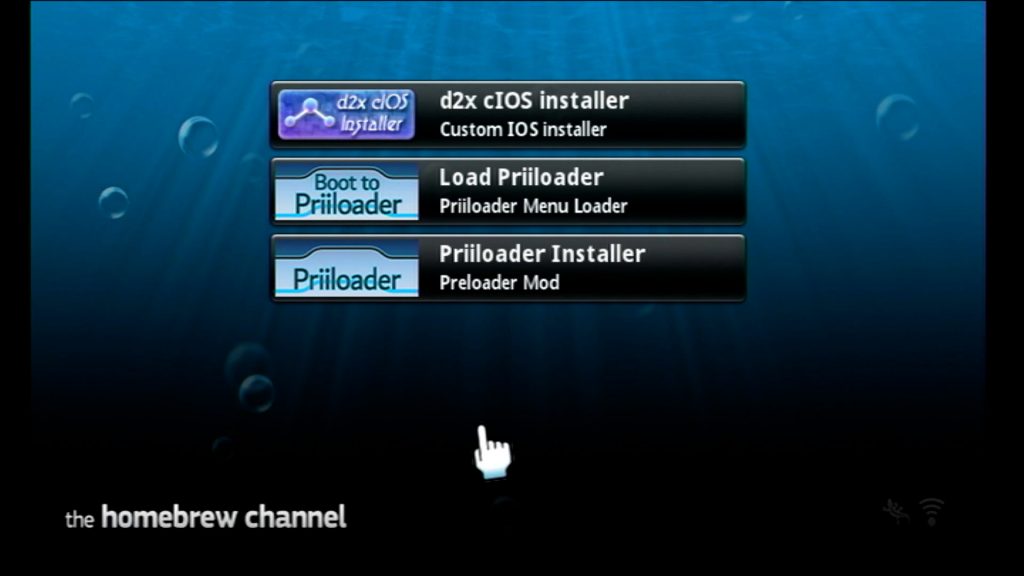
Select the USBLoaderGX app. It will start by scanning your USB drives to see if it can find a game drive. If everything runs OK it should tell you it’s found the drive and drop you into the main game list.
If it doesn’t find the drive don’t worry. This can happen and we just need to make a few settings changes. But do make sure you’ve got the drive plugged into USB port 0.
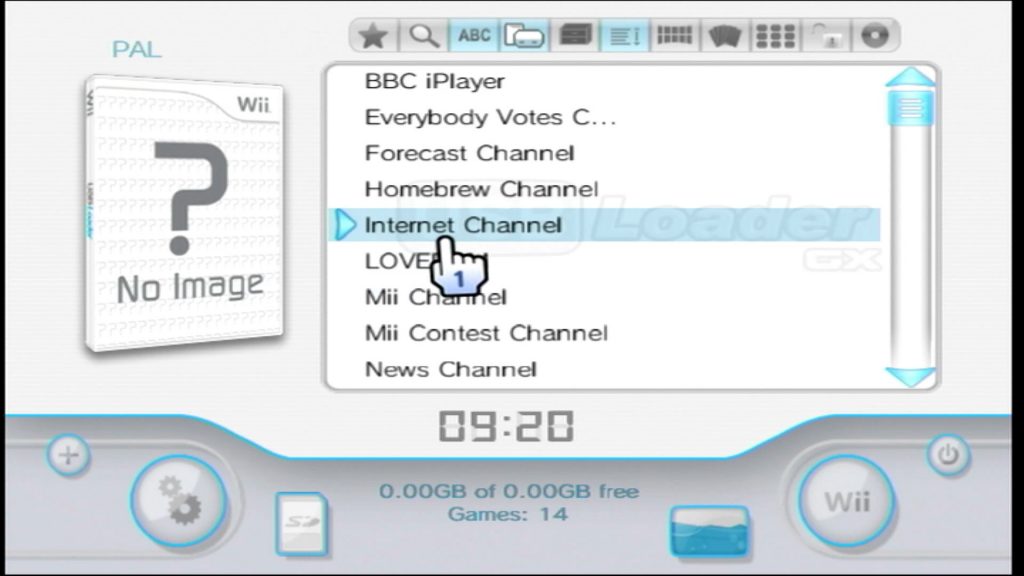
Let USBLoaderGX boot up and it will probably tell you that your drive isn’t initialised and them drop into Channel mode. Just OK any prompts until you get to the main Channel list. We now need to initialise the drive and make sure the loader is using the correct settings.
Click the gear icon to open up the settings page. Open the Loader Settings and scroll down to the Loaders IOS setting. This should be set to 249. Back out of that and open the Hard Drive Settings. Select the Game / Install Partition option and it should display your USB drive details. Set Multiple Partitions to On and make sure USB Port is set to 0. Back out of the settings pages until you get back to the main screen. You should now see your USB drive listed in the bottom centre of the page.
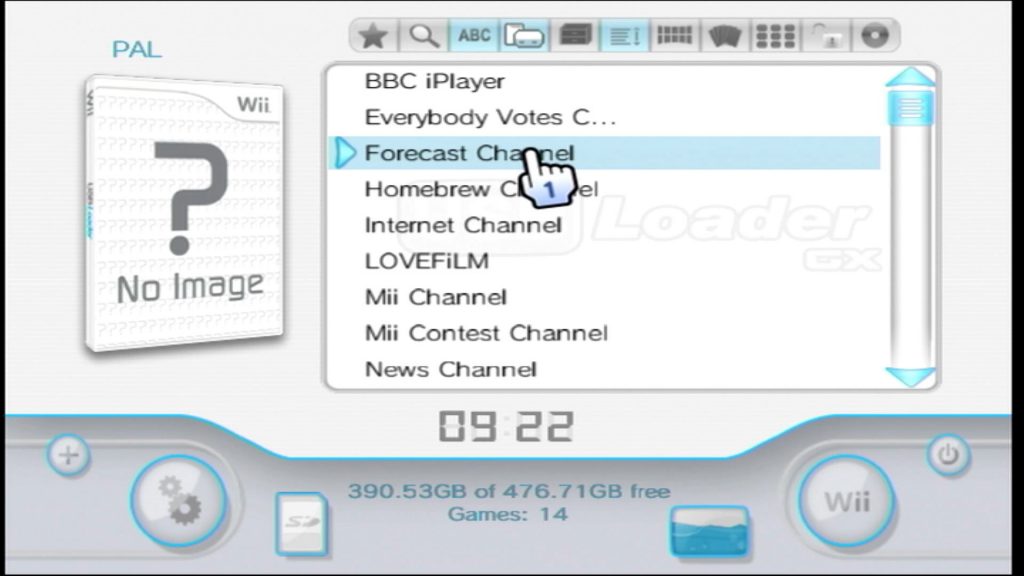
If this doesn’t work quit out of USBLoaderGX and then restart the app. It should now pick up on your USB drive.
If you’ve got it working we now need to turn off Channel Mode. At the top of the screen click the fourth icon from the left. Make sure that only Wii games and GameCube games options are checked and OK that. You should now see a list of games.
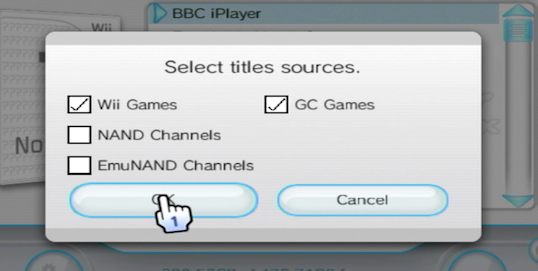
Downloading Media Files
USBLoaderGX lets you view your games as box art, but you’ll probably not have any showing at the moment. To get hold of these you’ll need your Wii to be connected to the Internet.
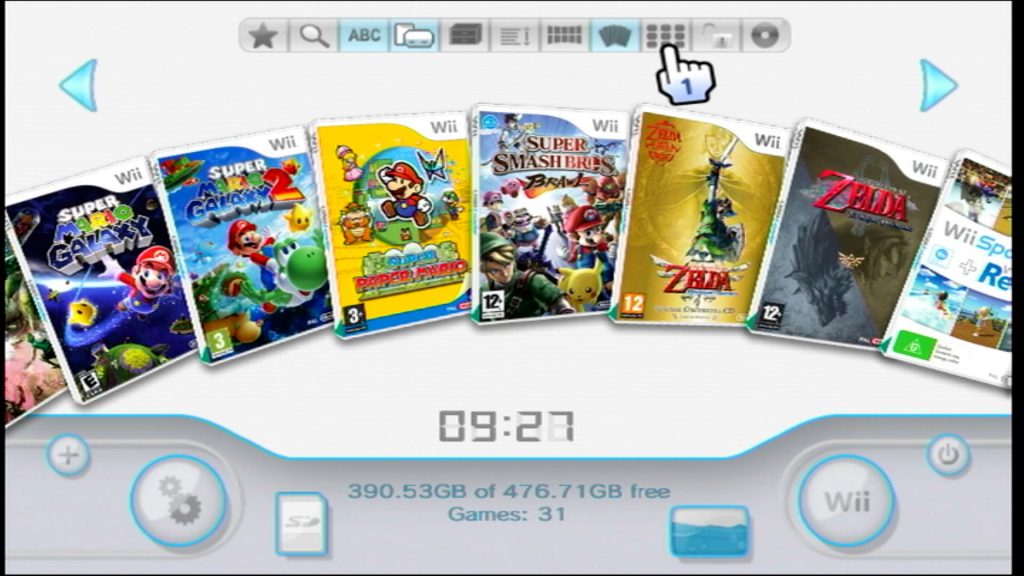
Make sure you are in list mode (sixth icon from the left in the top menu). Simply move your cursor over a game until you see a missing box image. Then click the missing image and the software will offer to download the missing files. Let it download the files and you should then have a full set of box images.
Creating a USBLoaderGX Channel
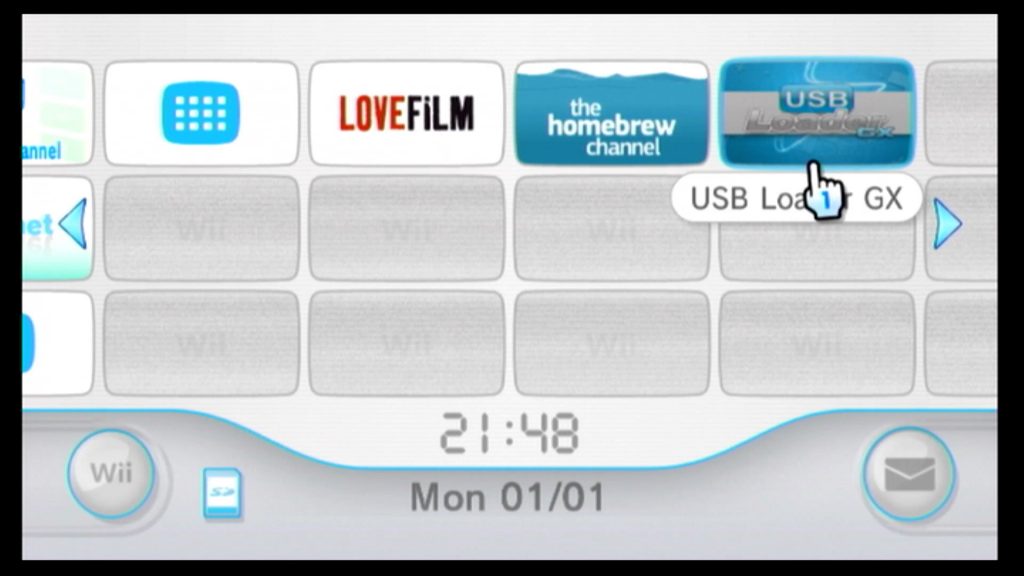
At the moment you need to go through the Homebrew Channel to get to the USBLoader app. We can put it directly onto the Wii home screen as a custom channel icon. That’s where our WAD file comes in.
Get back to the Homebrew channel and start the YAWMM application. Once it starts it will ask you for a source device. I copied the WAD file to the wad folder on my SD card so I’ll select the Wii SD Slot option. Clicking A should then bring up a list of my WAD files.
If your Wii Mote doesn’t seem to be working it may be incompatible with this app. A standard, non Motion Plus, original remote gives best compatibility so try to use one of those if you have a problem.
Use the D-Pad to select the USBLoaderGX WAD and click A. It should offer to Install the WAD so just click A again and the WAD file will be installed. Once that’s installed press A again and then press the home button to return to the Homebrew channel.
From here we can click the home button again and go back to the Wii Menu.
You should now have a USBLoaderGX channel button. Click that and you should be straight back into the USB game screen.
Exit Route
We’re almost there now. We just need to fix the game exit route so that we get back to the games list and not all the way out to the Wii Menu.
In USBLoaderGX click the settings gears and select Loader Settings. Scroll down to Return To and select it with the A button. This should bring up a list of Channels. Find the USBLoaderGX channel that we’ve just installed and select that.
Playing a Game
So let’s play a game!
There are a number of listing formats along the top menu. I’m selecting the Carousel mode. To play a game just click the icon.
If all’s gone well you should now be playing the game from your USB drive.
To exit a game just click the Home button and select the Wii Menu option. This should use our Return To setting and drop us back into the USBLoaderGX game list.
Where to Download Wii Games
If you search on the web you’ll find a number of download sites that have Wii games. Do be very careful to have your anti virus and firewall protection all up to date and running.
My advice is to check out Vimm’s Lair and the Internet Archive. These offer safe downloads and a great selection of games.
Don’t forget that you need to check your local copyright laws before downloading and game files. These files are usually protected by copyright and it may be illegal to download them in your region.
That’s It
So that’s your USB loader all set up and running and you should now be able to play any game you can get a backup file for.
Next we need to get set up to play GameCube games, but that’s for the next post.


