
Make Retropie Look Great With Themes and Images
3rd October 2021
How to Play ZX Spectrum Games in Retropie – Setting Up The FUSE Emulator
9th October 2021How To Add The Commodore 64 To RetroPie – Installing VICE
Retropie is a great way of turning a Raspberry Pi into the ultimate retro gaming console. It builds on EmulationStation and RetroArch to emulate a great range of consoles, home computers and arcade machines. Please check out my video on how to install and set up a complete Retropie gaming system with all the games for all the consoles. I’ll put a link in the description below.
But there is a big hole where the Commodore 64 should be. As one of the best gaming computers from the 8-bit era we really need to fill this hole. So let’s install VICE, the Commodore 64 emulator.
Installing VICE in RetroPie
If you look at the ROM folder in your Retropie installation you’ll see a list of folders for each of the systems that the standard installation supports. Here I’m connecting to my Raspberry Pi from my main PC using a network share. Again please check out my Retropie installation video to find out how to set this up.

Retropie supports lots of other systems but they are not installed as default. We have to install them manually.
RetroPie Setup Script
From the main Retropie menu we have to go to the Retropie configuration option.
I’m running a theme on my installation to make it look a bit better. If you want to find out how to do this check out my Making Retropie Look Great video which I’ll link to in the description. Now select Retropie setup which will run a console app that lets us modify our Retropie installation.
In these console apps you use your up and down arrow keys to change a selection, the left and right arrow keys or the TAB key changes the option at the bottom, and the ENTER key makes your selection.
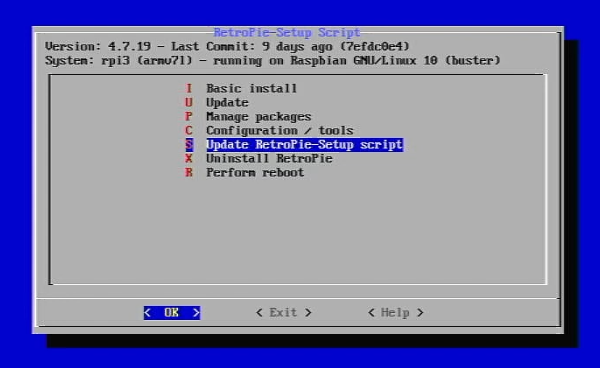
The very first thing we need to do after you’ve installed Retropie is to update the Retropie-Setup script. So use your arrow keys to select this option and then press return to select it.
Select Yes to update it and your Raspberry Pi will download and install the latest version. This process can take a while to complete once finished you’ll have the latest version of the Retropie-Setup ready for use. If you don’t run the update process some of the extra emulators we need won’t install correctly. Selecting the OK option will take you back to the main menu.
We now need to install VICE.
Install the VICE Optional Package
Retropie is built from a number of software packages each of which provides part of the overall system. VICE is one of the optional packages but you can install. So we now need to select Manage Packages and then select Manage Optional Packages. This will bring up a list of all the extra bits of software you can add into Retropie.
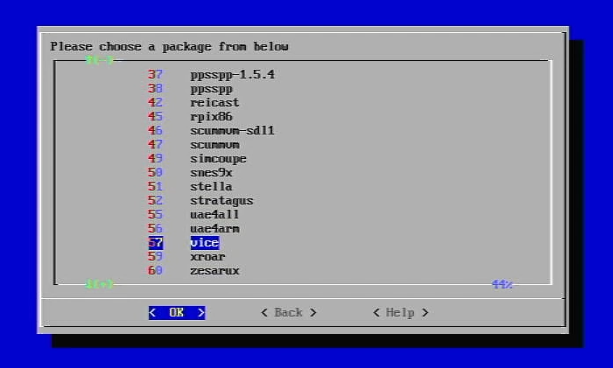
As you can see there are a whole range of additional systems that we can add to Retropie. So scroll down the list until you find VICE and then select it.
This will take you to the install package dialogue. There are two options when you want to install a package. One is to install from a binary image which is a ready-made version of the software you want to use. This version isn’t always the most up-to-date but it’s usually fine to get you started.

The second option is to install from source. I’m going to use this option as it will download the latest version of the package and build it directly on my Raspberry Pi. So let’s select that option and the Raspberry Pi will start to download and install the VICE emulator. This process is going to take a few minutes to complete but it does make sure you have an up-to-date version of the software.
Once that process is complete Retropie should report back that VICE has been installed. We now need to exit from the setup program so just select Back until you get to the main menu and then select Finish.
This should take you back into the main Retropie front end.
Adding Commodore 64 Games to RetroPie
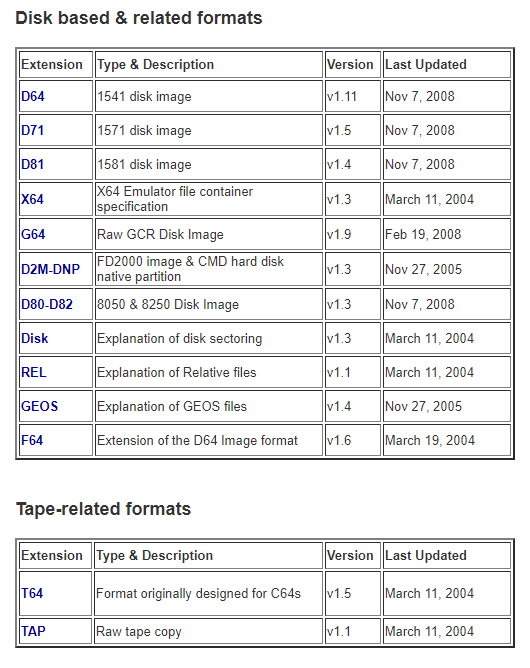
Although we’ve installed or Commodore 64 emulator it won’t appear in our main menu until we add some games. Commodore 64 games come in a range of file formats.
If you’ve been following my channel, and please do consider subscribing if you haven’t already, you’ll know I’m a great fan of using Emuparadise to easily get hold of game files, especially since you can download complete game collections in one go.
For the Commodore 64 you’ll find three complete ROM set download options.
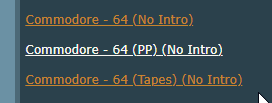
One lets you download the games in cartridge format. These files will load instantly in the emulator but has not all games were released in cartridge you won’t get a full collection.
The second option downloads the Commodore 64 Preservation Project game database. This is a complete collection of disc images, but they are stored as the raw .nib image files which VICE can’t use. There are utility programs that let you convert the .nib files to the .g64 or .d64 files that we need but this adds an extra layer of complexity that we don’t need.
The third option will download a full set of game tapes. These will work fine in VICE but will load at tape speeds. If you’ve ever used a real Commodore 64 with a tape deck you’ll know just how long this process can take! Yes, this is running correctly and we just have to wait, and wait.
One caveat on the Emuparadise site is that the download links don’t work. You need to install a workaround to be able to download games. I’ve made a video on how to do that, it only takes 5 minutes – How to fix the Emuparadise download links.
Disk images are the best option but I haven’t yet found a complete collection in a single download. The best place I’ve found to get hold of disks is at

This site seems to have a full library of games, all downloadable as .d64 images which are great for VICE. But you will need to download each game individually. I have already made a video on setting up the VICE emulator on your PC so please do have a look at that for more details on where to get your games.
I’ll leave it up to you what route you take. I tend to load the tape images first and then replace my favourite games with disk images as I find them.
Starting and Setting Up The VICE Emulator
So once you’ve got some game files you just need to transfer them over to the Retropie SD card. I’ve set up a network share so I can just drag and drop from my main PC. In the Retropie roms folder you’ll now find a c64 directory. Just drop your games in here. Once that’s complete we need to restart Emulation Station and we should then get the Commodore 64 appearing in our main Retropie menu.
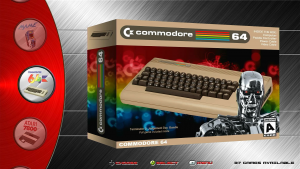
Selecting the Commodore 64 will bring up our list of games, and selecting one should start the VICE emulator and get it to load our software – you don’t need to learn how to load games in Commodore 64 language!
Most games include various loading screens and use the space bar on your keyboard to progress through these start screens.
Once our first game has fully loaded we need to make sure the VICE emulator is set up correctly so that it recognises your game controller. For most home computer emulation you’ll also find it easier if you have a keyboard attached to your Raspberry Pi. Most require certain keys to be pressed to select game options.
Configuring VICE
With VICE is running you can press the A button or F12 on your keyboard to bring up the VICE menu. Once in the menu you can use the D Pad or arrow keys to change your selection, the left shoulder button or Return key to select an option and the right shoulder button or Backspace to go back one menu level.
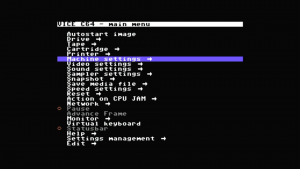
There are a whole range of settings we can play with, but for gaming we only need to get the joystick up and running. Go to the Machine Settings menu, then select Joystick Settings and then Joystick Device 2. Most Commodore 64 games expect the joystick to be plugged into port 2, but if you find one that doesn’t work you can always come back into this menu and swap it over.
Once you’re in the joystick settings you’ll see a number of options for setting it up. You can use your keyboard number pad, define a set of keys or, as we’ll now choose, set your game controller as the joystick input. Clicking the backspace key or the B button will take you back to the joystick settings menu.
I’ve found that the joysticks don’t always map to the correct buttons on my game controller. The fire button on mine seems to get mapped to my select button for some reason. We can make sure everything is correctly set up by going to the Joystick 2 mapping screen. Here you’ll see a list of joystick buttons that we need to map. Select each option from the list in turn and then press the relevant button on your game controller to map it. The fire button should be mapped to your B button is the A button is used to access the VICE menu. The other fire buttons can be mapped to your Y and X buttons.
So you’ve now got the joystick enabled and made sure your buttons are correctly mapped. Everything should be ready to play your Commodore 64 games. But before we go back to playing games we need to save our configuration changes.
Use the backspace or left shoulder button to get back to the main VICE menu and select the Setting Management option. Here you’ll see three options to save various settings, current settings, hotkeys and joystick mappings. You can select each of these in turn, or you can simply toggle the option to Save Settings On Exit to make sure that any changes you make are saved when you exit the emulator. I’m going to use the Save Settings on Exit option so when I get back to the main VICE menu I’m going to exit the emulator to make sure everything is saved.
You should now be ready to play any of your Commodore 64 games. One extra bit to note though is that you’ll need to know how to press a few of the special keys on the Commodore 64 keyboard. Below is a diagram showing the keyboard mapping.

The most important keys you’ll need to remember other space key which is obviously mapped to your spacebar, and the Run/Stop key which is mapped to your Esc key.
Play Your Commodore 64 Games
So you should now have full access to thousands of Commodore 64 games from within Retropie. Have loads of fun either rediscovering your Commodore 64 memories or meeting the games for the first time.


