Learn to Code Space Invaders – Lesson 5 – Storing Data in Tables and Objects
23rd July 2019
Learn to Code Space Invaders – Lesson 7 – Functions
27th July 2019Space Invaders Lesson 6 – Firing Bullets
Firing Bullets Using Object Orientated Programming
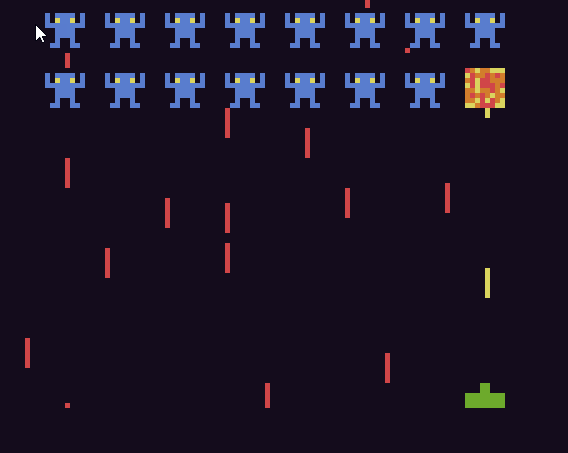
Now that we’ve got our player ship moving we need to give the player the ability to fire bullets. At the moment there are no aliens for the player to shoot but we can still develop the code to model the bullets and get them moving up the screen. Again we are going to use a Lua table to create a data object to hold all the variables that describe the bullet.
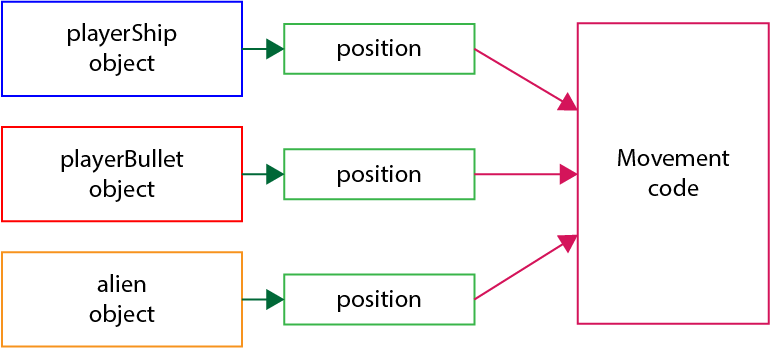
So our first task is to work out what data we need to model the player bullet. As much as possible we need to mimic the structure of our player ship object. All of our onscreen objects such as the player ship, bullets, aliens and alien missiles will share a number of properties, e.g. their on-screen position. If we model this data in the same way for each object we’ll be able to create blocks of code that can handle any of these object types. For example each of these objects should contain a sub object which holds their on-screen position information.
playerShip.position, playerBullet.position and alien.position will all contain an X and Y variable which holds the on-screen position of each of these items in our game. We’ll eventually write code that moves these objects around the screen. If that code knows to expect a position object with these X and Y variables it will be able to move the player ship, bullets and aliens by updating the X and Y coordinates without having to know what type of object they actually are. The code will simply take whatever object it’s been asked to move, look inside to find this position object and then update the X and Y variables stored within it.
Creating these standardised and defined structures for objects is called creating an interface. An object interface defines a certain set of features that each object must have. When objects conform to an interface (called implementing the interface) we can write code that can take any of these objects and perform program operations on any parts of them that are defined by this interface.
As your only on lesson 6 of your beginners programming course don’t worry if all of this sounds a bit confusing at the moment. I’m introducing the concept here and we’ll see it in action over the next few lessons. Once you’ve used objects a number of times you’ll start to see how it all fits together and as we then start to pass data between blocks of code you will see the advantage of using this interface design technique. When you eventually move on to proper Object Orientated Programming these ideas will become invaluable tools to have in your programming toolkit.
Modelling the Player Bullet
Our player bullet needs to have a number of attributes that allow us to model it in our software. The bullet itself will be drawn as a line on the screen. To describe this object will need;
- a position object which will contain X and Y coordinates
- a length variable to tell us how long the line is
- a colour variable to specify the colour of the line
- a speed variable to tell us how fast the bullet moves up the screen
So our player bullet object, which will again be stored inside a Lua table, will look like this;
playerBullet = {
                position = {
                                x = 0,
                                y = 0
                },
                length = 5,
                colour = 14,
                speed = 2
}
Spawning the Bullet in the Right Position
When the player presses the fire button we need to start the bullet in the correct position before it then moves up the screen. We know the position of the player ship using the position object held inside the playerShip object. But that tells us the top left corner of the player ship sprite.
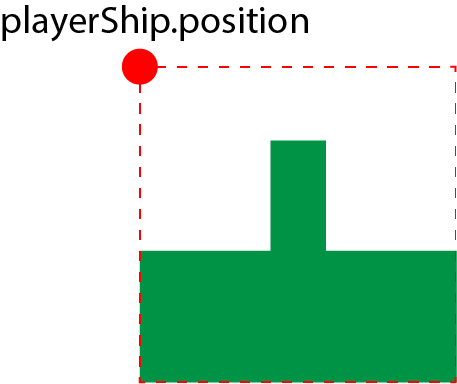
We need to adjust the start position of the bullet so it appears to come out of the gun port on the player ship sprite. We could simply add an offset to the x and y coordinates using the pixel values e.g.
playerBullet.position.x = playerShip.position.x + 4
playerBullet.position.y = playerShip.position.y + 2
But these values are actually properties of the player ship object that define the position of the gun port for this particular sprite. If we were to change the design of our sprite we’d need to edit this code with the new offset values. If we used these values in a number of places in our code we’d need to find each place and edit the numbers. At the moment are programs are very short so this isn’t a problem. But soon will be writing much longer programs and having to remember to edit these magic numbers in every place will get very hard.
If you find yourself typing numbers into your code always think what that number means. If it describes some property in your software it’s much better to use a variable to hold the number and then store that variable in the correct place within your program data. If you then always reference the number by using the variable all you have to do is update the code that initialises the variable to automatically update the value of the number everywhere in your code.
For this gun offset problem the best solution is to store this data in our player ship object as that’s where it really belongs. The offset needs to contain X and Y offsets so it makes sense to store these in an object. So inside our player ship object we can create a bullet offset object which contains are two X and Y offsets.
playerShip.bulletOffset = {
   x = 4,
   y = 2
}
We can then rewrite our player bullet position initialisation code to use these new object values.
playerBullet.position.x = playerShip.position.x + playerShip.bulletOffset.x
playerBullet.position.y = playerShip.position.y + playerShip.bulletOffset.y
Moving the Player Bullet up the Screen
Once we’ve put the player bullet at the start position all we need to do is adjust the Y coordinate in its position object to make it move up the screen. We already know that the top of the screen has a Y coordinate of zero so we need to subtract a number from the bullets Y coordinate each time we run our TIC function. The larger the number we subtract each time the more the bullet will move each TIC and the faster it will appear to move.
Again, by storing this speed value in the player bullet object we can easily adjust the speed by changing the line in our code where we initialise this variable. We can then be sure that everywhere that uses this playerBullet.speed value will be automatically updated.
Drawing the Bullet Using a Line
To draw the bullet will use the line command in TIC 80. This command needs the X and Y coordinates of the line starting point, its finishing point and the colour of the line.
line( startX, startY, endX, endY, colour )
Using our player ship and player bullet objects our line command becomes
line(
   playerBullet.position.x,
   playerBullet.position.y,
   playerBullet.position.x,
   playerBullet.position.y + playerBullet.length,
   playerBullet.colour
)
Code for Lesson 6
-- title:  Space Invaders
-- author: Bob Grant
-- desc:   Lesson 5
-- script: lua

playerShip = {

	position = {
		x = 120,
		y = 128
	},

	spriteNum = 0,
	minX = 0,
	maxX = 232,
	speed = 1,

	bulletOffset = {
		x = 4,
		y = 4
	}
}

playerBullet = {

	position = {
		x = 0,
		y = 0
	},

	length = 5,
	colour = 14,
	speed = 2

}

function TIC()
	cls()

	if(btn(2)) then
	 playerShip.position.x =
			playerShip.position.x - playerShip.speed
	end
	if(btn(3)) then
	 playerShip.position.x =
			playerShip.position.x + playerShip.speed
	end
	if (playerShip.position.x < playerShip.minX) then
	 playerShip.position.x = playerShip.minX
	end
	if (playerShip.position.x > playerShip.maxX) then
	 playerShip.position.x = playerShip.maxX
	end

	-- check if the fire button is pressed
	if (btnp(4)) then
	-- if pressed make a bullet appear
	-- at the player ship
		playerBullet.position = {
			x = playerShip.position.x + playerShip.bulletOffset.x,
			y = playerShip.position.y + playerShip.bulletOffset.y
		}
	end

	-- move the bullet up the screen
	playerBullet.position.y =
		playerBullet.position.y - playerBullet.speed

	-- draw player bullet
	-- line(startX, StartY, endX, endY, colour)
	line(
		playerBullet.position.x,
		playerBullet.position.y,
		playerBullet.position.x,
		playerBullet.position.y + playerBullet.length,
		playerBullet.colour
	)


	spr(playerShip.spriteNum,
		playerShip.position.x,
		playerShip.position.y, 0)


end

