The 8 Queen Problem – Computer Science
18th October 2020
The Best Computer Language for Beginners
8th November 2020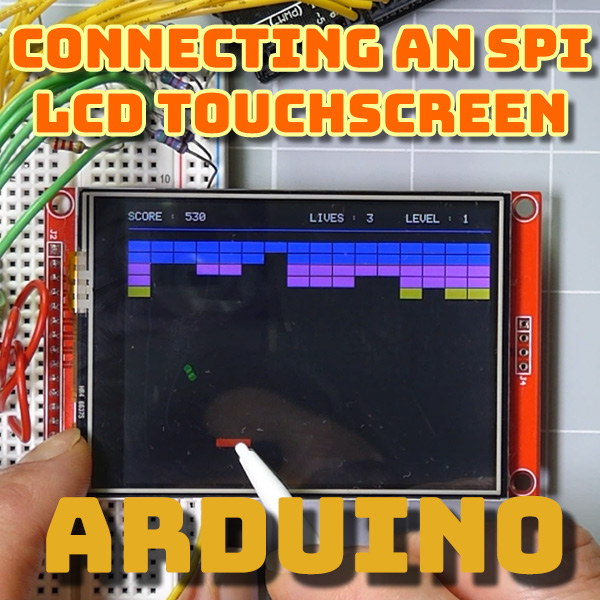
Connecting an SPI TFT Touchscreen to Your Arduino
Connecting an SPI TFT Touchscreen to Your Arduino
You can buy some great LCD modules for under £10 that will easily connect to your Arduino or microcontroller projects. These give you a full colour display to output information as text or graphics, and if you add in a touchscreen overlay you’ve got a fantastic user interface device.
Most of these small TFT modules connect using an SPI interface, often using the ILI9341 (or similar) display driver IC and XPT2046 to drive the touchscreen. If you opt for the cheaper Chinese versions you’ll get the module but no instructions or support to get it working. In this video I’ll show you everything you need to know to get both the screen and the touchscreen working on your Arduino.
Key Points to Get It Working
We’ll be using the Adafruit ILI9341 library to handle the low level communication with the LCD panel. The Adafruit modules referenced in their own tutorials contain extra circuitry to make the connection easier. For the generic panels we need to make sure we connect the reset pin and initialise the library, telling it which pin we’ve used on the Arduino.
We also need to add our own level shifting circuit to take the 5V Arduino logic down to 3.3V for the ILI9341.
We’ll be using the LCD and touchscreen together so we’ll also need to correctly set their slave select inputs to avoid errors as we start the devices.
Once you’ve got these extras in place the LCD modules should connect without any problems.
Circuits
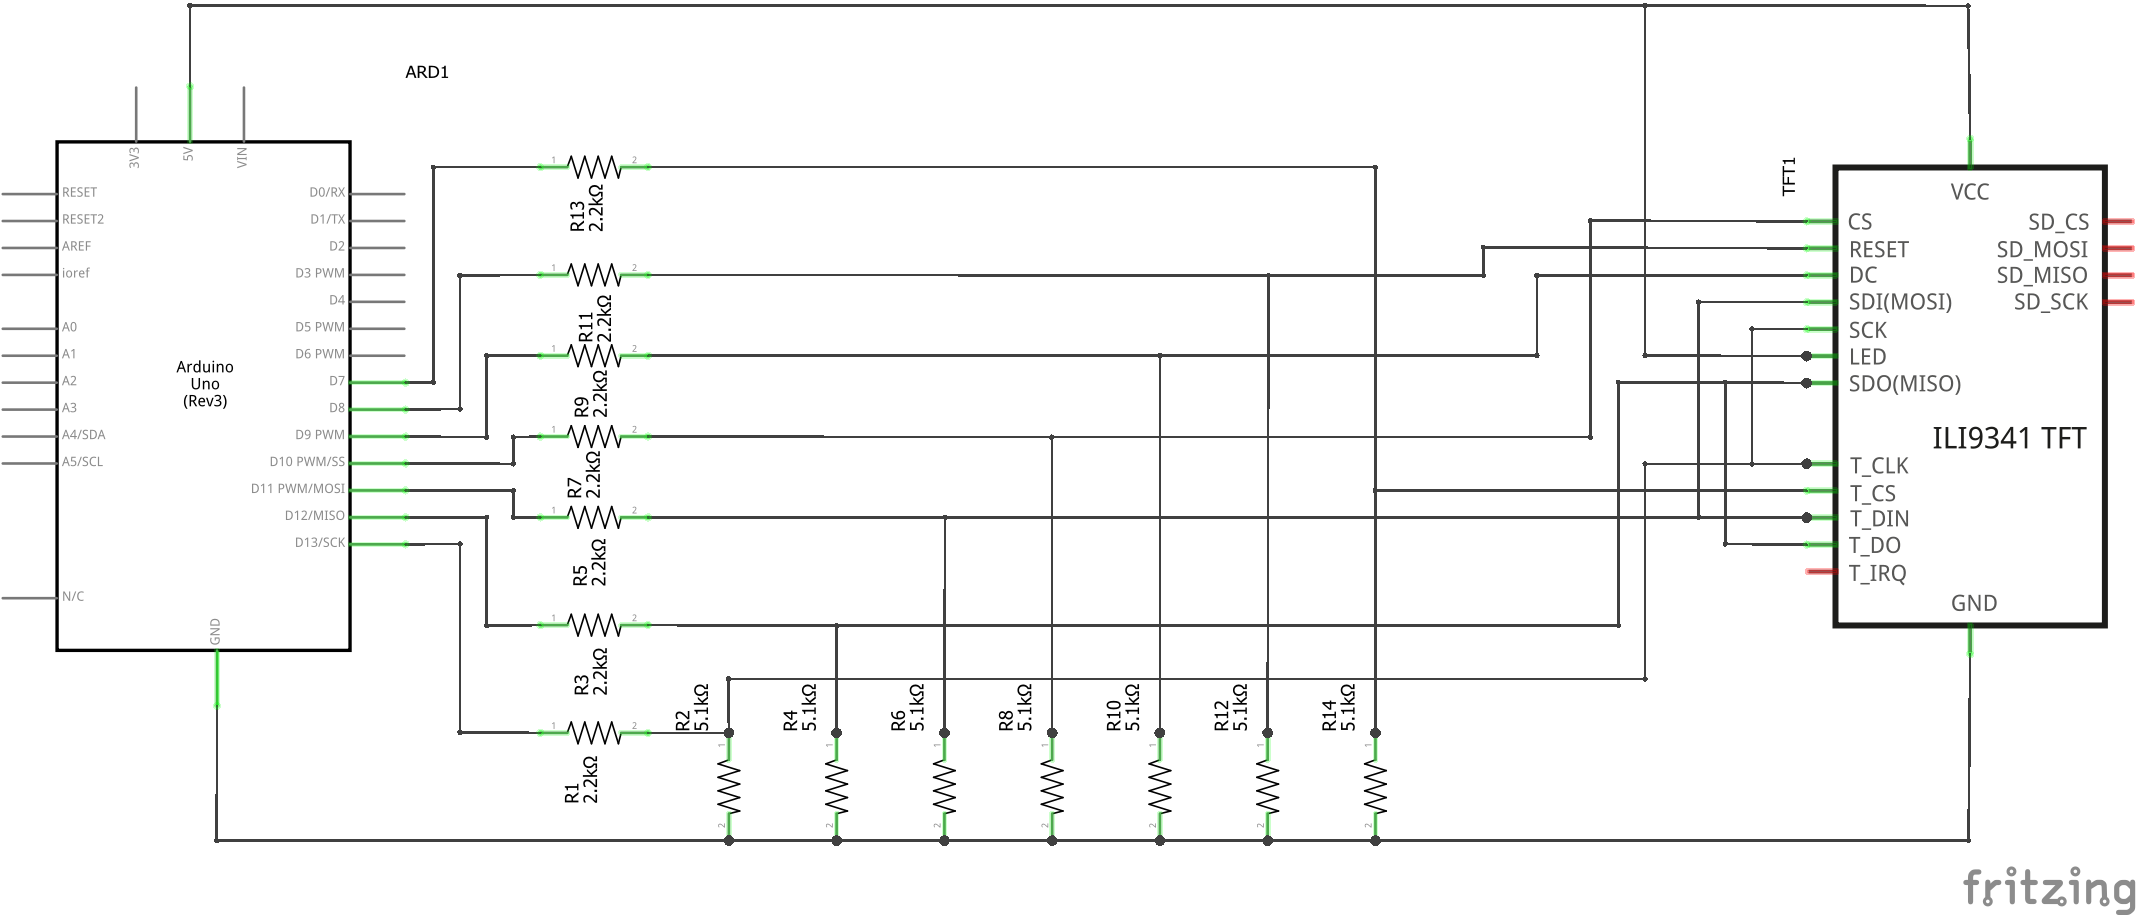
The full connection circuit for the panel is shown below using an Arduino Uno.
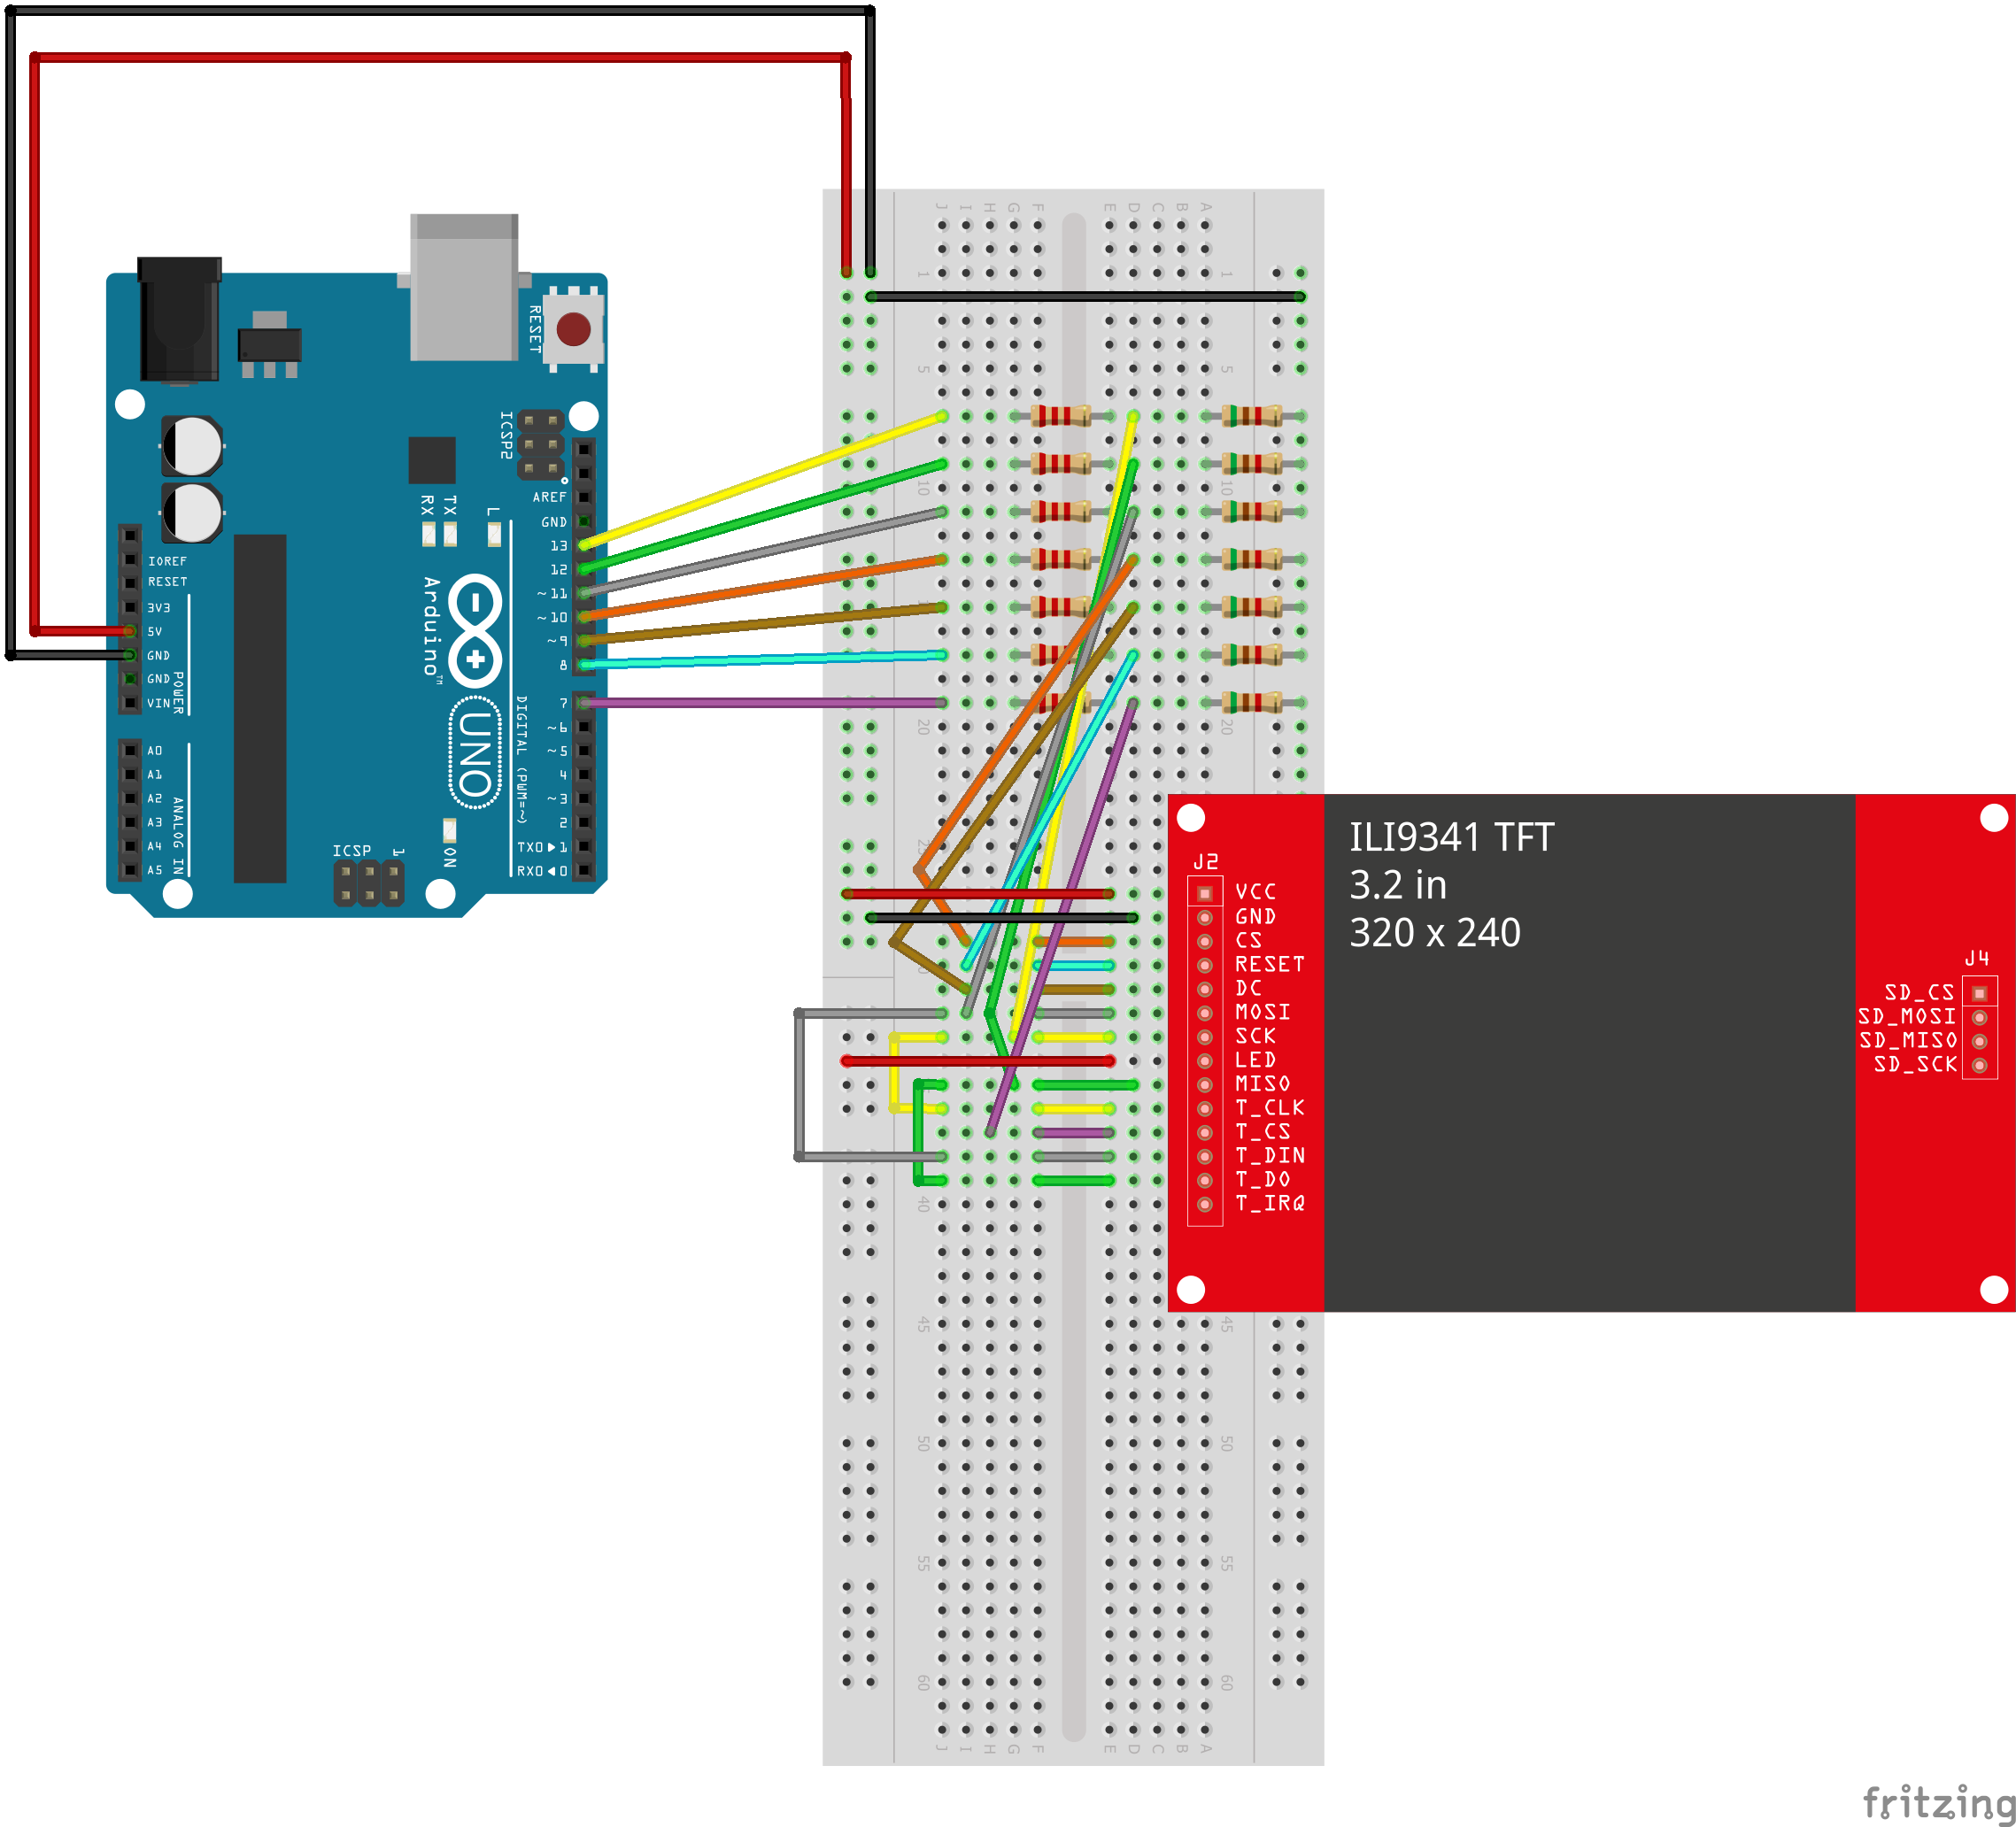
You can use this breadboard layout as a guide to connecting it all together.
What Next?
Once you’ve got the module up and running you need to work out how to use it. Check out my next tutorial to get a Pong game running on the device. This will show the text and graphics in action and give you advice on the limitations of the screen and how to get animations working correctly.
Links
LCD module – Amazon
https://amzn.to/35quUJF
LCD eBay
https://rover.ebay.com/rover/1/710-53481-19255-0/1
ILI9341 Library
https://github.com/adafruit/Adafruit_ILI9341
XPT2046 Library
https://github.com/PaulStoffregen/XPT2046_Touchscreen
Adafruit GFX Library
https://github.com/adafruit/Adafruit-GFX-Library
Adafruit LCD tutorial
https://learn.adafruit.com/adafruit-2-8-and-3-2-color-tft-touchscreen-breakout-v2/spi-wiring-and-test
Adafruit GFX Library Tutorial
https://learn.adaruit.com/adafruit-gfx-graphics-library/overview