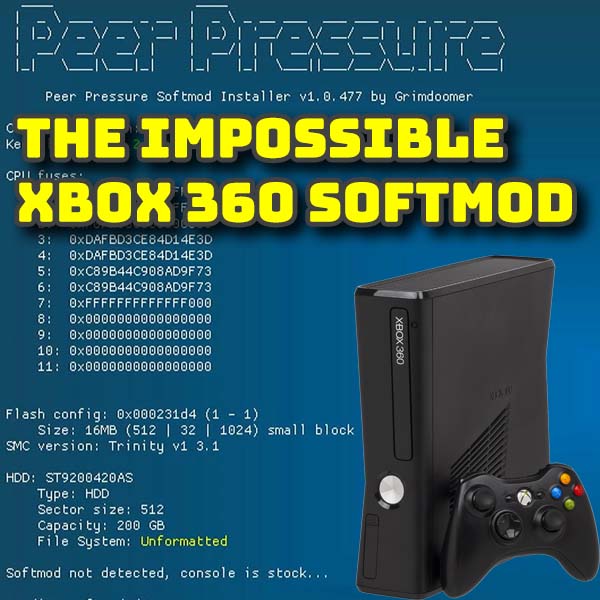

Peer Pressure – The impossible Xbox360 softmod – Full installation and setup
10th October 2026
Ultimate Xbox360 Mod for ALL models – boot into exploit with no USB drive needed
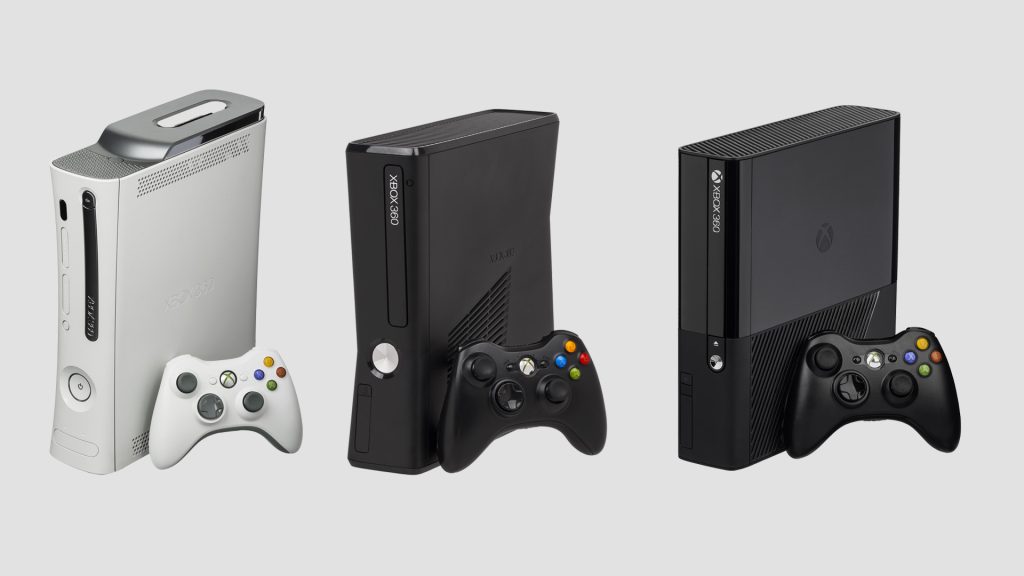
There’s been a lot of progress on the Xbox360 front over the past couple of months culminating in the fantastic Peer Pressure full softmod released in October 2026. But Peer Pressure only works on the earlier models so if you’ve got a later slim or any E console you’re out of luck. So in this video I’ll take you through my Ultimate Xbox 360 mod for all models which will let you boot straight into the exploit, without having a USB drive plugged in and with access to all the homebrew goodies.
I’ll start from scratch so you can follow along and end up with a fully working system.
So let’s get going.
What you need
To complete this project you’re going to need a couple of items.
We’ll be downloading and copying files over to our Xbox so you’ll need some sort of computer and a USB drive that it can write to. The drive doesn’t need to be very big but you’ll probably end up using it as a game transfer drive so 64GB or more will work best.
You’ll also need an Xbox360. It doesn’t matter what model you have. This mod will work with everything.
So once you’ve got all these bits assembled we’re good to go.
Dashboard Version
The first task is to find out if we have the correct Dashboard version on our Xbox360. So power up the console and head over to the System settings menu and then select Console Settings and then scroll down to Console Info. This will display your current dashboard version. For this project it has to be 17559. If your console is already on this version great. If not we’ll need to update it as part of the setup process.
Just make a note for now as we’ll set this up later.
Bad Builder
Our main task is to get a working ABadAvatar USB. The easiest way to do this is to use a package called Bad Builder which does all the hard work for us. The only issue here is that it is a Windows application so if you’re on another operating system you’ll need to do this manually. I’ve covered this in my ABadAvatar 1.3 video so please do head over to that and build your USB drive manually.
Otherwise let’s get Bad Builder up and running.
So on your computer head over to the Bad Builder GitHub repository at this web address
https://github.com/Pdawg-bytes/BadBuilder
There’s lots of information on this page showing you how to use the app so please do have a read through. But for now we need to go to the latest releases section and then scroll down to the assets list.
The code has been compiled for a range of Windows environments so as most of us will have a 64 bit PC I’d go for the AMD64 version unless you are using an ARM processor. Just download the exe file to a folder on your computer.
Once that’s downloaded navigate to the download folder and you should see the file sitting in there.
Bad Builder needs to be run as Administrator so right click on the exe file and select Run as Admin. This should open up a terminal window with a number of options.
Our first task is to make sure the console dashboard and avatar data is present and correct.
In Bad Builder use your arrow keys to move to the Target Drive option. Select this with the return key and then select your USB drive from the list. Make sure you get this right. Bad Builder is about to format the drive you select which will wipe all its data. If you’re unsure which one it is check. Back on the main menu we need to go to the Update Xbox Dashboard option and select it. Select the Download and Install option to get Bad Builder to make an update disk for you.
Back on the main menu select the Install option and let Bad Builder download and setup the required files.
You now need to take the USB drive over to your console, but don’t plug it in yet.
We now need to make sure your avatar data is in place.
On the main menu and go to the Social section and then to the sign in option. You should see the avatars for your accounts. If you’ve only got the create and download options create an account, save it to your hard drive and then come back to this page.
Now look at the avatars. Your accounts should have coloured avatars that move as you select them. If like me all your avatars are greyed out you’re missing some data.
If you’re missing avatar data, or if your console is on a lower dashboard than 17559 you need to run an update to fix it. If everything is OK you can skip this step.
Plug in your USB drive and you should get a prompt to update the dashboard. Say Yes to this and let the Xbox install the 17559 Dashboard code.
Once the console has restarted you should be able to the sign in page and see your avatars in full colour, and if you go to the main settings screen and Console Settings and System Info you should see you’re on the 17559 Dashboard.
You now need to take your USB drive back to your computer.
Now we need to build the ABadAvatar drive. So make sure your USB drive is plugged in and restart the Bad Builder app, again running as Admin. Then select the Target Drive option on the menu in the bottom left and find your USB.
Back on the main menu select the Exploit option. This lets us choose which mod we want to run so we need ABadAvatar V1.3. If you’re following this at some point in the future just make sure you use the latest version.
Back on the main menu the next step is the payload selection so click the Post Exploit Bootstrap option. We want XeUnshackle.
Bad Builder now lets us add extra homebrew apps during the build. If you look above the menu to the current selections list you’ll see that Aurora, XeXMenu and Simple 360 NAND Flasher are selected by default. These are the base applications we need. Once we’ve got everything set up we can add loads more apps. But we do need to select this option to make one selection. In the menu select the Set Default Launch option and then select Aurora. This will tell our Xbox to boot straight into our homebrew dashboard rather than the default version.
So that’s all we need to do. Just select the Install option and let Bad Builder do its thing.
Once that’s finished you’ll have a fully working ABadAvatar USB drive.
If you’ve been creating your USB drive manually you should be in the same position.
Tweaking the Setup
For the final setup we need to use modified versions for some of the packages we’ve downloaded.
First of all we need to replace the standard XeUnshackle with XeUnshackle Max. This is a fork of the main code that allows us to turn off the launch video, hide the console keys and autostart the system. These tweaks will give us that seamless boot experience we are after.
So head over to this GitHib repo
https://github.com/klofi/XeUnshackle-Max
And click on the latest releases section. In the Assets section download the zip file to a folder on your computer. Once it’s downloaded navigate to the file and extract the files. If you now browse into the extracted folder you’ll see a number of files and folders. One of these will be lauch.ini. If you can’t see the .ini file extension then make sure you have file extensions turned on. On a Windows machine go to the view menu, show and turn on file extensions.
Bad Builder has already created a modified version of this file on the USB drive so we don’t want to copy it over. Just rename it to launch_max.ini so we still have the file.
You can now copy everything in the archive over to the root of the USB drive. If your asked about overwriting or merging files and folders just say yes.
Next we need AutoDNS. This app will help keep our console safe from Microsoft bans whilst allowing us to leave our Internet connection active. Head over to this GitHub page
https://github.com/dclstn/Xbox360AutoDNS
And click on the releases link. You can download any of the .xex files. Each one uses a different set of nameservers. I’ll be using the Google DNS version. This file needs to be placed in the root of the USB drive so you can just download it straight onto there.
So that’s all our software loaded onto the USB drive.
Software Setup
We now need to tweak some settings and files to get everything to work as we want it.
On the root of your USB drive you’ll see a few files we need. First you should have your AutoDNS file. We’re going to need the name of this file exactly as it’s showing on your drive. If you click the filename you should be able to highlight and copy it.
Next we need to edit the launch.ini file with some sort of text editor. I’m using Notepad++ here but any text editor will work fine.
Scroll down until you find the plugins section. Then edit one of the empty plugin slots to load the AutoDNS app. Just use the exact same format as the others but with your copied filename.
Usb:\ AutoDNS-google.xex
Save the file and then back to the USB drive.
Internet and Backup
We now need to do a bit of work on the console to get it ready for the mod.
Do not plug your USB drive into the console.
Boot up and then go across to the System menu and then into the Network settings. You should see your network connection listed. If not make sure you set up the connection as normal and then come back to this page.
Select your Internet connection and then select the Configure Network option. This will show you the current network setup. Click down until you highlight the DNS settings section and select that. We now want to set up manual DNS so select that.
DNS generally has a primary server and a backup or secondary server so we need to change both settings.
Click on the primary server and change the IP address to 192.0.2.1. This is a fake DNS address that AutoDNS will use to protect you. Click your Start button to save that setting and now edit the secondary server IP address to that same value.
If you now click the Done option you should get back to the settings list so just make sure that those values are in place for the Primary and Secondary servers.
We now need to make sure that no accounts are set to auto login. Back on the main menu go to the social section and login to your usual account. If you get any errors about not being able to connect to Microsoft Live just click the B button to ignore it. Now click the guide button and scroll over to the settings tab and select Profile and then Sign In Preferences. In here make sure that Auto Sign-In is turned off. If you have any other profiles set up make sure those are not set to auto login either.
With that done you can power off the Xbox.
First Boot
We’ve now ready for our first boot. So, plug in the USB drive and power back on. This is going to be the standard ABadAvatar boot for the USB drive so that we can backup the console and make the final tweaks.
You should see the normal startup animation and then the login page. There should be a new ABadAvatar account listed and that should then login. This will trigger the exploit and you should get the XeUnshackle animation followed by a blue information screen.
This is now offering information about your console and the option to back up the Xbox data. So first click your X button to save your console info and then the Y button to dump the boot loader backup. You can then press the A button to hide your console keys and then the start button to set the Auto Start option so that this screen doesn’t need you to press any buttons next time round.
This should then boot up the Aurora dashboard which will be pretty empty at the moment but proves that we have a fully working system.
If everything has gone well, great, we’ve got a modded Xbox.
Press your guide button and turn off the console again.
Configure XeUnshackle Max
Take your USB drive back to your computer.
If you open up the root of the USB drive and then the BadUpdatePayload folder you’ll find a couple of files from the XeUnshackle backup. The ConsoleInfo.txt file and the one ending in 1bl.bin are important backups of your console data. You need to copy these somewhere safe with cloud backup if possible. If you ever brick your console these files will help you recover the Xbox.
When we were in the blue XeUnshackle screen and we set Auto Start, that forced XeUnshackle to create a settings file that lets us tweak the startup process. This is the XeUnshackleConfig.txt. Open this with a text editor and you’ll see 4 lines of settings.
These are the default settings values so we need to modify them.
Set AutoStartDelay equal to 0. This will boot straight to the modded console.
Set PlayVideo equal to 0 so the XeUnshackle start animation doesn’t play.
Set ShowKeys equal to 0 so your console keys don’t show.
And you can leave video volume at 100 as it’s not going to play anyway.
This means that when our exploit triggers XeUnshackle will do it’s job but not delay the startup process or require any input from you.
Make sure you save the file and take the USB drive back to the Xbox.
Auto Booting Xbox360
Plug in your USB and power on. You should get a seamless bootup that goes through the normal boot animation, loads into the ABadAvatar account, runs the exploit and then boots straight to the modded console Aurora dashboard. This effectively gives you the softmod boot sequence, and with AutoDNS running you can leave your Internet connected knowing that you are safe from bans.
You now have two choices. The Peer Pressure softmod allows you to use non Microsoft certified hard drives. Our setup can use Bad Storage to do the same. With this you can use any 2.5 inch laptop drive, including some SSDs. But Bad Storage can’t boot from the uncertified drive so you would have to keep this USB drive setup.
If you’ve got a certified hard drive we can go through the final step to move the whole exploit onto the internal drive to ditch the USB stick.
So let’s do that next.
Transferring to Hard Drive
So power down your console and pop your USB drive back into the computer.
ABadAvatar is designed to look for the exploit on any of your attached drives so we simply need to move the profile and files over to the hard drive. But we also need to make sure that any homebrew apps or plugins that we are using are moved as well and linked into the system correctly.
In the root of the USB drive we’ve already seen how we add apps into the launch.ini file. We want to create a hard drive version of this file so open it with your text editor and then save it as a new file on the root of the USB called hd_launch.ini. This will leave our USB drive in tact as we edit the new file.
At the top of the listing you’ll see some notes on how you can reference different drives in the console. We want to move our files to the hard drive so you can see here that we use the Hdd location.
If you now scroll down the listing we can start to change references from Usb to Hdd.
In my Paths section I have boot option set to a folder in the Content folder which allows you to boot into XeXMenu. We’ll be moving all of that over so we need to change the location to Hdd. Don’t forget the upper case H.
Underneath the Paths section we’ve got the default launch application. It’s expecting Aurora to be on the USB drive so again change this to Hdd.
Scrolling down to the plugins section all of these need to be changed to Hdd as well and we’ll need to move all these files over.
Once you’ve got those edits in place make sure to save the file and we can now move back to the Xbox but don’t plug in the USB drive. We need to boot normally without ABadAvatar.
So when the console boots we should be on the normal Dashboard. Now insert your USB drive.
The first thing we need to copy over is the ABadAvatar profile. So go to the settings menu and select Storage. Select the USB drive and then profiles. You should see the ABadAvatar profile. Select it, then select Move and then select your hard drive. This will place the profile data onto the hard drive so it’s no longer on the USB drive.
Next we need to reboot the console with the USB drive plugged in.
This should take you to the Aurora Dashboard.
We’re now going to copy the files over. Press the back button on the controller to bring up the System menu and select the File Manager.
You should see a list of your drives so move down to the USB drive and open it with the A button. We now need to select the files we’re going to copy. Highlight the Apps folder and press X to select it. Then repeat this for the BadUpdatePayload folder, the Content folder, the AutoDNS file, JRPC2 file, hd_launch, and Xbdm. The text files are not important.
Now press the left button on the D Pad to go to the left menu and then down to the copy option and select that with the A button. Aurora should confirm your files have been queued for copying.
Now click your B button to get back up to your drives list and then open the hard drive.
Now go to the left menu again and select the paste option at the bottom. This should copy your files over to the hard drive.
Once the files are copied you may get an error message. This is usually that some files were already on the hard drive so you can just click OK.
We now need to rename our hd_launch.ini file. So use your D pad to highlight the file, then move to the left menu and go to the rename option. In the window just remove the hd_ at the start of the filename and then save that.
So once that’s renamed we should be all set!
Power down the console. Take out the USB drive and power on.
If everything is et up correctly you should now have a self booting, hard drive only modded, Xbox360.
The last thing we’ll do is to set an auto login for Aurora. So click the start button to bring up the settings, then select profile. Move over to the Auto Login radio button and select than. Then down to the Change button and then select the profile you want to log in with.
The next time you boot Aurora will automatically log you in.
So that’s our Ultimate Xbox360 mod fully installed. You can now start to add games, emulators and so much more. Just make sure to subscribe to the channel and check out my Xbox Modding and Gaming playlist to find out how to get the most from this great console.
Image Credits
Xbox360 Phat By Evan-Amos – Own work, Public Domain,
https://commons.wikimedia.org/w/index.php?curid=33220305
Xbox360S By Evan-Amos – Own work, Public Domain,
https://commons.wikimedia.org/w/index.php?curid=17444906
Xbox360E By Evan-Amos – Own work, Public Domain,
https://commons.wikimedia.org/w/index.php?curid=33202193