
Save your Xbox360 from console bans with AutoDNS for Bad Update and ABadAvatar
3rd October 2026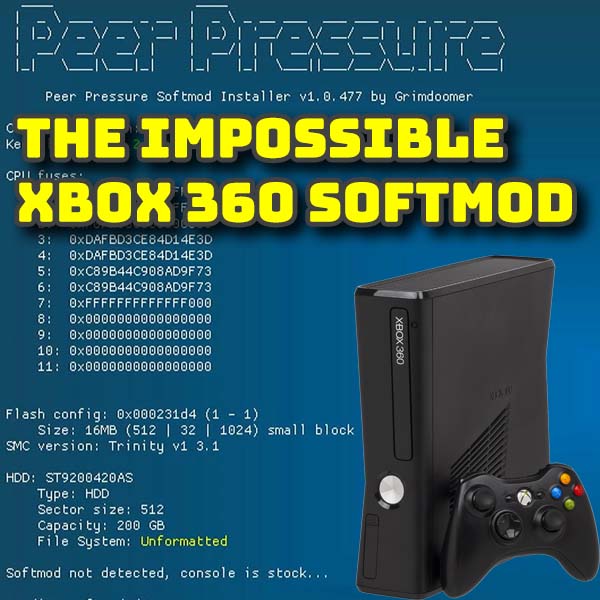
Peer Pressure – The impossible Xbox360 softmod – Full installation and setup
The impossible has finally become possible. Ok, not teleportation, but something just as important. A true softmod for the Xbox360!
It’s taken 21 years to achieve, but Grimdoomer, the developer of the Bad Update and ABadAvatar exploits has finally done it with their Peer Pressure softmod.
So in this video we’ll look at what it is, how to install it and what its limitations are.
Let’s get going!
What is a Softmod?
If you’ve been using a Bad Update exploit variation you’ll know that when you turn on your console it first boots into the stock operating system and then runs a special piece of code to exploit the system and enable all the homebrew capabilities.
With a softmod the actual console is reprogrammed to boot directly into the exploited state without having to boot into the stock setup. This makes it effectively like a hard modded RGH or JTAG system.
Whilst this only saves you a couple of seconds on boot times it does give you all the advantages of a homebrewed Xbox right from power on. All of the console protection from account bans and unwanted Internet access is in place, and, even more importantly, you can use standard, non Microsoft hard drives inside your console.
After that you’ve got access to all the usual features of a modded console. Run homebrew apps, play games from backup files, play OG Xbox games, emulate arcade machines and play a while range of retro console and computer games.
What are the limitations?
With Peer Pressure there are some limitations.
The big one is that it’s not compatible with all Xbox360 models. Only earlier models will work.
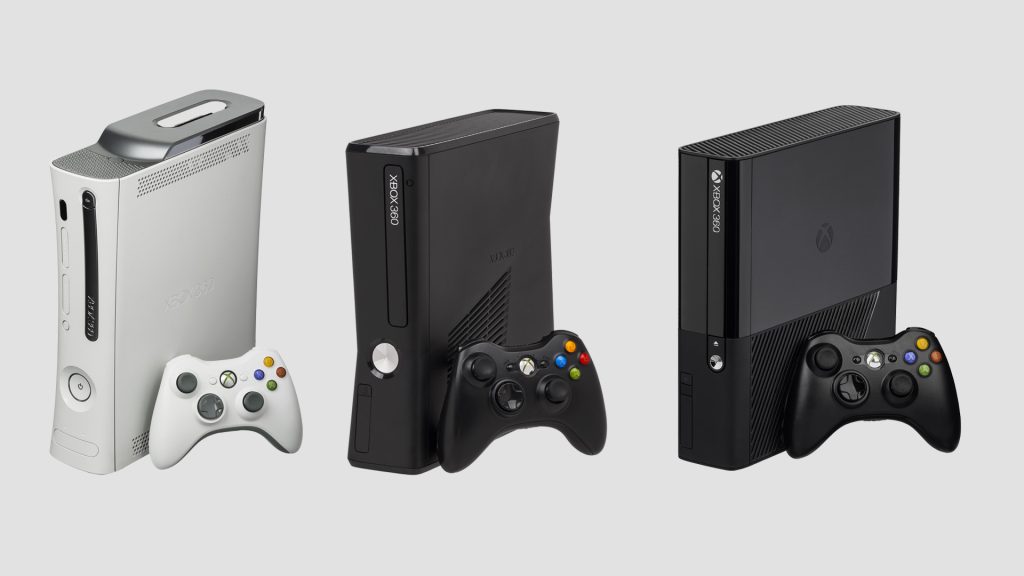
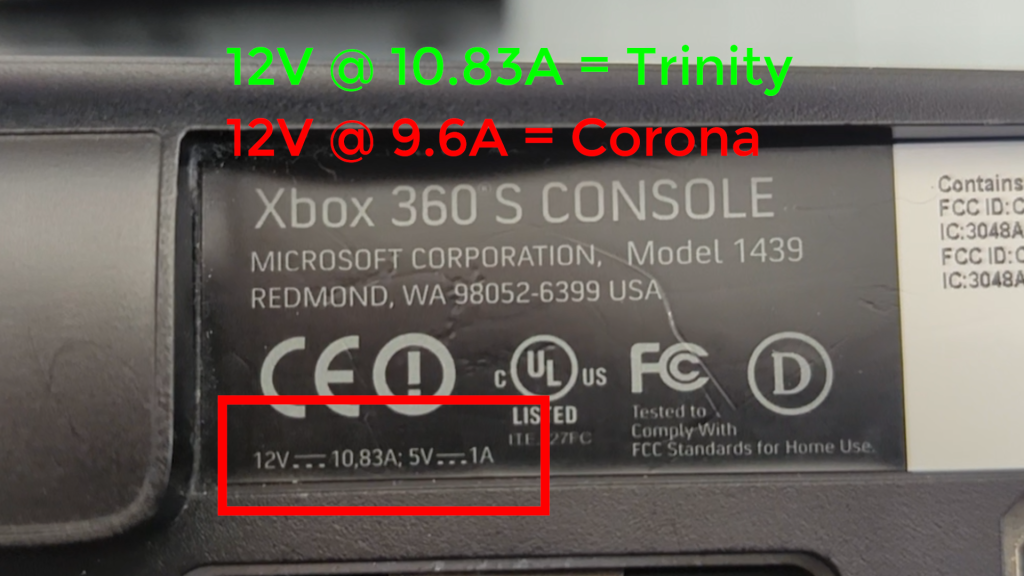
If you’ve got an original Phat model you’re fine. If you’ve got an E model you can’t install Peer Pressure. If you’ve got an S or Slim model you need to check your motherboard. To do this look at the back of the console on the Xbox label to find the power supply ratings.
If the power supply is rated as 12V @ 10.3A you’ve got a Trinity motherboard and you’re in luck. If it’s rated as 12V @ 9.6A you’ve got a Corona motherboard which won’t work.
If your console can’t run Peer Pressure don’t worry. You can still install Bad Update or ABadAvatar and still do everything. I’ll be making my Ultimate Xbox360 modding video after this one which will use ABadAvatar to create a boot to exploit system. So make sure to subscribe to my channel and watch out for that one. As soon as I make it I’ll also link to it in this video’s description.
The other downside to Peer Pressure is that it can’t run DashLaunch plugins. For most of us this isn’t an issue, but if that’s something you need then this isn’t for you.
Hard Drives
Another limitation of Peer pressure is that it needs an internal hard drive. Without this you can’t install it. But as I mentioned you don’t need an official Microsoft drive.
If you want to add one to your system , or if you want to upgrade to a bigger drive you can just plug in a standard mechanical 2.5 inch drive unit and let Peer Pressure set it up for you. You do need to careful about what drive you use. The maximum size is 2TB. The console can’t work with drives bigger than this. It also has to be a mechanical drive so no SSD or NVMe units. The exploit uses a timing based race and SSD drives run too fast for it to work.
To fit the drive you’ll need a drive enclosure for your model, but after that just slip in the drive and you’re good to go. Remember though that Peer Pressure is going to wipe and format the drive so backup any information you need first.
Preparation
With all the preamble out of the way let’s start building our system.
For this you’ll need a USB drive. For this installation we’re only going to be copying over a few files so it doesn’t need to have loads of storage space. Later you may want to use it to copy games so if you’re buying one I’d go for at least 64GB.
Power on your Xbox and plug in the USB drive. Go to the System Settings option and select Storage. If you’ve used the USB drive before in the Xbox it will show as a USB drive, otherwise, like me, you’ll see an uninitialized drive. Highlight it and then look at the button options in the bottom left. If the drive is already Xbox ready you’ll have a Y button. Use that and then format the drive. Otherwise press A to format the drive. Remember that this process will wipe your drive clean so make sure there isn’t anything on the drive that you need to keep.
This gives us a correctly formatted USB drive that will work with our console.
Dashboard Version
Peer Pressure requires a specific Dashboard version to be installed on your console. If you go to the Settings and Console Settings and then Console Information you’ll see your current Dashboard version. This has to be 17559 which at the moment in October 2026 is the current latest release. If Microsoft release an updated version in the future we’ll need to check that Peer Pressure is compatible with it so please do look in the video description for some help.
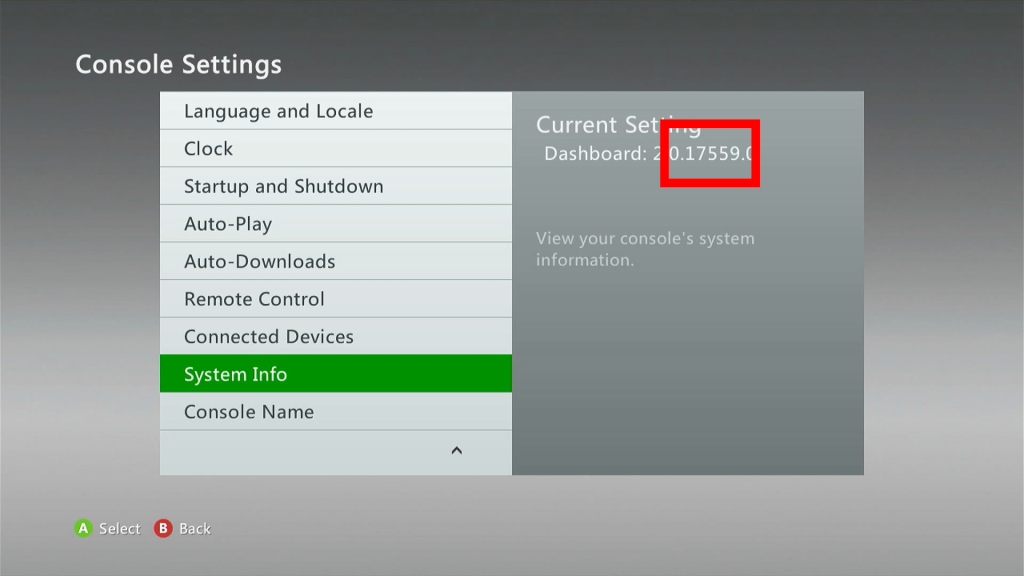
If your version is correct you can skip this next step, otherwise I’ll take you through updating your firmware. So take your USB drive back to your computer and connect it.
https://digiex.net/threads/xbox-360-dashboard-system-update-2-0-17559-0-download-with-avatars.16047/
Back on our computer we need to go to this forum post, and I’ll put this link into the video description. If you now scroll down a bit you should see a link to download the 17559 version dashboard. Download this to your computer. This will be an archive file so you’ll need to extract its contents out to a folder on your PC.
If we now look inside this folder you’ll see the actual update code folder. This needs to be copied over to the root of our Xbox USB drive.
Sometimes you may have an issue where the USB drive that was formatted by the Xbox shows as full. If you have this error just format the drive in your computer as an FAT32 drive and try the copy process again.
Update the Console
Once that’s copied over we need to take the USB drive back to the Xbox. Make sure you’re on the main dashboard and plug in the USB drive. The console should see the update file and offer to restart to install it. Just select Yes and let it run through the update process. This will be in two stages with a reboot in the middle. Just wait until you see the main dashboard again.
Go over to the Settings page, then System Settings and console info and you should now be on the right dashboard version. We can now use our updated console to reformat the USB drive to ensure it matches our new firmware so go back to the System Settings, Storage, select the USB drive with the Y button and then format it. This gives us a fully cleaned drive formatted to the latest dashboard version.
Our console and USB drive are now ready for the mod.
Downloading Software
We’re now ready to download the software for the mod.
First we need a copy of the 17559 Dashboard update. We’re not using this to update the firmware, we now need it to make sure that our Avatar data is fully loaded. Head over to this web page
https://digiex.net/threads/xbox-360-dashboard-system-update-2-0-17559-0-download-with-avatars.16047/
And download the archive file to a folder on your computer. If you downloaded it in the last section you can reuse that download.
Next we need the Peer Pressure code. Head over to this GitHub repository
https://github.com/grimdoomer/Xbox360PeerPressure
On this page you’ll find lots of information about the project, how it works and how to use it. Please do have a look through as a lot of work has gone into creating this software.
For now we just want to latest release package so head over to the releases page and download the latest SoftmodInstaller.zip file.
To get the installer to work we need to run a Bad Update exploit so we can take control of the console. The Bad Update code is in the installer download but we need the Rock Band Blitz demo to trigger it. Head over to this web page
https://digiex.net/threads/rock-band-blitz-xbox-360-arcade-trial-download.15780/
And download the trial version.
Finally we’ll need some sort of homebrew dashboard to run our system. Peer Pressure contains some code that lets you easily set up Aurora as your dashboard so we’ll download that. Head over to this web page
https://phoenix.xboxunity.net/
And download the Release Package .rar file.
That’s all the software we’ll need for now.
Building the USB drive
We now need to get all of this onto our USB drive. So make sure that’s plugged into your PC.
First we’ll extract all our downloads into their own folders so that we can access the actual files. You’ll need some sort of application to do this so either use the 7-Zip application or, as I’m using here, Ashampoo’s Zip Pro. This should give you a folder per download. You can now delete the archive files is you want.
First we’ll install Peer Pressure. You should have a folder called SoftmodInstaller. Inside that you’ll see two folders, BadUpdatePayload and Content. These need to be copied to the root of your USB drive. So select the files, copy them and then go to the root folder of the USB drive. Right click again and paste the folders here. In this whole process if you get asked about overwriting files or merging directories just say yes.
Next you should have an extracted SystemUpdate folder. Inside that there will be a folder called $SystemUpdate. This too needs to be copied and then pasted into the root of your USB drive.
Next look inside the RockBandBlitz extracted folder. You will either find a Content folder or a numbered folder. This is a GoD package of the game so we want to copy the game files over to the USB drive. If you can see a Content folder open it up and you should see a zeros folder. Inside that will be the same numbered folder that we need. So copy this numbered folder to your clipboard. Then go over to the USB drive.
You should see a Content folder in the root of the USB. If you don’t make sure that you have hidden items showing by going to the View menu, show and turn on hidden items. Wjile you’re there it’s worth also turning on file extensions.
Open the Content folder and then open the zeros folder. Paste your numbered folder in here. There will probably already be a numbered folder in this area so make sure to overwrite or merge any files if asked.
Finally we need to set up Aurora. If you extracted it to its own folder you should have an Aurora Release Package folder. First we need to rename this to just Aurora with a capital A. Then copy the whole folder, but this time on your USB drive you need to open the BadUpdatePayload folder, and then open the SoftmodExtras folder, and then paste the Aurora folder in here. You should now have the Aurora folder with a file called SoftmodExtras.ini.
This ini file contains instructions for Peer Pressure on what extras to install. If you right click on the file in Windows you should be able to open it with a text editor such as Notepad or, as I’m using here, Notepad++.
There are lots of instruction in here that show you how to install homebrew apps as part of the installation process but we’ll only be using Aurora for now.
At the bottom of the file you should find an Aurora section. The lines will have been commented out using the semi colons at the start of the lines. You just need to delete the semi colons for each of the lines as shown on the screen to tell the system that we want to install Aurora. In the source line you’ll see this listed as Aurora which must match the folder name you saved the Aurora download as.
And that’s everything ready to go!
Installation
Back on the Xbox360 if you’re using a new hard drive make sure you turn off the console and plug it in. We need this installed before we start. Make sure your USB drive is unplugged and then power on the console. This will make make sure you’re not running any Bad Update or ABadAvatar exploit. Now plug your Peer Pressure USB drive into the console.
First we need to make sure that you are signed out of any profiles and that no profiles are set to auto sign in. Press the Xbox guide button to bring up the guide menu and scroll over to the settings section. In the profile option scroll down to Sign In Preferences and make sure this is set to off. If you have other profiles make sure these too are set to off.
Next go back to the guide menu and make sure you are signed out as well. For the installation to work we need no one to be signed in.
So now go back to the main menu and then across to the settings page and enter System Settings. In the Network settings area make sure that your console is disconnected. Either unplug your Ethernet cable or select your wireless connection and click the Y button to forget the network. We don’t want the console to connect to Microsoft when we run the installer or it could get your console banned before we start.
Now we need to clear out any existing Rock Band Blitz data. Back out to your System Settings and then click the Storage Menu. Look on your hard drive and go to Game and Apps section and then look for any Rock Band Blitz content. I’ve not got any here but if you do you can just select it with the Y button and delete.
Now you need to back out to the main menu and go to the Games section. Inside the My Games option you should find Rock Band Blitz listed. Select this to play the game. It will go through its starting sequence until it gets to the title screen. If you now press A you may get a prompt asking you to select a device for the save files so just select the USB drive. If prompted again press the A button to start the Bad Update exploit which will then trigger the Peer Pressure installation.
If the exploit fails just restart the console and try again.
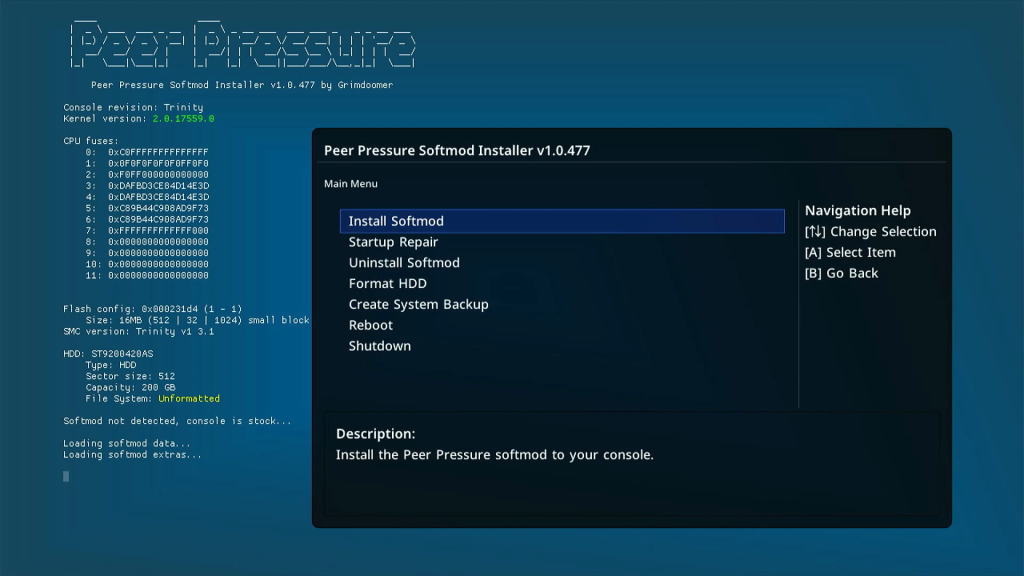
If everything is OK you’ll see a warning message which is basically the developer warning you that you are about to hack your console and that it could damage your Xbox. If you’re happy to continue select OK. This should take you to the main Installer menu.
At this point you should have all of the menu options in white and there should be no red warnings on the left of the screen. If you have greyed out options and red warnings your console isn’t compatible with the softmod so you’ll need to fall back to using Bad Update or ABadAvatar.
Otherwise let’s get on with the installation.
Format Hard Drive
First off we need to check our hard drive. Again remember you can’t install this softmod without one. Look on the left of the screen and it should list your drive. If it’s not there you’ll need to check it’s working and properly mounted.
If you’re using a brand new drive it will probably say it’s unformatted. To further check this select the Install option from the main menu and you should see a red warning message about your hard drive. If this is the case click the B button to go back and then select the Format Hard Drive option. Again using this option will wipe the drive clean so only select the Format command if you’re sure. Also if your drive is already formatted you don’t need to re format it.
Once the drive is finished formatting click back until you get to the main menu again. Now select the Install option.
Here we need to set the options we want during install. We will need to create a System Backup. This will create a copy of our NAND, Fuse data and hard drive info and save that onto our USB drive for safe keeping. I’d also then recommend disabling Xbox Live in retail mode. This will block the console from connecting to Microsoft servers and getting itself banned even if you force it into stock or retail mode. You can override this is the settings but I’d start by enabling it.
Finally we want to install the extras set up on the USB drive. When you check the option you’ll see a list of the installed extras so just enable the ones you want. We’ll want to install Aurora but this version of Peer Pressure also lets you install Xell which gives you access to a range of lower level features so make sure to check that as well.
With all those options selected click the Full Install option and then let it run through it’s process. You’ll see it backing up the console, modifying your NAND, copying files and then installing the mod but just wait until you get to the final success message.
Once here just click the A button and you’ll get to this message. At this point everything has been installed so the system will need to reboot into the softmodded console. So click OK and let the Xbox turn off.
Backing Up Your Backups
Once the console has powered off don’t power back on. Take your USB drive and pop it back into your computer. We now need to backup the backup files.
On the USB drive open up the BadUpdatePayload folder, and the System Backups folder. In here you’ll find the console backups in a numbered folder and your hard drive info in the Hdd folder. If I back out one level we can copy the whole system backup off the USB drive and put it somewhere safe. Ideally this will also be backed up online. These files are essential to your Xbox360 if anything goes wrong, or if you want to uninstall Peer Pressure. The backup files are unique to your console and cannot be replaced. If you do ever brick the console these files will help you recover it.
First Boot
We’re now fully set up and backed up so it’s time to test the mod. For this you don’t need the USB drive so leave that unplugged from the console and power on.
You’ll probably see some different LEDs on the power button but that’s just the mod doing what it does. Eventually you’ll get the Xbox start animation and then you should drop straight into Aurora.
If you’re here, congratulations. Your Xbox360 is fully softmodded.
Account Setup
Before we start playing games we just have a few last setup tasks to complete.
First make sure you plug in your USB drive.
From Aurora press your guide button and select the Xbox home option. This will take you out to the main dashboard or if it takes you to the sign in page just click B. You may get an update prompt appearing so if you do run the update, reboot and get back to here.
Now go to the Social section and click the sign in or out option so we can create an offline profile. I would strongly advise using an offline account as it removes any risk of you doing something that may end up being detected by Microsoft and getting your console banned. There is protection built into Peer Pressure but you can still force connections if you bypass these restrictions.
Just click the Create Profile option, make sure you save the profile onto your hard drive or memory unit and complete the process but do not sign in to Microsoft.
I’ve already created an account so I’m now going to log in using that.
Next, on the main menu go over to the System menu and select your Network Settings. In here just reconnect back to your network as normal. While you’re in softmod mode Peer Pressure will automatically block any access to Microsoft Live so you’re completely safe leaving the Internet turned on. When you test your Internet access this protection will stop the test software from connecting to Microsoft Live so don’t worry if you get an error.
Now press the Guide button on your controller and go back to the Aurora home page.
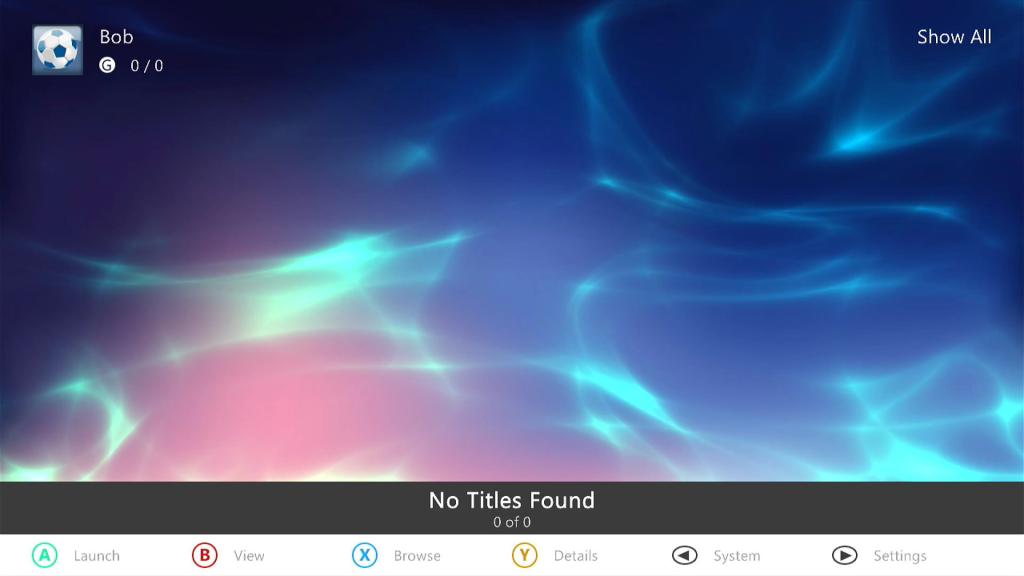
We can now set our offline account to be the auto login for Aurora. Press the Start button on your controller to open the settings window and go to the profile option. Now select the Auto sign in radio button and then go down to the Change button. This will let you select an installed profile so select your offline account.
Back out of the menu and then use the guide button to turn off the console.
If you now power back on you should find yourself dropping straight into Aurora as normal but now with your offline profile signed in and full Internet access.
What Next
Now that your console is fully modded you can really start to have fun. You can install games from your legally obtained backup files, run MAME to let you play all of the old arcade cabinets from the 70s, 80s and 90s. And you can install emulators for a whole range of retro consoles and computers using RetroArch and various stand alone emulators.
If you want to find out how to do all of this make sure you subscribe to the channel and then check out my Xbox Gaming and Modding playlist.
Image Credits
Xbox360 Phat
By Evan-Amos – Own work, Public Domain, https://commons.wikimedia.org/w/index.php?curid=33220305
Xbox360S
By Evan-Amos – Own work, Public Domain, https://commons.wikimedia.org/w/index.php?curid=17444906
Xbox360E
By Evan-Amos – Own work, Public Domain, https://commons.wikimedia.org/w/index.php?curid=33202193