Custom Mame Romsets – Just the games you want without the rest
30th June 2025
PlayStation 4 Lapse/Lua Exploit for V12.02 Explained
12th July 2025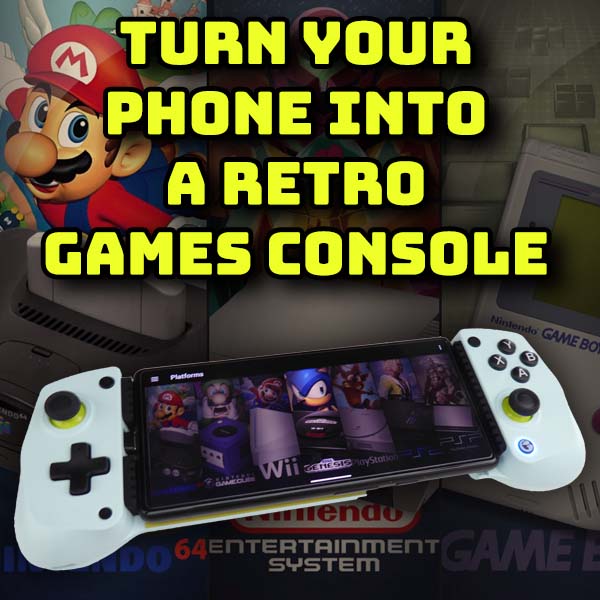
Turn your phone or tablet into a retro gaming system – LaunchBox with GameSir X5 Lite controller
There are a lot of retro gaming handheld systems on the market ranging in price from a few pounds to a few hundred. Choosing one can be a bit difficult to get the right mix of price and performance to make sure you can play all the games you want without having an overly expensive device lying around for just a few games.
But there is an easier way to get a top class handheld for a small cash outlay.
Retro gaming devices rely on processing power, memory, storage, screen quality and easy to use controls.
If you think about it, you already own a portable, powerful, computer and you may well be looking at it right now.
Your phone!
It’s got everything we need to run the games at high quality apart from an easy controller layout.
So why not just add a cool controller like this one from GameSir and turn your phone or tablet into one of the best gaming handhelds on the market?
Let me show you how.
Android or iOS?
First off we need to look at the Android and iOS emulation scenes.
For a long time Apple didn’t allow emulation on its platform but you now have a modest number of apps available, including RetroArch which is one of the main ones I’ll be covering. But Android still leads the way and that’s what I’ll be working with in this video.
What We Need
To turn our phone or tablet into a game system we’ll need three types of software.
The actual game code will be rom dumps from the real consoles, arcade machines and computers that we want to play.
This game code needs an emulator that will turn your device into a virtual console that can run the game. Each console we want to play needs an emulator that can mimic that device.
Finally we need a front end system to pull everything together so we get a seamless gaming experience where we can browse all our games with nice images and information and launch them with the click of a button.
GameSir X5 Lite
Emulators tend to have a built in, on screen gamepad, but to make our games much more playable I highly recommend some sort of game controller. The one I’m using here is the GameSir X5. This is a great option for Android phones and tablets with a USB C connection. You simply slot your phone into the controller making sure the USB C plug is properly connected. And you’ve now got a fully featured handheld device.
I like this controller as it takes it’s power from the phone so you don’t have to remember to charge it up before you can play. Plus it’s got great quality hall effect joysticks, so no drifting, and a really good, solid feel to all of the buttons and triggers.
It also opens up to over 210mm wide so will fit all phone sizes and all but the biggest tablets. The build quality is great and there is a pass through charging port on the left hand side so you don’t need to stop playing when your battery gets a bit low. Overall a very well thought out game controller.
If you like the look of this then check this link – GameSir X5 Lite.
More GameSir Controllers – GameSir Shop.
Emulators
So let’s start in the middle and get some emulators ready.
If you look on the Google Play Store you’ll find lots of emulators for pretty much every retro computer and console ever made. So we’ll start with one of the most popular, RetroArch.
RetroArch is a multi system emulator which means that with a single app we can run games from almost all of the 8, 16 and 32 bit era systems.
RetroArch comes in two flavours on Android. For this project we’ll use RetroArch Plus which has access to a few more system emulators.
To install the app we simply need to find it on Google Play and click the install button. We will have to do a bit more setup in a bit but for now that’s all we need to do.
RetroArch is great for the older consoles. For newer ones, and here we’re talking about Nintendo 64 and Sega Saturn, you’re better of installing standalone emulators.
So for my setup I’m going to use M64Plus FZ for Nintendo 64, Dolphin for my Nintendo GameCube and Wii, PPSSPP for PlayStation Portable, PPSS22 for PlayStation 2.
So once I’ve got all of those installed we need to get our front end up and running.
LaunchBox for Android
Again there are a number of front ends we can use. In this video I’ll use one of my personal favourites, LaunchBox.
Launchbox is free for up to 100 games, but after that you’ll need to buy a licence. This works out at $15 per year or a $40 one off fee. It might seem a bit much but the application is backed by Unbroken Software who are actively developing the code.
To download the app you just need to visit the Launchbox website and go to the Android download page. You’ll need to enter your email address and they will then send you a link. Open the email on the device you want to install the app to and click the download link. This will download an apk application installer file.
If your phone offers to install the file directly do so, otherwise we’ll need to use a file manager app to find the download and launch it from there. Again you may be prompted to allow the installation so just say yes to any prompts.
You should now have Launchbox installed.
Games
Lastly we need some game files.
As usual YouTube rules mean I can’t give you actual download links but if you have a search around on the Internet they shouldn’t be too hard to find. Again do make sure you consult the copyright laws in your region to make sure you’re meeting all the legal requirements before downloading any software files. If you’re not sure I did make a video to help guide you so please have a look at that.
On my computer here I’ve assembled a number of games for a range of consoles. Each folder contains games for one system to make it easy for me to sort them.
All we need to do now is to copy these files over to our phone or tablet. If your device has an SD card slot that’s probably the best way to go, or, if like my Google Pixel 6, you don’t just copy them to a folder on your internal storage.
Setting Up The Games
Our last step now is to get the games running in the emulators.
For this we can jump into Launchbox and get it to do a lot of the work for us.
Let’s start with one of the older systems, the Super Nintendo Entertainment System.
If we open the menu with the three dots we’ll get an option to import games. On this page we just need to work our way down the sections.
We need to tell Launchbox where the SNES games are. So click the Folder button and then navigate out to where you saved the rom files. We just need to get to the folder and then click the Select Folder button.
This will take us back to the import screen and Launchbox should have identified the Platform. If not just click the option and tell it what games these are.
If you prefer a specific region for your games you can select that in the next section. For the other options we can really set check the combine ROMs but leave the rest unchecked.
We can now proceed with the import.
Launchbox will scan the folder and then show you a list of games it’s found. If this looks ok click the Proceed button and the software will start importing the games and gathering some data about them. Once finished clicking the OK button should take you back to the main Platform screen. Here you should now see an SNES option.
If you click on the SNES platform you should get a screen that lists all your games.
Launchbox will automatically start to download box and background artwork for all your games so those will start to appear on the listings. But we now need to set up an emulator to play the games.
If you select a game and then try to Play it you’ll get a message saying that the emulator has not yet been set up. If you click OK this will take you to the Platform Emulator settings. You can also get to this by going to a platform game list and clicking the there dots menu and selecting Emulator Options.
So for the default emulator I’m going to use RetroArch Plus that we downloaded earlier.
RetroArch uses plugins called cores to emulate each system so we need to tell LaunchBox which one we’re going to use. Here you’ll need to consult some forums and so on to find our which cores are best for your system, but for the SNES I’m going to use the SNES9X core.
When we downloaded RetroArch we didn’t finish its setup. This is where we now need to go back into the app and make sure we’ve got the right cores loaded. From Launchbox we can click the handy Open RetroArch button and that will take us straight into the app.
Here we need to go to the Online Updater and then into the Core Updater and then it’s just a matter of scrolling down until we find the core that we’ve told Launchbox that we’re going to use. Selecting that will download and install the core into RetroArch ready for use.
Sometimes you’ll get to RetroArch and the core you selected won’t be available. In that case find another suitable core and install that, then change the selection when we get back to Launchbox.
We can now quit out of RetroArch by going back to the main menu and then selecting the Quit option. From here we go back into Launchbox and we should be on the emulator setup screen. The only option we need to look at is the extract zip file option which you can set to on by default even if your ROM files aren’t zipped.
We’re now ready to play.
Playing Games
If we now go back to the SNES listings we should be able to find the game we want, select it and play it. His should automatically open RetroArch, load the correct core and then load the game.
And just like magic our phone is now an SNES console.
GameSir X5 Lite Controller
If you haven’t got a game controller for your phone you can play most emulators with an on screen gamepad, but I would recommend investing in a proper controller such as the one I’m using. It really does make a hell of a difference.
More Systems
So that’s one complete system set up using RetroArch. Other RetroArch systems are set up in exactly the same way.
But we did download some other standalone emulators. So let’s set one of those up.
PlayStation 2 Emulation
One of the great advantages of using your phone is that it is probably one of the most powerful handheld devices you can buy. Again this of course does depend on the phone you use, but compared to any sort of Raspberry Pi or microcontroller based system you should be multiple times more powerful.
This let’s us move further up the emulation tables to get to the newer systems.
On my Google Pixel 6 we can have a go at PlayStation 2 emulation. For this we installed the PPSS22 standalone emulator.
So back into Launchbox we need to again import some rom files. I’m just selecting the folder where my PS2 game iso files are stored and then running through the same importing process as before.
When we get to the emulator settings page I can pull down the selection list for the default emulator and we should see our PPSS22 app listed. All I need to do is to select this and we should be good to go.
Back on the main platform screen we now have a PS2 section. Inside there we’ve got out games and I should be able to select one, click the play button and launch the game.
More Systems
From here it’s just a matter of going through each system we want to play and repeating the set up process for either RetroArch or a standalone emulator.
So I’ve done that with my phone and I now have a range of systems I can play.
For some you may find that the emulation doesn’t work as well as you might expect. This can either be that you need a different emulator or emulation core, or that your phone just isn’t powerful enough to run that system. But just have a play around. Look at what other people are saying and have fun getting things to work more smoothly.
Conclusion
So that’s your phone transformed into a retro gaming handheld. There are a whole range of systems for you to explore and I’ll be making a few videos over the coming weeks to show you how to get the most out of your set up. Do have a look at the GameSir controllers. They really do make a massive difference to the gameplay over the on screen controls.