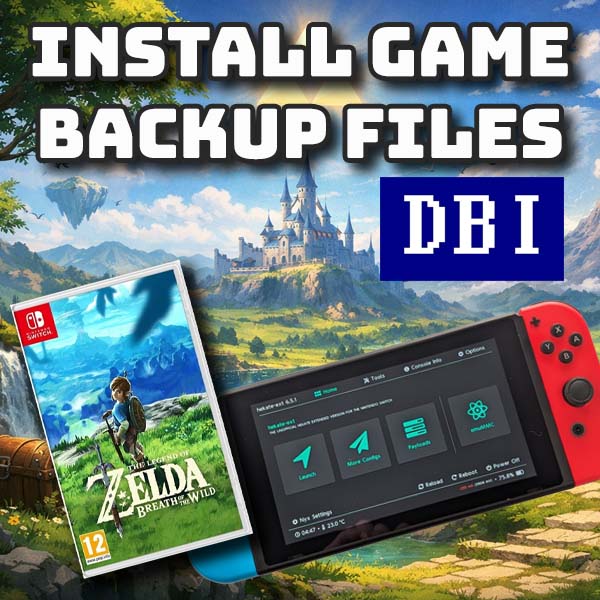
Install PS4 games from backup files – Games, updates and DLC from package files using GoldHEN
19th May 2025
PS3 CFW 4.92 – Update your EvilNat Custom Firmware to the latest version
2nd June 2025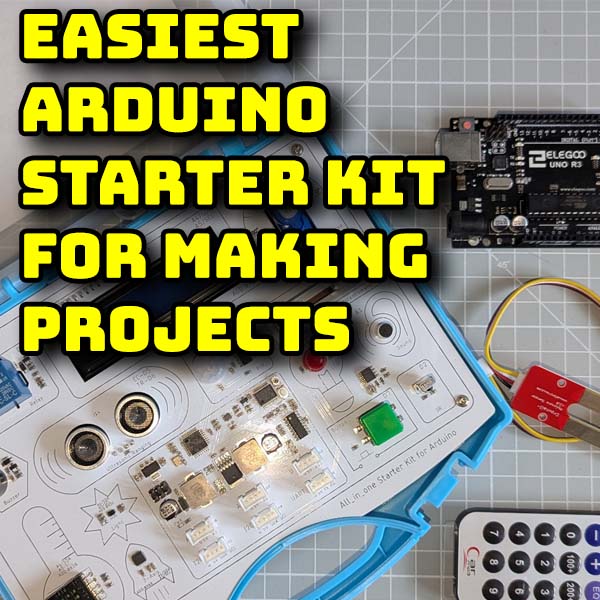
Easiest way to start Arduino coding and making projects – Elecrow All In One Starter Kit for Arduino
The Arduino system is great for learning to code and build electronic projects. But it can be a bit difficult to get started with the circuits and getting sensors to work. So let’s look at how to make that a lot easier.
The Arduino microcontroller boards are a great platform to learn coding and to get into the whole making projects scene. They are cheap, and easy to set up and have fantastic support with development tools and ready made library code for pretty much any application or piece of electronics that you can think of.
But when you’re first starting out the idea of connecting up circuits and then programming them, along with finding the right sets of drivers and linking those into your project can seem a bit daunting.
So this is where this all in one starter kit from Elecrow really helps out.
This is, well, as it says, an all in one solution to starting out with the Arduino system.
What you get is an Arduino Uno that’s pre connected to a wide range of sensors and actuators, all neatly packaged inside an easily transportable case. All you need to do is set up your PC or laptop with the Arduino development software, plug in the box and you’re instantly ready to start coding.
So let’s take a closer look.
The Kit
The kit is based around a built in Arduino Uno compatible board using the ATMega328P microcontroller. This gives it the standard 2KB of RAM with 32KB of Flash memory for your code.
The board uses both the I2C bus and direct I/O pin connections to drive 15 sensors. These are a 10amp 250V relay, an LCD 16 x 2 character LCD panel, a servo motor, a buzzer, an ultrasonic sender and receiver for distance measurements, a passive infra red sensor, a linear potentiometer, a temperature and humidity sensor, a light level sensor, a 3 axis accelerometer, an LED, a microphone, a push button input, an infra red remote control and a separate moisture sensor.
On top of these built in sensors there are some expansion I/O ports using the Elecrow Crowtail connectors that allow you to add even more components from their sensor range.
Each sensor and output is neatly labelled with either its pin number or I2C bus address so you know how to connect to it in the software.
Connection to your computer is via a USB type C port on the side and of course the Arduino IDE you’ll use to program it is compatible with Windows, Linux and Mac OS with an online IDE for Chromebooks.
The included manual takes you through 21 coding lessons that shows you how to use every single part of the kit. This is backed up with a code repository so you don’t have to type everything in from scratch, but more on that later.
So in all you’ve got a complete learning tool to get you up to speed with using Arduinos in your projects.
Getting Set Up
As I mentioned we’re going to need to use the Arduino Integrated Development Enviroment or IDE to be able to do anything with the Arduino boards. So you’ll first need to head over to the main Arduino website at
From there open the Products menu and go to the Arduino IDE link. This is the main application that allows you to write your code and upload it to the microcontroller boards. It’s available for most desktop operating systems so just download the one for you and install it onto your computer.
If you’re using a Chromebook you’re still OK as there is an online IDE that you can use to program the boards. Again just follow the link from the IDE main page.
Now that we’ve got a development environment we need to make sure we can connect to the kit.
Plug the board into your computer using the USB C connection.
In the IDE go to the Tools and then to the Boards option and navigate to the Arduino Uno listing. Select this as the board we’ll be using.
Now go back to your tools menu and select the Port option. You should see a couple of COM ports listed. I’ve got COM1 and COM3 on my PC. If I select COM1 I can test it by going back to the tools menu and trying to get the board info. This makes the computer talk to the board and ask it what type of board it is. I get an error message coming back saying there is no board on COM1. If I now repeat the process on COM3 you’ll see that I’ve connected to the board and I’m getting data back. It might come back as an Unknown Board as the kit uses it’s own version of the Arduino, but as long as we get a board being reported we’re good to go.
We’re now ready to start some coding.
Typing in the Code
Part of what we’re doing here is trying to learn to code. All of the programs for this kit are available online through the wiki link on the main product page. In there you’ll find a link to the main code repository where you can either download, or copy and paste the program code.
But I’d advise not doing that. One of the best ways of seeing how the code works is to type it in. Just copying and pasting you don’t really read the code. It just becomes a matter of copy, paste, click go and the code works. Typing it in forces you to go through each command statement to see how it’s structured, what it does and how to build up a full application.
So let’s start with the simple flashing LED app as this doesn’t need any further setup.
In the manual you’ll get a full code listing. In our Arduino IDE open up a new sketch and first off we’ll save this so we create a new project on our hard drive. By default the Arduino IDE saves your sketches, which is what it calls our code files, into its own folder. So we can open up our Sketches folder and make a new folder inside that for our All In 1 Kit Sketches.
Inside that I can name my program file and the IDE will then create a new sub folder and save the code in there. This means that we’ll now have a Sketch folder for all our mini projects.
Once the code is saved you simply need to type in the listing from the manual.
Be very accurate and type it in exactly as shown. We’re working in a language called C++ and it will not let you run the code unless it’s all typed in correctly.
Running the Code
Once the code is ready I’d again save it, before we try to run it.
Make sure the IDE is connected to your board and click the Upload button at the top left of the IDE window.
This will start the code compiling which is were our C++ compiler translates our code listing into commands the Microcontroller can understand.
Once that’s completed it will send the code down to the Kit and you should see your first project up and running with a flashing LED.
Congratulations you’re now an Arduino coder!
More Complex Examples
As you progress through the exercises you’ll start to use more and more of the attached devices.
If we look at lesson 4 we get to use the LCD panel in the box.
This panel is connected to the Arduino using an I2C connection. This is a way of allowing the microcontroller to send messages and commands to another part of the circuit using only 2 IO pins on the Arduino. But it does need some code to be able to run the I2C bus in the form of a driver.
This is one of the really powerful features of the Arduino system. We need code to run our LCD display so that we can simply tell it to show some text. The Arduino IDE has built in support to allow us to find, download and install these libraries and drivers directly from its library manager.
Installing Libraries
If you look at the code for this project you’ll see the library statements at the top of the listing.
#include "Adafruit_LiquidCrystal.h"
The #include statement tells the compiler to grab some extra code from the file specified so that we can use it in our program. If I try to compile the program at the moment it will throw up a not found error.
To fix this we need to install the library.
Go to your Tools menu and Manage Libraries.
Make sure the type and topic are set to All and then type in the name of the library in the search box. So here we want to search for Adafruit LiquidCrystal. And we should get it pop up for us. Just select the install option. Some libraries in turn use other libraries and we can these dependencies, in other words our LCD library depends on you also having this additional bits of code. So accept the dependencies prompt and the IDE will download and install the missing libraries.
If we now try to upload our sketch the compiler will be happy and we should get a nice message appearing on our LCD panel.
What’s in the Kit?
So you should now be able to work through the code examples and try out all the different devices.
The manual takes you through each of the programs in great detail explain what’s happening at each stage. It also shows you some of the circuit diagrams needed to get the devices to connect with the Arduino so hopefully you’ll start to see the advantage of using this All In One solution.
Once you’ve been through all the exercises you can then start to build up your own projects using the board modules or start to add your own using the Crowtail connections.
Conclusion
So all that’s left now is to get on with the projects.