Protect your hard drive or SSD – for Raspberry Pi and projects
9th February 2024
How to hack your Xbox360 and play any game you want – RGH3 mod
4th March 2024How to solder electronic circuits – build projects and fix devices
Soldering is simply a way of joining two or more pieces of metal together. When those pieces are joined we want there to be an electrical connection so that current can flow from one to the others. In electronics this joining process not only allows us to create circuits but it also sticks components and circuit boards together so that they are mechanically joined.
The soldering process consists of four components. We have the pieces of metal we want to join, the solder alloy we’re using to make that join, heat that we use to melt the solder alloy and flux which cleans the metal surfaces and allows the solder and metal to create a solid bond.
What is Solder?
Electronic solder comes in two main forms. Lead free solder is usually an alloy of tin, copper and silver and is the one you’ll most likely be using. Lead based solder is simply an alloy of lead and tin but is now banned in the EU due to the poisonous effect of lead of people and the environment, even though it’s actually a better solder.
What Can Solder Bond?
For solder to work it needs to be able to form a metallic bond with the base metals. The regular solder we use in electronics can bond to copper, tin, brass, bronze, silver, gold and a few other metals. But basically all the metals you’ll meet in building electronic circuits as you’d expect. Other metals can be soldered but these require specialist solders and equipment.
How Much Heat Do We Need?
To make a solder joint we need to melt the solder. The melting point of lead free solder is usually around 250 Celcius or 480 F but it needs to be hotter than this to form the bonds. I set my soldering iron to around 350 Celcius or 660F which melts the solder quickly so I can complete the join without heating the electronic components too much which can damage them.
What is Flux?
The final component is flux. This is a chemical mixture that cleans the surface of the metals during the joining process so that the solder can form a clean bond between the objects. There are a number of different types of flux such as rosin based, no-clean, etc. but they all do basically the same job.
So those are the components. Let’s look at the actual soldering process.
Equipment
To solder you’re going to need so equipment.
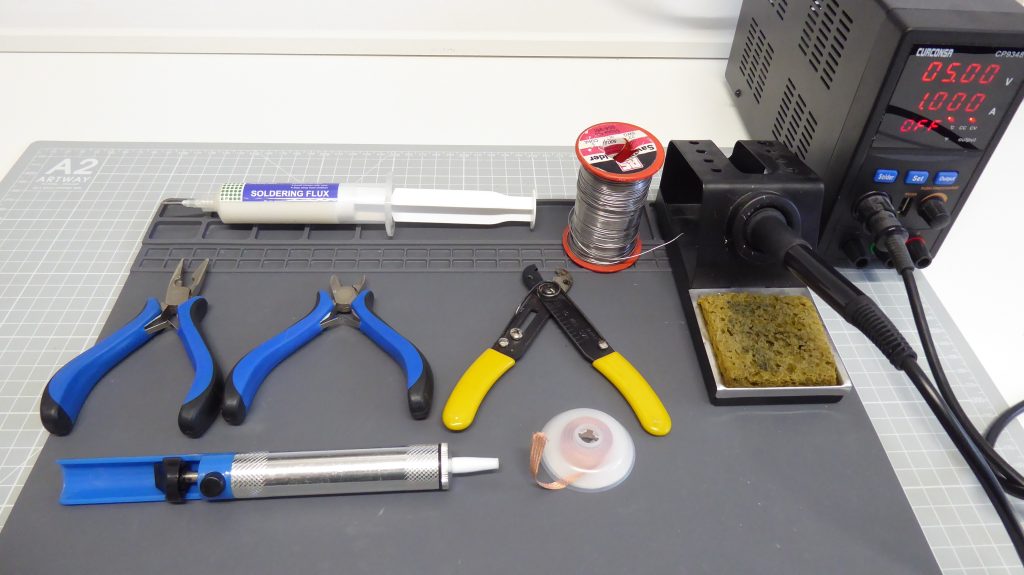
Equipment similar to the ones I use
Digital soldering stations – https://amzn.to/3TcztBu
Solder sucker – https://amzn.to/3TcztBu
Electronics pliers sets – https://amzn.to/3IdMkNB
Flux paste in syringe – https://amzn.to/42ZT4bd
Copper braid – https://amzn.to/49SUeHF
Soldering mat – https://amzn.to/49sKLXZ
Lead free solder – https://amzn.to/3wxloWp
Lead based solder – https://amzn.to/48Cygrs
Wire wrapping wire – https://amzn.to/49vsKZ4
Most importantly you’ll need a soldering iron. You can pick these up from just a few pounds for a simple mains powered fixed temperature iron, to a few hundred pounds for a fully featured soldering station. If you’re just starting out and only want to solder up some small projects using new components the cheap irons will work fine. If you want more flexibility and more consistent joints then go for a temperature controlled iron.
With that you’ll need a few different tips. For small electronics soldering I use a pointed tip so that I can get into very small areas and apply my heat just to a small section of a board. If you’re working on larger soldering jobs you’ll need a chisel tip with a flat section to apply heat evenly to a larger area.
Next you’ll need some solder and we’ll talk more about that in a second.
You’ll also need some wire cutters and wire strippers to trim component leads and prepare your connection wires.
Some flux paste to help the soldering process.
And a desoldering tool and some copper braid to undo mistakes and remove components.
There are a lot of different options out there. Pretty much all of them will work but if you’re not sure which ones to buy I’ll put links below to the ones I’m using.
Once you’ve got some tools you’re ready to start soldering.
The Soldering Process
To get a good solder joint we need to get good wetting of the metals. This means that we need the solder to be able to flow onto the metal surfaces and form a strong bond with them. This not only gives a good mechanical joint but also creates the good electrical connection we need to make our circuits work.
Solder will only flow onto hot, clean, metal surfaces. We can see this if we look at soldering some multi core copper wire. Here I’ve just stripped the insulation from some electrical cable. As you can see the wire looks shinny and clean. But if I try to get some molten solder to stick to it the solder simply sits on top of the copper and doesn’t bond with it. We’ve got the correct heat to melt the solder. The copper is in contact with our iron so it’s hot as well. But we are not getting this wetting process happening where the solder flows onto our wire.
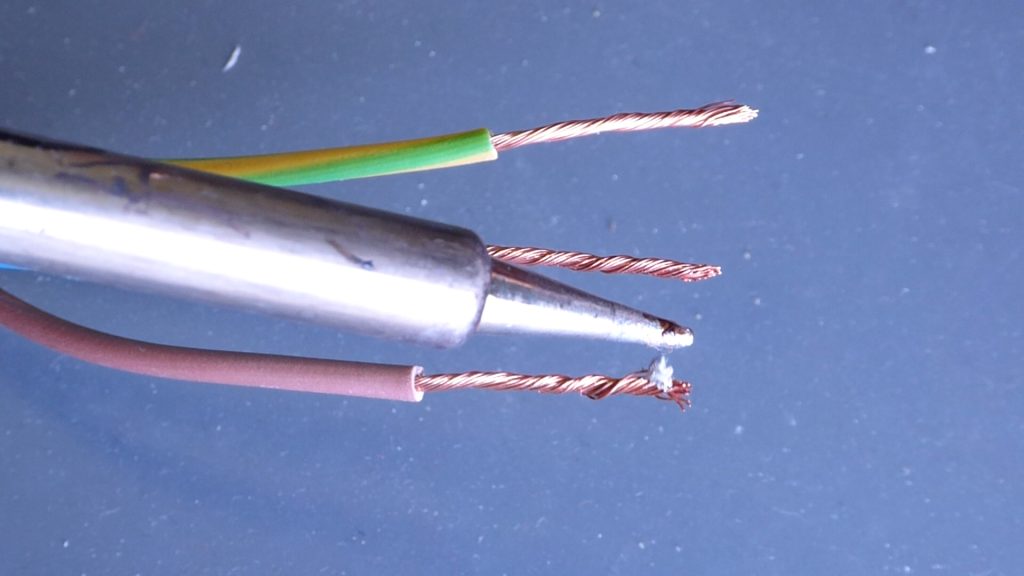
This is because even though the copper looks clean it’s really got a surface coating of dust and grease and a layer of copper oxide. All of these stop the molten solder from bonding with the copper underneath.
This is where our flux comes into play.
I’m using a flux paste in a syringe so I can squirt some accurately onto the solder joint. As I now bring in the heat with my soldering iron you can see the flux melting onto the metal surfaces. As it does that it cleans away and dirt and oxide layers so that when the molten solder is applied it is able to flow onto the bare copper surfaces and we can see the solder alloy bonding with the copper as this wetting process takes place.
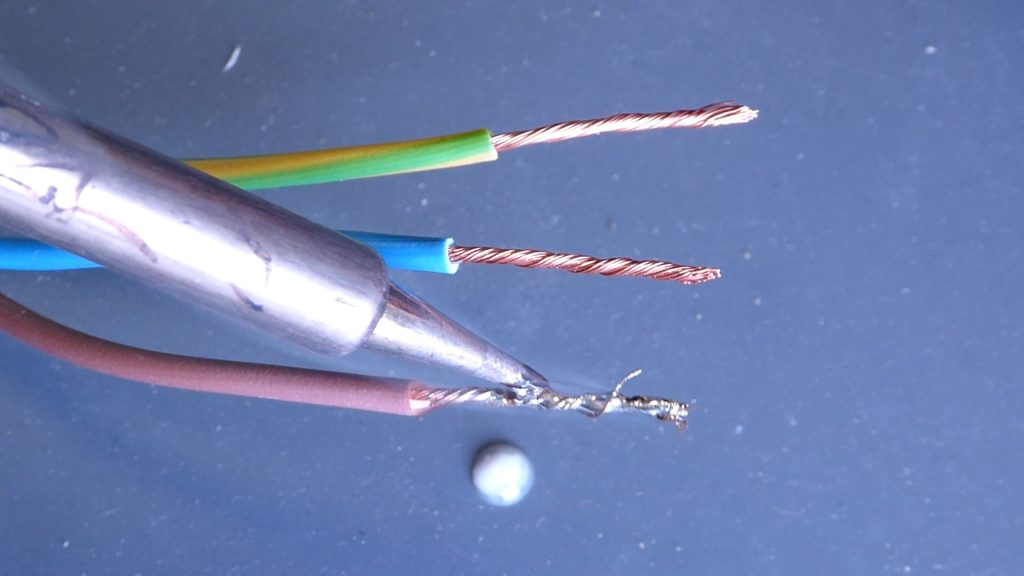
This is what we’re trying to achieve when we make our solder joints.
Flux Based Solder
Since flux is needed to create a good joint, most electronic solders contain a flux core in the centre of the solder wire. You can see this boiling out of the solder if I melt it onto my soldering iron. The flux forms the smoke you see. If I drop this solder bead onto this piece of tissue you can see the solder alloy and the remains of the flux residue.
If we go back to our electrical wire we can use this flux cored solder to solder directly onto the copper strands. Again look for the flux melting out of the solder wire and allowing the wetting process to take place so that the solder alloy flows in and around the copper strands.
So we now know what we need to make a good joint. Let’s look at some circuit building.
PCB soldering
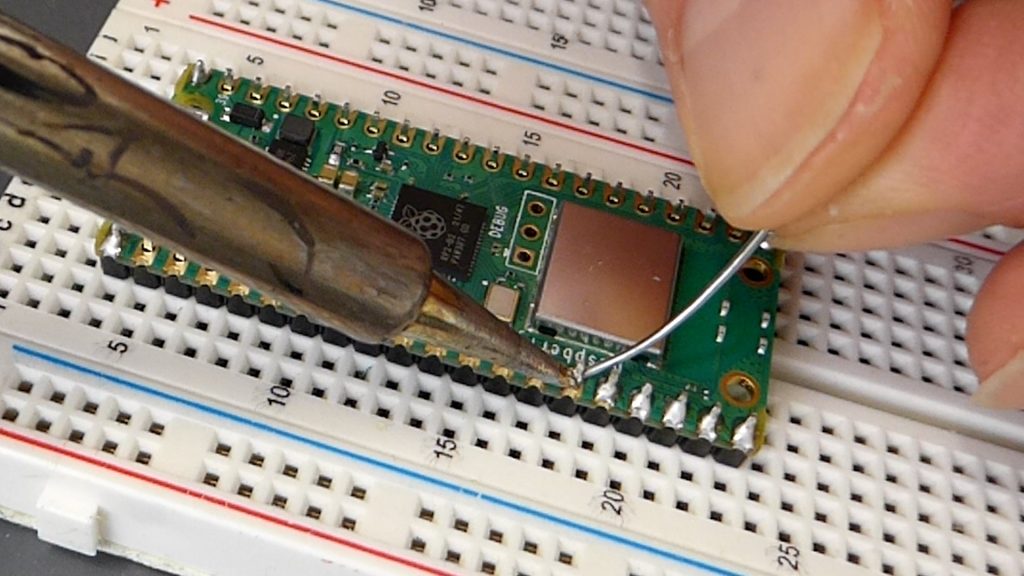
Here I’ve got I strip of header pins that I need to solder onto a Raspberry Pi Pico. I’ve got the pins already pushed through the circuit board and I now need to create a good electrical and mechanical bond between each pin and its pad on the PCB.
Again our solder will only stick to how surfaces so we need to start by applying heat to the pin and pad. Adding a small amount of solder to the end of your soldering iron wets the iron to allow it to get a better thermal connection with the metals to heat them up.
Once we’ve applied the heat for a second or so we then introduce the flux cored solder which melts and flows over the pad and pin to create the joint we need.
We feed enough solder into the joint to fill the pad and create a small pyramid at the base of the pin. Then we remove the heat and let the solder solidify.
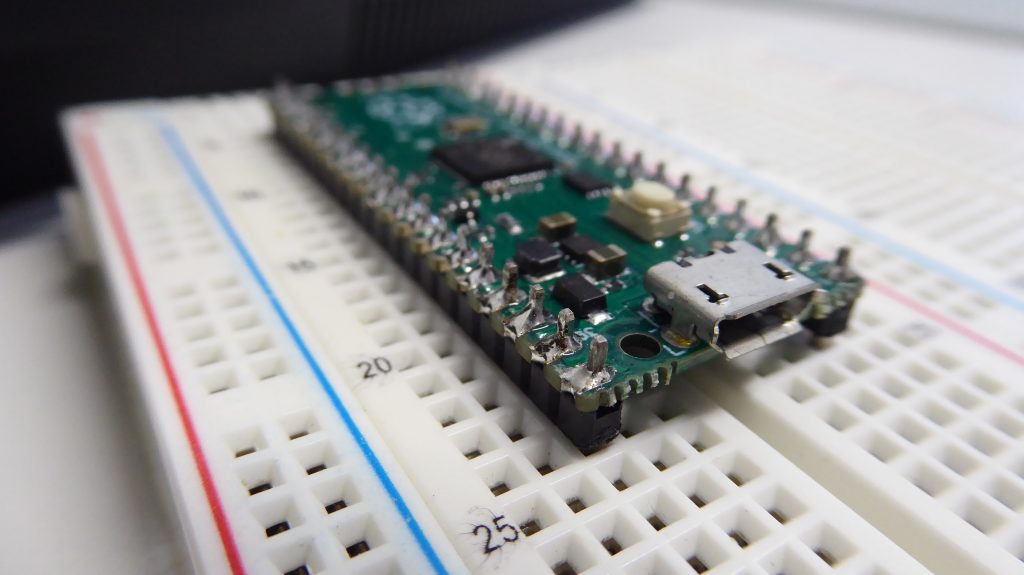
And that gives us a good electrical connection.
If we look at it in real time you can see that we’re working quite quickly to reduce the heating time on the components. In this job the metal pins are held by a plastic strip. Heating for too long will damage the plastic.
It can be tempting to try to solder without heating the components by just melting the solder onto the joint. But this can cause the solder to not properly bond to both surfaces. Usually you get a sort of bond to one component, but as you can see here the pad hasn’t been connected correctly. In this example I’ve making it look extreme, but these dry joints, where one surface didn’t get wetted by the solder, are a big issue that will stop your circuit from working.
Similarly if I try to carry the molten solder onto the joint the flux burns away before I get there and again we get a poor, un wetted joint.
There are times when you will want to carry a solder blob to a joint, but in these situations you’ll need to add some flux paste to the joint before bringing in the molten solder, and then keep the heat applied to the joint until the flux does its job and the solder starts to flow into the joint.
Soldering Parts That Fall Out
So now that we know how to get a good solder joint we can look at a few of the common situations we’ll come across as we build and repair our circuits.
First off a few tips on building up circuits. Whether you’re using a PCB or some sort of matrix or strip board you’ll need to solder on a range of components, some of which won’t want to stay put as you solder.
For example here I’m adding a resistor to this matrix board. First a need to bend the leads so that it fits through the correct holes in the board. Do try to bend the leads rather than just shoving them in. This protects the connection to the component as well as making your project look much neater.
When you then push the component into the holes simply turn the board over, hold the component in place with your fingers, press it tightly against the board, and then bend the leads slightly to hold it in place.
Then you can solder one pin to get a permanent joint with some solder in place.
Next we can just do a final adjustment by melting the joint we’ve just made and pushing the component flat against the board, just in case it moved slightly on the first soldering. You should now have a component held firmly in place by the single solder joint so you can solder the other pins.
Finally we need to cut the excess leads off with a pair of side cutters. Make sure you hold your finger at the end of the lead to make sure it doesn’t fly off.
Desoldering Parts
So far we’ve concentrated on joining parts together. But we’ll also need to be able to desolder components if we put something in the wrong place, or if a component is damaged and needs replacing.
For this we’ll need to use some desoldering tools. I’ve got a manual solder sucker that works with a spring loaded syringe. You can get powered versions with a pump but for smaller jobs these ones are fine. We can also use copper braid to both desolder and clean up joints.
To remove the resistor we’ve just soldered onto the board we first need to melt each solder joint, and when the solder turns liquid suck it up with the desolder tool. You do need to get right in on top of the solder to get it to work, and sometimes you’ll need to repeat the process until all the solder has been removed. We then do the same to the other pins.
Now it’s a matter of making sure that each pin is not being held at the edge by some solder and pushing the pins down into the pcb hole. Eventually you’ll free al the leads and the resistor will pull out.
Copper braid can be used to desolder but it tends to leave some solder behind. I prefer to use braid for cleaning up areas where I’ve applied too much solder. Again solder will stick to hot metal. So put the braid over the solder joint and then press it down with your soldering iron. As the braid heats up and melts the solder, the solder will be pulled into the braid. Again you can use flux to help this process.
Similarly if you get a solder bridge where you add too much solder so that it joins two connections together, copper braid is great at getting the excess off without desoldering the components completely. You can then add a bit more solder back in to fix the separate connections.
Working With Old PCBs
All of our work so far has been on brand new components. But quite often we’ll want to work with old PCBs. Maybe we’re fixing a retro computer, or modding an old games console.
The basic principles we’ve looked at still hold. We need clean metal with no oxide or dirt layers which is where a lot of people go wrong. The solder on the old solder joints has an oxide layer so isn’t able to bond with anything else. So we’ll need to add some flux to clean it if we want to solder to it. We can also add some new solder to freshen it up a bit and give us something more to work with.
On this circuit board I want to add a jumper wire to one of the PCB pads. Once we’ve cleaned the area with alcohol we put a blob of flux on the old solder joint and then add some new solder to create a small blob of solder. I can now use some thin solid wire to connect to this pad. I add a little bit of solder to the wire to wet it and then a bit more flux to the joint. This lets we get a bit of solder onto my iron without worrying about the flux burning off and I can then use that to solder the wire to the PCB pad. Again we’re trying to be quick to make sure we don’t overheat any other parts of the circuit.
One other technique I want to show you is how to make a solder joint to a hidden PCB pad. This is one that you’ll need to make the RGH3 mod to an Xbox 360. Here we’ve got a very small via pad. A via is a connection hole in the PCB which allows the designer to connect different layers in the PCB together. They quite often get covered with the solder mask as these via are plated rather than soldered. To connect a lead to one of these pads we first need to scrape away the solder mask.
I’m using the back of a craft knife. I need to make sure I can scrape of the varnish but not damage or cut any of the traces. All I’m doing it gently working over the pad and you can see the varnish coming off. Cleaning it with some alcohol wipes away the scrapings so we can then continue exposing the pad. We’re looking to get a nice clean copper ring showing through.
Once we’re got the pad exposed we’re back to our normal soldering process. I’m adding some flux to help with bonding then priming the pad with some solder. Now I can wet the end of some thin solid wire and finally solder that to the exposed pad again using some flux to help it join quickly.
Joining Wires
The very last technique I want to show you is how to join wires. Quite often you’ll need to extend cables or connect two flying leads together, or to other components.
Here the process is to first prepare the two halves of the connection. Strip back any insulation and twist the stands together if you’re using multi core wire. We don’t want any strands flicking out as we solder. Next we wet the exposed wire with some solder. And then repeat the process for the other wire.
When it comes time to join the wires you might need some help holding everything together. Put the two wetted wire ends together and then apply heat with a cleaned, wetted soldering iron. The solder on the two wires should then bond together. If not try adding some flux and bringing in some extra solder on your soldering iron.
You’re looking for the solder to create a strong weld between the two wires to almost turn them into a single wire.
Once that’s cooled you can use some heat shrink to insulate the joint.


