Upgrade Your Modded Switch SD Card – more games, Android & Linux partitions
4th May 2026
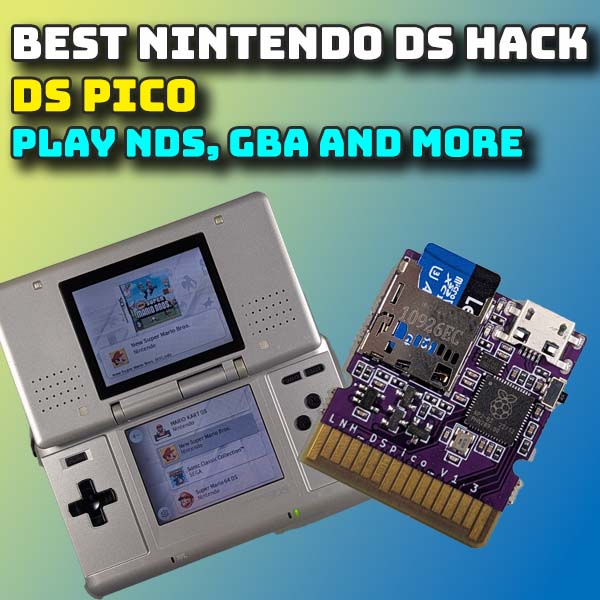
Best way to mod your Nintendo DS – DSpico flash cart – full setup and emulation
15th June 2026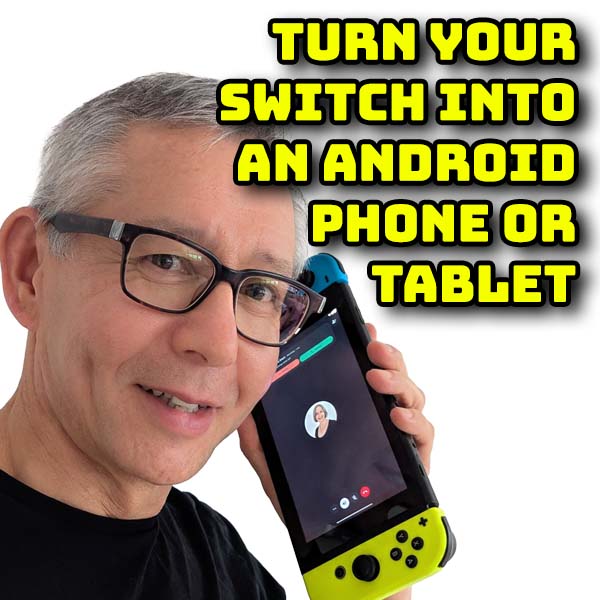
Turn your Nintendo Switch into an Android phone or tablet – full LineageOS install and setup
Once you mod your Nintendo Switch you instantly unlock the ability to run alternative operating systems on the console. The original Horizon OS is great for running games but it doesn’t allow you to use the device for much else. Homebrew software is great for a small range of applications but to fully unlock its potential we’ll need something better.
In this video I’ll show you how to turn your Switch into an Android device.
What is Android?
Just in case you haven’t come across Android, it’s a mobile phone operating system that is used for a wide range of phones, tablets and smart TV devices. It’s part of the Google ecosystem but the code is open source so other developers can use it as a base for their own systems.
For the Nintendo Switch we’ll be using LineageOS. This is a stripped down version of Android that you can run on a whole range of computers, tablets and games consoles. The team have removed much of the bloatware that usually comes packaged with Android to leave you with a clean starting point you can then add to yourself. All the Google apps have been removed. Applications can be sideloaded so you don’t need to connect to any services. And you don’t need to connect to any Google or other accounts to get the operating system to run.
Having said that, as you’ll see in a while, we can choose to reconnect to help make our life that bit easier with full access to the Google Play store.
So let’s turn our Nintendo switch into an Android Phone.
What You’ll Need
To get this project up and running all you need is a modded Nintendo Switch, some way of downloading and copying files to your SD card, and a computer running Windows, MacOS or Linux to connect with Android over the Android Debug Bridge.
If you haven’t yet modded your console then have a look at my modding tutorial where I’ll show you how to install the Picofly modchip so you can exploit any original Switch model.
To copy files you can either connect the Switch SD card to your computer using a USB lead and the Hekate USB tools, or simply take the SD card out and plug it into a suitable micro SD card reader.
So once you’ve got these parts sorted out we can get started.
SD Card Preparation
First we need to make sure that our SD card has been prepared for Android.
Hekate is the main payload that your modded Switch uses to power on. To boot into Android it needs the Android Operating System to run from its own section or partition on your SD card. This helps isolate Android from the rest of your Switch system to avoid any problems with compatibility and so on.
This does need your SD card to be formatted and divided up in a special way.
If you haven’t already done this you’ll need to follow my SD card upgrade video which shows you how to rebuild your SD card with the Android partition. You don’t need a new SD card, but the process does involve wiping all the data so you’ll have to go through the full process of backing up and reinstalling your Switch files. The process is not hard but can take a couple of hours to copy the files over.
Legacy or Dynamic
One of the choices you need to make while setting up your SD card is whether you’ll use Legacy or Dynamic Android. Legacy is required to run older versions of Android, specifically version 11. To run the latest builds of Android you need a dynamic setup. The two are not compatible and you can’t switch without reformatting the card.
The legacy version 11 setup is deemed the most stable and best performing for emulation, but it is of course an out of date version of the operating system. It also means you won’t be able to upgrade the OS but if you only want it for specific retro emulators it can be the best way to go.
In this video I’ll be using the dynamic setup so we can install the latest versions of Android.
I will make a video on the Legacy setup as it’s a bit easier so make sure to subscribe to the channel so you can get hold of that when I publish it.
Building the OS
Once you’ve got the SD card ready we need to get hold of Lineage. This process is very well documented on the Lineage website, so head over to this web page to follow along as we install the software.
https://wiki.lineageos.org/devices/#nintendo
On the Lineage page you’ll see listings for each of the original Switch models. They all use exactly the same setup so don’t worry if yours doesn’t match mine.
The OS comes in two forms. Android TV which will turn your Switch into a smart TV device and Tablet which is the one we’ll be using today. This gives you the full touch enabled Android system with full access to all the apps. So just click through the menus to get to your specific device. We’ll be going through the Install process so if you need any help refer to this page or my main project page on my BytesNBits.co.uk website.
First off we need to set up a few folders and files on the Switch partition of our SD card.
Connect your SD card to your computer. I’m using the Hekate USB tools do this.
On the root of the SD card we need to create a folder called switchroot, all lower case. Inside that we need an install folder and an android folder all lower case as well. These folders will hold the initial Android boot files.
Now go to the Preparing the SD Card page on the Lineage website.
https://wiki.lineageos.org/devices/nx_tab/install/variant1/#preparing-the-sd-card
You’ll find a list of files and where they need to be saved.
The first link will take you to the Lineage builds page.
https://download.lineageos.org/devices/nx_tab/builds
For me the latest build version is for Lineage 22.2. When you come to use this it may be at a higher release but just use the latest version. Lineage version 22 will install Android 15. Version 23 will install Android 16 but that isn’t available for the Switch while I’m making this video.
The boot.img, recovery.img and nx-plat.dtimg all need to be downloaded into the switchroot/install folder on the SD card.
Bl31.bin, bl33.bin and boot.scr need to be downloaded to the switchroot/android folder.
While we are here we can also download the Lineage OS file which is the nx-tab-signed.zip file in the build package. We’ll be using this a bit later from our computer but we need to make it easy to type in the file location.
On your main hard drive make a lineage folder. Then download the file into this folder. This will let us reference the file as c:\lineage\nx-tab-signed.zip when we come to use some command line instructions.
We now need to go back to the Preparing the SD Card page for the last couple of files. These are direct download links and they both need to be saved onto the Switch SD card in the switchroot/android folder.
Finally on the SD card we need to create an Android settings file. Again this is all documented on the Lineage website.
So use your file explorer to navigate to the root of the SD card. You should already have a bootloader folder, but if not create it. Inside that folder you’ll need a ini folder, again create it if it’s not there. Then inside that folder we need to create a new text file. Name this android.ini, all lower case again and then we need to copy the code from the Lineage page and paste it into the text file.
Make sure you save this.
You can now eject the Switch SD card from your computer.
Setting up the PC
The installation process is going to be in two main stages. We’ll first boot Android into recovery mode using the files on the SD card, but we’ll then have to sideload the OS image over the Android Debug Bridge (adb) connection. This is simply a USB connection between the Switch and your computer running the adb software.
You can either install the adb software and drivers from this web page,
https://wiki.lineageos.org/adb_fastboot_guide#installing-adb-and-fastboot
Or we can use Lineage’s online tool to do it direct from our browser by visiting this page,
https://download.lineageos.org/flash/fastboot
I’ll be using the web based system in this video, but it does only work on certain browsers, basically Chrome, Edge and Opera. You can see the compatibility list here.
If you can’t get it to work you’ll need to go through the full installation.
Add-On Software
Finally we talked earlier about Lineage removing all the bloat from Android. You now need to decide if you want to put a bit of that back in to make your life a bit easier.
The Google Apps add on package will install the Google Play Store along with the other Google software such as Gmail, etc. You can run Lineage without this and sideload applications but I do find the Play Store very useful to have.
To install the add on we need to download the ARM64 version from this web page
https://wiki.lineageos.org/gapps/
You do need to make sure you download the package for the version of Lineage we’re installing, so for me this will be LineageOS 22. Again download and save the file to the lineage folder on your computer hard drive so we can reference the file easily.
We’re now ready to install!
Installing Android
Make sure your SD card is back in your Switch and reboot into Hekate.
For Android to be able to use your joycons they need to be recognised by the Switch stock operating system. Make sure you attach the joycons you want to use with Android and launch into your stock or semi stock sysMMC environment. Once that boots through you’ll need to reset the console and boot back to Hekate.
Now go to the Tools menu and Partition SD Card.
You should have a Flash Android 13+ button. Click this and when asked to reboot into recovery mode select No.
Let the flashing process complete and then go back to the main Hekate home screen.
Next click the Nyx Settings button in the bottom left corner and then click the Dump Joy-Con BT button in the top right. This will save files with your joycon connection info so that Android can find them.
We now need to boot Android into recovery mode so we can install the actual operating system code.
On the Hekate home screen select the More Configs section.
You now need to press the Volume Up button. Keep this held down and click the LineageOS option on screen, but keep the volume button held down. Now wait until you see the LineageOS splash screen. Once that appears you can release the volume button and you should now be in recovery mode.
You should see a menu of recovery options. You should be able to click these but if not use the volume buttons to move your selection and the power button to select.
We first need to Factory Reset Android, so select that option and then Format data / factory reset. This process is going to set up and format the Android partition and internal storage. Don’t worry this is all separate from your Switch storage.
Once that’s complete return to the main recovery menu.
Next we’re going to sideload the LineageOS zip package we downloaded earlier. Make sure your Switch is connected to your PC via the USB connection.
On your PC either go to the web browser based tool from Lineage for the ADB connection, or open up a terminal window if you’ve installed the ADB drivers directly onto your computer.
On the Switch select the Apply Update option and then Apply From ADB. The Switch will now be waiting for some data from the computer.
Before we start the transfer make sure that once the file is sent over DO NOT reboot to system. If you do this you’ll lose the chance to install the Google Apps package.
On the computer we need to run an adb command.
If you’re using the terminal or command line tool start up a terminal window. In Windows I’d use one with administrator access. If you’re using the online tool make sure you’re on the ADB tab. The tool needs to connect to the Switch so hit the connect button. You should see a list of devices pop up so select the Switch.
This should connect, but as you can see I’m getting an error message. This is because I also have the command line tool installed which has taken over the connection so I’ll need to bring in a terminal window and run an ADB kill-server command to release access.
Once this is out of the way I can get my connection.
Next we need to sideload the Lineage software. If you’re using the terminal tools you’ll need to type in the first of these adb commands to install LineageOS.
adb -d sideload c:\lineage\lineage-22.2-20260531-nightly-nx_tab-signed.zip
The online tool makes it a bit easier so we just need to click the Choose Zip button, find and select our downloaded file and then click the sideload button to send it to the Switch.
Once the file starts transferring we should see the progress on the Switch screen.
You may see some warning and error messages come up but in general these are expected so just let the process run through. Eventually you’ll get a success message and be dropped back into the recovery menu.
This is the point where you don’t yet want to reboot the system.
If you’re not installing Google apps then do go ahead and reboot. If you are installing them we need to run the second sideload adb command to install the GApps package. Again either type the command or select the zip file and sideload the code.
adb -d sideload c:\lineage\ MindTheGapps-15.0.0-arm64-20250812_214357.zip
Once the package has been transferred you will get a warning prompt about a verification failure. This is normal and just Lineage saying that the package isn’t an official Lineage add on so say Yes to install anyway and let the GApps package install.
Once that takes you back to the main recovery menu you can Reboot the System to start up LineageOS for the first time. This will then take you through the initial Android setup process so just work your way through that until you eventually boot into the main desktop.
Congratulations, you’ve now turned your Nintendo Switch into a fully working Android tablet.