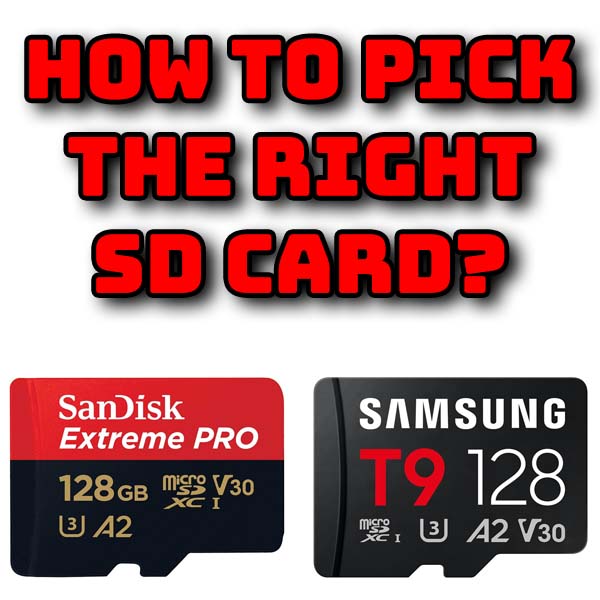
SD cards explained – what do the numbers mean – what’s the best one for you?
1st May 2026
Turn your Nintendo Switch into an Android phone or tablet – full LineageOS install and setup
7th June 2026
Upgrade Your Modded Switch SD Card – more games, Android & Linux partitions
A modded Nintendo Switch can do so many great things that once you’ve got it up and running you’ll want to explore its full potential. Play any game you want from your legally obtained backup files, play retro console games using emulators and even turn your Switch into an Android tablet or a full Linux PC for loads of extra features.
But all of this takes up storage space will quickly run out on a smaller SD card. Or, in the case of Android and Linux, it needs the card partitioned in a different way.
Whether you’re upgrading for more space or wanting to try out a new operating system the process is the same.
So let’s upgrade our SD cards.
What You Need
This project is of course for a modded Nintendo Switch. If you haven’t yet modded your console do check out my Picofly installation video to get yours set up.
You’ll also need an SD card. You can either use a newer, bigger card, or if you just want to add space for Android or Linux you can use your existing card. Remember that Android and Linux will use at least 16GB each if you want to install them, more if you intend to use them for multiple applications so check you’ve got enough room on your card for that.
Either way you’ll also need to create a backup of your emuMMC system which will use 32GB or 64GB for the OLED model on your existing SD card.
To check your storage boot into Hekate and go to the console info screen. Then select the microSD option and wait for it to scan the drive. You’ll then see the drive usage in the bottom left corner. This will tell you how much free space you have on the card.
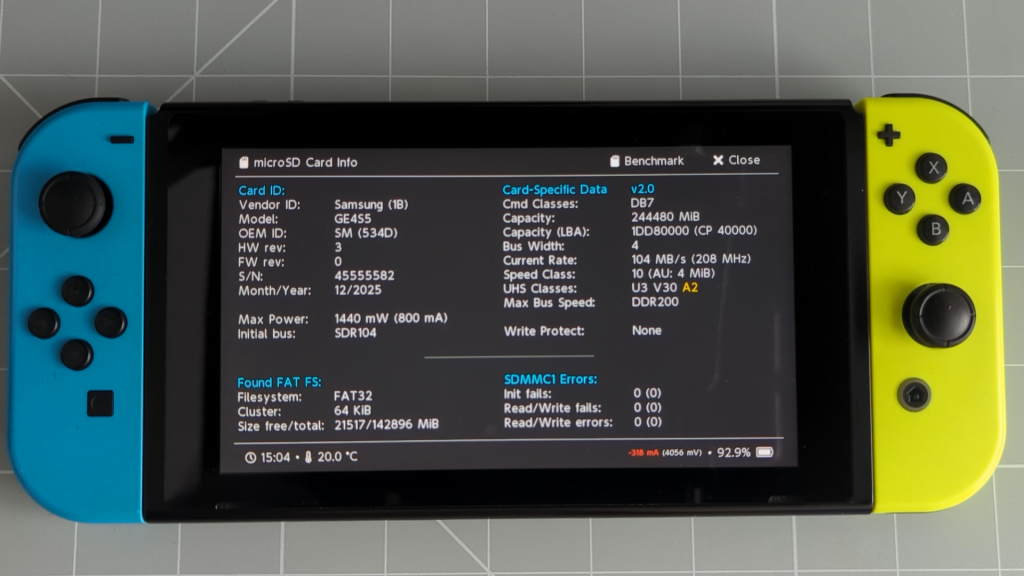
As you can see mine only has about 21GB free so I’ going to have to delete some games to create enough space for my 32GB emuMMC backup.
If you’re upgrading to a new SD card make sure you check out my SD card speed video so you know which one to buy. The Switch doesn’t use UHS-II and doesn’t make use of the A2 application enhancements so my advice is a UHS-I card with U3 or V30 speed class and try to get one that specifies A1 app performance although most will meet this by default.
One thing to note before we start. If you’ve already installed Android or Linux on your card this process will delete your setup and you’ll need to reinstall from scratch. Make sure you backup anything you need from either operating system so you can easily reinstall your applications and data. I’ll not be covering this step in this video.
Once you’ve got all that ready we’re good to go.
Backup emuMMC
First we need to backup the existing setup. Even if you’re using the same SD card we need to do this as the upgrade process will wipe the card.
First boot into Hekate either by just turning on the console if you use the Picofly hard mod or by injecting your payload through the RCM jig.
If you’re using partition based emuMMC, which is what most people use, you’ll need to first backup the emuMMC data. If you’re using file based emuMMC or no emuMMC you can skip this backup and restore step.
To backup the emuMMC go to the Tools menu and Backup eMMC. Make sure you turn on the Raw Partition option at the bottom of the screen. This is important to make sure we backup the correct data.
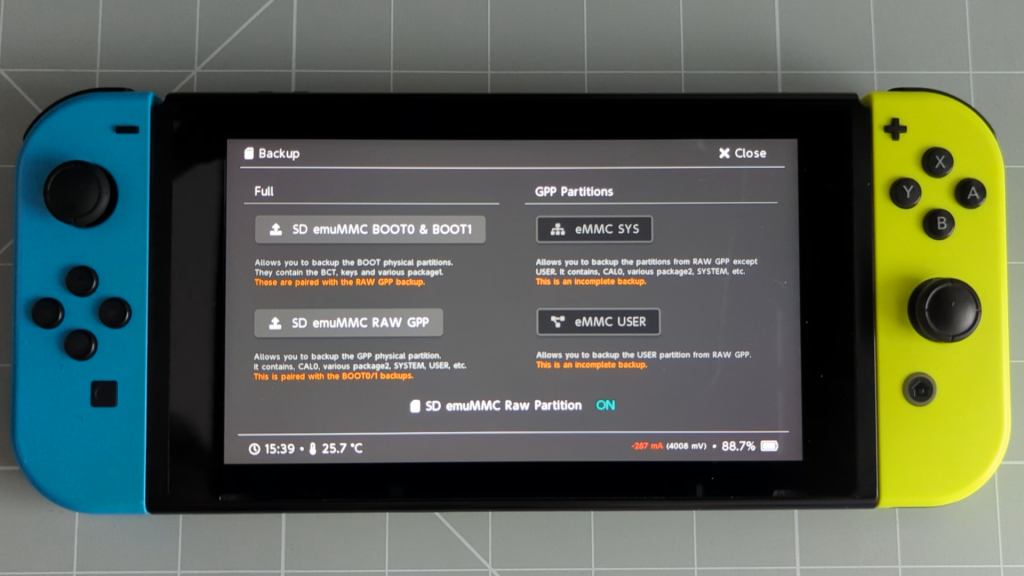
Then backup the Boot 0 and Boot 1 section. This should run through very quickly.
Then backup the RAW GPP section. This will probably take about 10 minutes.
Once you’ve completed these steps the backup is ready so go back to the Hekate home screen.
Saving Your Existing Setup
When we upgrade the SD card we’ll want to keep all of our existing setup. This just needs us to copy all of the files on the SD card to our computer so we can then re install them onto the new card. You can use the USB tools in Hekate to get access to the files but I find that plugging the SD card into my PC using a good card reader works better. Remember you could be copying over 100GB of data depending on how many games you’ve installed.
So power down the console and take the SD card to your computer.
There are no tricks here. Just copy everything to your computer. Obviously you’ll need enough space on your hard drive. If you are using a new SD card you can skip this copy stage and just move your files directly from your old SD card to the new one as long as you’re able to connect both at the same time.
Either way make sure that you have a backup of the entire SD card that’s not going to get wiped as we prepare the new card.
Partitioning the New SD Card
So now it’s time to get the new or existing card re partitioned.
First we need to format it. You can just format to exFAT. All recent versions of Hekate are fine with this and will reformat the final partitions to FAT32 for us.
Once that’s complete we now need to install the latest version of Hekate onto the blank card.
Go to the Hekate download page and download the latest release with Hekate and NYX.
https://github.com/ctcaer/hekate/releases
This will be a zip file so just extract the files from the archive. You should see a bootloader folder and a bin file. If you’re using a hard modded Switch with Picofly you need to rename the .bin file to payload.bin.
Now copy all the files and folders to the root of your newly formatted SD card.
Once that’s complete eject the SD card and pop it into your Switch.
You now need to boot into Hekate using the new SD card.
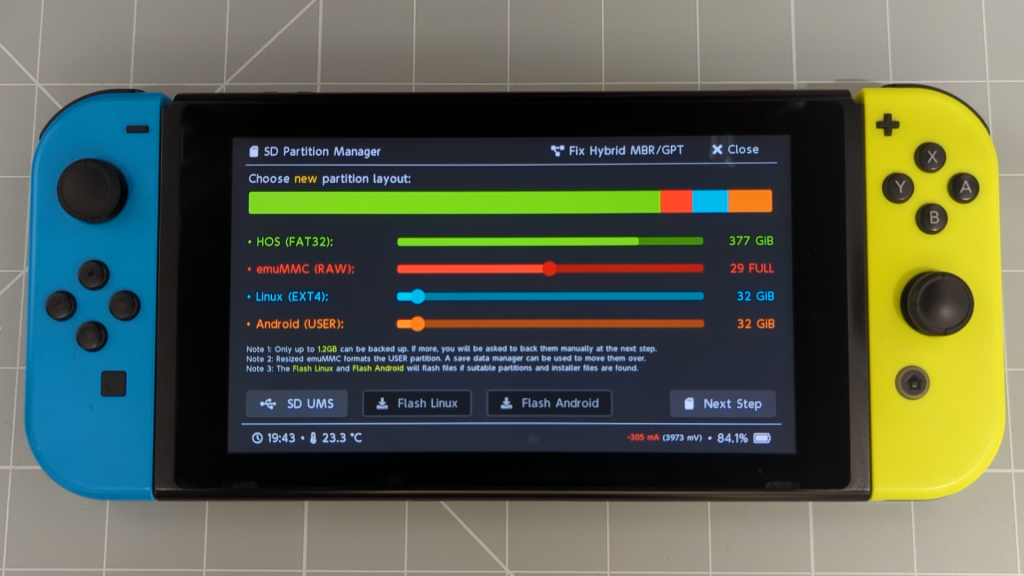
Once you’ve done that go to Tools and Partition SD Card. The sliders let you create space on the card for your emuMMC, Android and Linux partitions.
To enable emuMMC slide it’s slider along until you get to 29 FULL for a normal Switch of 58 FULL for an OLED model. You can go further and create multiple emuMMC partitions but mostly you only need one.
If you want to give Android or Linux a go now is the time to set space aside. Remember that if you decide you want to install either of these at a later stage you’ll need to go through this whole upgrade process again. On the down side they do eat up quite a bit of your SD card so do bear this in mind. If you’re not sure why you’d even want Android or Linux you may be better of leaving these out for now.
If you do want to install Android or Linux drag their respective sliders along to allocate some space. 16GB for each will give you enough space for the operating system and some basic applications. I tend to use 32GB for normal app usage. If you intend to use them for retro emulation then you’ll need to allow enough space for your ROM sets.
For my upgrade I’m going to set 32GB for each so I can try out both.
With your partition sizes set click the Next Step button and then Start.
If you’ve selected an Android partition select Dynamic so you can use the up to date Android versions. Only use Legacy if you know you’ll be installing Android 10 or 11.
Hekate will now re partition the SD card and format it.
Restore Setup
We’re now ready to restore our old system.
Again you can either use Hekate to connect the SD card to your computer or just take the SD card out and plug it directly into your PC.
Once you’ve done that just copy your entire SD card backup to the newly created SD card. If you’re asked to overwrite any files just say yes. Again this may take some time.
If you backed up your emuMMC system earlier we now have to move some files.
On the new SD card open the backup folder. You’ll see folder with some random folder name. Open that. You should now have an emummc folder and a restore folder.
Open the emummc folder and you’ll see all your backup files. We need to move these to the restore folder. So select all the files and cut them. Then back out one folder and go into your restore folder. Inside there you should find an emummc folder. Open that and then paste all your backup files into it.
You can now eject the SD card and pop it back into your Switch.
Boot into Hekate again.
If you’ve got a backed up emuMMC partition we need to restore it.
Go to the Tools menu and Restore eMMC. Again make sure you turn on the Raw Partition option at the bottom of the screen. This is very important as you can damage your sysMMC without it.
Now restore BOOT0 and BOOT1. Once that’s complete restore the RAW GPP. Again this one will take some time.
Once that’s complete go back to the main Hekate home screen.
At this point I like to reset the console.
Well done you’re now fully upgraded. Launching into Hakate you should be able to launch into either sysMMC or emuMMC and have all your applications and games ready to go.
If you’ve set up space for Android or Linux you’re now ready to install those.