
Best PlayStation 3 Driving and Racing Simulation Games
12th November 2024
Xbox360 Wireless Steering Wheel – Great addition to your Xbox collection
24th November 2024Thermal Cameras for Electronics – Thermal Master P2 review
We do a lot of electronics work on this channel both making our own circuit based projects and working with other devices such as retro consoles and computers. With all of these, fault finding can be a challenging process. So having an array of good test equipment is essential to help identify and fix problems.
One piece of equipment that I hadn’t really considered until now is an infra red camera.
These are cameras that work in the infra red region of the electromagnetic spectrum so that they can basically see heat. As objects get hotter they transmit larger amounts of infra red radiation which the camera can detect. This data can then be processed to produce a heat map of the scene.
This might seem unrelated to electronics at first, but if you think about current flowing in a circuit, it passes through components which extract or dissipate power, which generally ends up turning into heat, you can hopefully see where this is going.
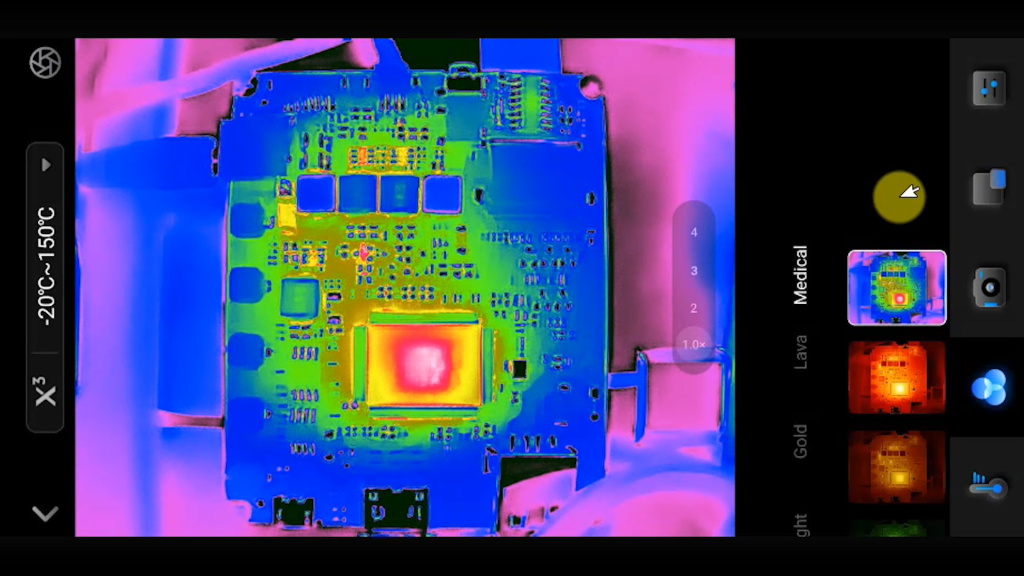
The heat map that an infra red camera produces basically shows you where electrical energy is being dissipated in your circuit. Quite often this energy dissipation is perfectly normal. For example, try touching the top of the processor in your PC whilst it’s working hard on a game and you’ll soon realise just how much heat these components can dump.
But from a fault finding point of view we can use this heat map to find areas where more heat is being generated than there should be. For a simple example I can wire up an LED with a current limiting resistor. If I choose the right value we get the LED lighting with no issues.
If I put in too low a resistance value we now get too much current flowing in the circuit which causes the resistor to dissipate the extra power so it heats up. We can then see this as a hot spot on the infra red image. If this was a failing component drawing too much current it too would heat up and show on our camera.
So using an Infra Red camera will let us quickly identify potential areas on our circuit board that could be failing in some way.
There are a range of IR cameras available on the market ranging from around £50 or $50 up to a few thousand £ or $.
Luckily a company called Thermal Master were kind enough to send me one of their P2 mobile phone cameras for review. So let’s take a look at this device.
Thermal Master P2
The Thermal Master P2 is billed and the world’s second smallest IR camera. Obviously Thermal Master also make the first smallest as well.
In the box you get the camera itself in a smart carry and protective case, a manual and that’s pretty much it.
The camera has a USBC plug on one edge and this is designed to fit into the USB port on your mobile phone. This removes the need for any display or image processing hardware in the camera which of course brings the price down for these types of unit when compared to the fully self contained handheld cameras.
On the price front the P2 retails for around $250 or £250. This puts it into the lower mid range price bracket where there are a few other mobile based cameras on the market.
To get the device up and running you simply need to download the Thermal Master camera app onto your Android phone or PC and then plug in the camera. It’s designed to plug directly into your PC or phone’s USB port, but I found I needed to remove my case to allow it to get a good connection. Alternatively you could use a USB C extension cable to make it more like a wired stand alone unit.
At the moment I don’t think they have an Apple compatible device, but I guess if Apple move to a USB C connection that too will become available.
Specifications
If we look at the specifications for the camera there are a few that you need to be mindful of when buying one of these devices.
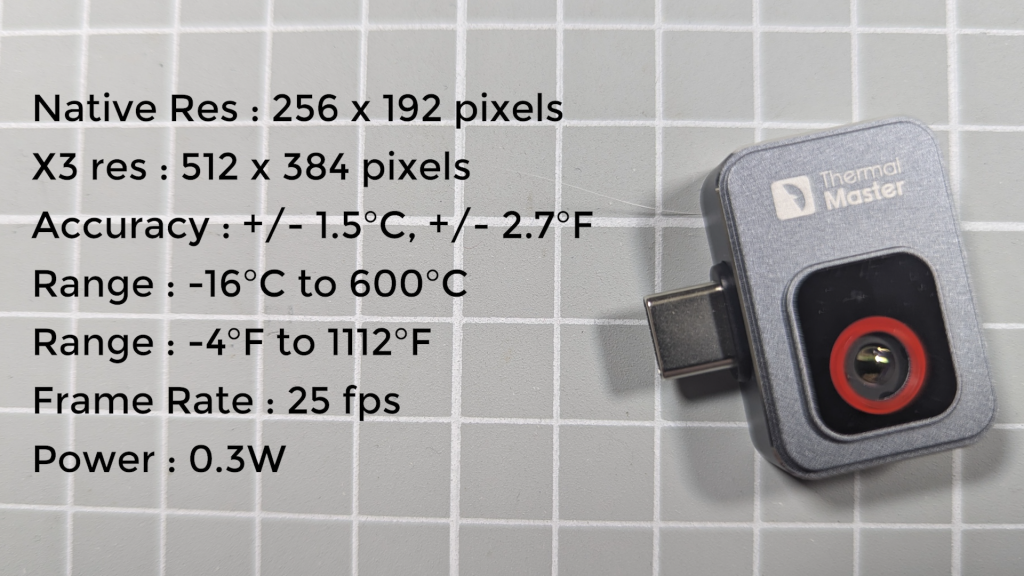
Most importantly is the resolution. This camera boasts a native sensor resolution of 256 x 192 pixels. For normal cameras this sounds very low, but for IR cameras it’s actually quite good and will compete with some of the much more expensive brands. Resolution can also be improved through software. The Thermal Master companion app has a special X3 mode that uses software enhancement of the image to effectively double the overall resolution to 512 x 384. It actually works really well and makes the image look sharper and clearer, but obviously we’re not really getting more pixels.
Accuracy is the second major consideration. The P2 states a temperature accuracy of +/- 1.5 C over a temperature range of -16C to 600C (+/- 2.7F over -4F to 1112F). This is actually a good accuracy rating so again puts the P2 into the quality device bracket.
The frame rate of the camera is also good running at 25 frames per second so you’ll get a relatively smooth update of your image, ideal for scanning around your circuit.
Power usage has been kept low with the camera running at 0.3W. This means that it won’t put much extra drain on your phone battery so you’ll be able to use it for prolonged periods, and that it can be powered over a standard USB cable if you want to connect it to your PC.
Thermal Master App
So that’s the hardware spec. To use the camera you’ll also need the Thermal Master camera app. This is available on both app stores and as a download from the Thermal Master website for PC use.
Looking at the Android App we’ve got a good range of features.
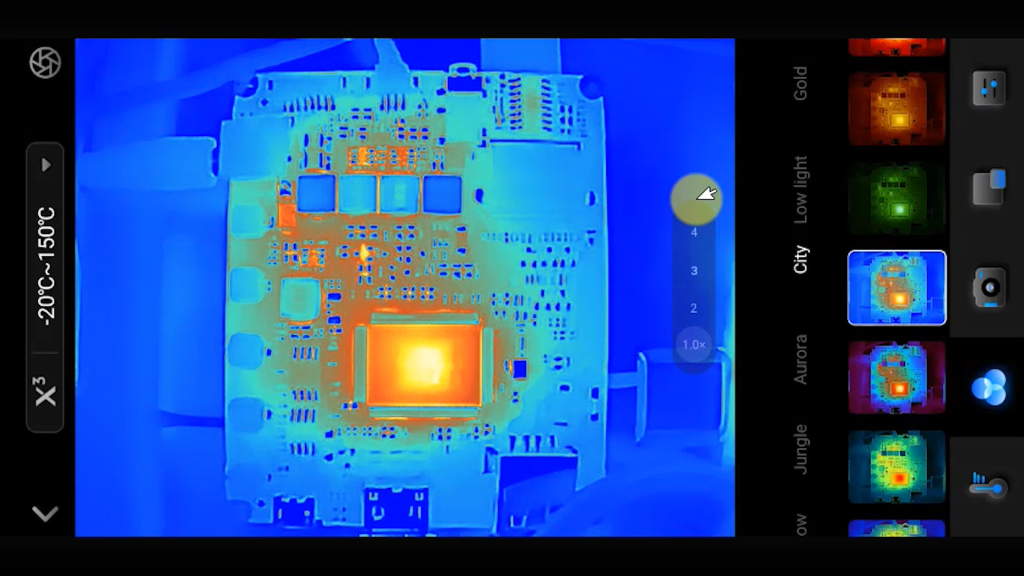
As I’ve already mentioned we’ve got the X3 button which uses something called the Razor X AI algorithm to enhance the standard resolution from 48K to 192K pixels. This does make the images look quite a bit clearer, but as it’s all done digitally you don’t get any extra detail. This is also true of the 15x digital zoom. It’s great for focussing in on a particular section of your circuit board, but it only magnifies the existing pixels rather than giving you the full resolution whilst looking at a smaller selection.
The minimum focussing distance of the camera is also a bit long for detailed electronic work. You need to be about 10cm (4 in) away from the subject to get a sharp image so it can be a bit more difficult to identify an individual surface mount component if they are in a closely spaced array.
But having said all that the actual image quality is good, and you’ll easily be able to see any hotspots in the circuit.
To visualise the scene more easily the app offers several colour space modes. You’ve got a range of the normal colourised images that you’ll probably be familiar with, with different colours representing hot and cold.
But there are also a couple of more diagnostic centred themes which help you more easily see the problem areas. For example this one uses white for cold or normal temperature areas and then uses shades of red for those areas over a certain threshold value. This make sit very easy to spot the hot areas and components in the circuit.
Measurements
Once you’ve found and area of interest the app then offers you a number of measurement tools. The simplest is the point measurement. You simply add measurement points on the screen and the app will give you a temperature reading for that point. With this you can for example put a point in the centre of the screen and then move the camera around to put that point onto the exact place you want a reading for. You can then go on to add more points, so, for example, if you’ve got the camera in a tripod you can then measure multiple temperature points and see them change in real time.
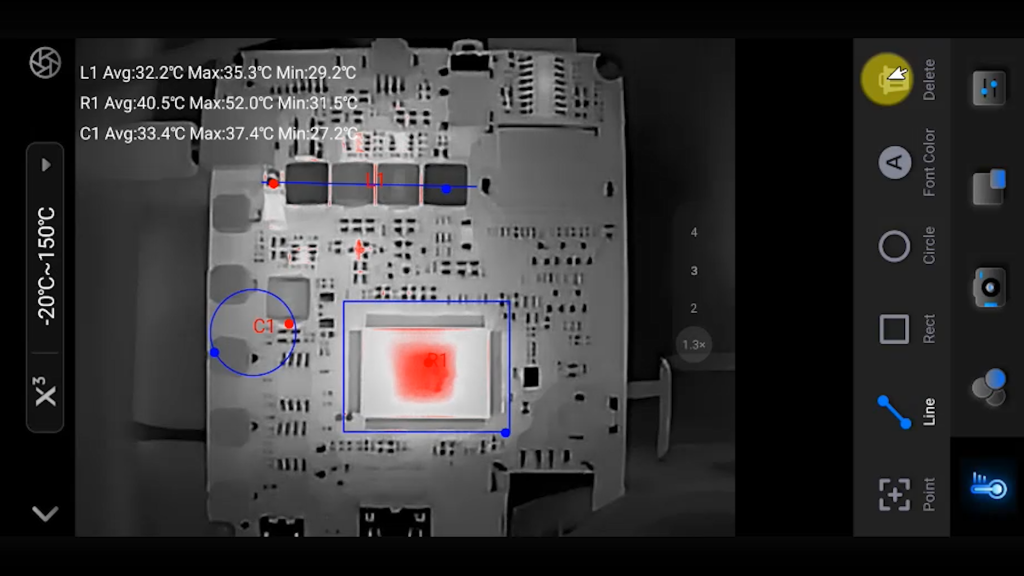
Other tools include area based measurements that will show you average and maximum temperatures in that area and line tools that measure temperature variation over a line across the image.
So a really good set of tools to help you monitor and diagnose your circuits.
Other Uses
Of course an Infra Red camera isn’t just useful for electronic circuits. It’s a great general purpose tool for anything that involves the generation or dissipation of heat.
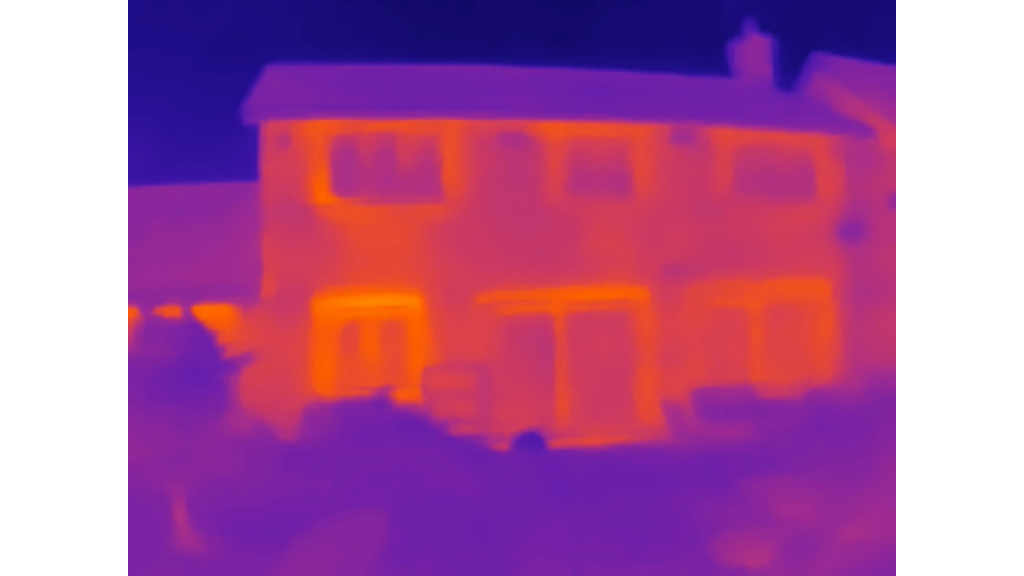
In the UK we don’t have great extremes of weather, but we do have prolonged cold spells, and with the cost of heating these days it’s important to make sure our houses are well insulated. So looking at my own house in infra red really does show up where the heat is escaping from. As you can see the windows and doors are the worst culprits. In our house we have good wall insulation and loft insulation so those areas seem to be well covered.
Household plumbing is another great application for these devices. If you examine your heating or hot water pipes you can see where the heat is going, or not going. This is great for finding blockages or air pockets.
And really the list goes on. So a really useful tool to have in your box.
So I hope this has given you an insight into the sorts of cameras and this Thermal Master one in particular. If you want to get hold of one just visit the Thermal Master website at https://thermalmaster.com/.


