
Emulation on the Nintendo Wii – Turn Your Wii Into a Retro Gaming Centre
10th January 2024
Play Every Retro Console and Arcade Game with RetroBat – full installation and setup
25th January 2024Make Your Own ZX Spectrum Computer Artwork
I’ve been looking for something to put on my office wall for a while. I want it to reflect my love of electronics and 80’s computers and coding, etc. so that it becomes very personal to me. Posters and photos didn’t really stand out to me, but I hit upon the idea of using a circuit board whilst making my replica Commodore 64 and ZX Spectrum.
What about mounting a ZX Spectrum motherboard in a case that I could hang on the wall.
So that’s what I’m going to do in this project.
Making Your Own Artwork
This is my dream machine for a piece of art. Yours’s will probably be different.
So I guess the best place to start is to try and find a piece of hardware that you want to turn into your artwork. I wanted an object that meant something to me, that wasn’t too big and that I could actually get hold off fairly easily. As already mentioned the idea of using a motherboard from a retro computer really stood out to me as it would combine my love of electronics and 1980s home computers. So really the ZX spectrum stood out as the ideal subject.
Getting Hold of Parts
Having a look on eBay I found quite a few sellers selling non working motherboards. These ranged in price from about £15 upwards which I guess depended on how likely the seller thought the circuit would be able to be repaired. So this really worked in my favour where I specifically wanted one that didn’t work. So I managed to find one as a buy it now sale for £17.
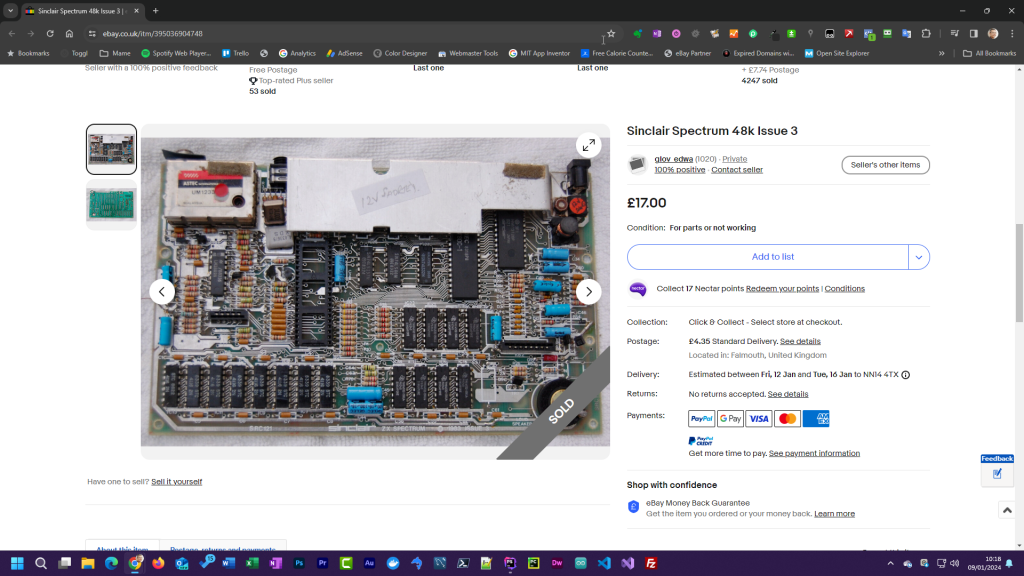
With the circuit board sorted out I next needed to workout what I was going to do with it. I’d seen a couple of videos where people had used portable resin to encase objects and I thought this could make a very interesting project. But having looked at making a mould, pouring the resin, trying to make sure that no air bubbles got trapped in it and then the whole polishing and finishing process, I very quickly came to the conclusion but this wouldn’t be a good idea for my first ever attempt.
So I finally decided on using a display picture frame which would allow me to mount the ZX spectrum motherboard inside it. These frames are basically very deep picture frames which people use to mount memorabilia. Ideal for the circuit board.
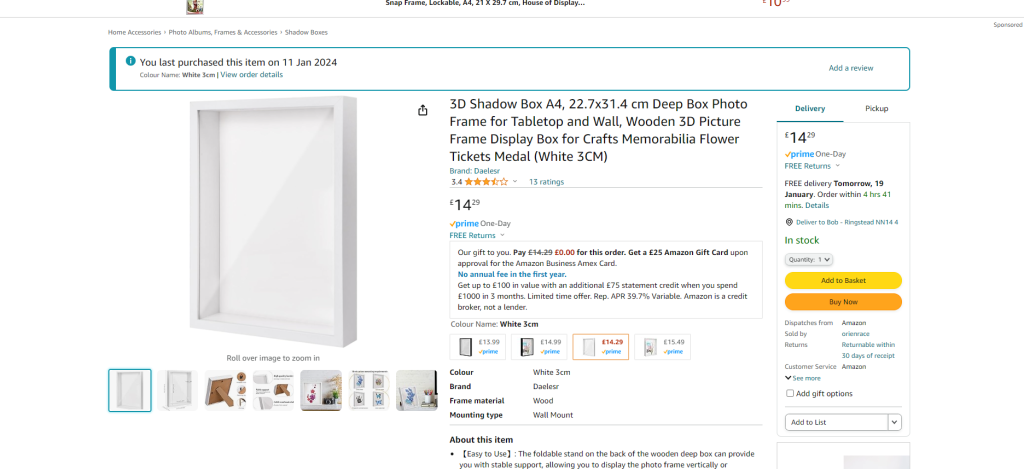
This also meant that I could then design a background image for the frame to enhance the look of the circuit once it was mounted. So with a quick bit of measuring I decided upon an A4 sized frame which had 30mm of mounting space. Looking on Amazon this came in at £14.
Drawing the Background
So, next it was off the Photoshop to try to create the background.
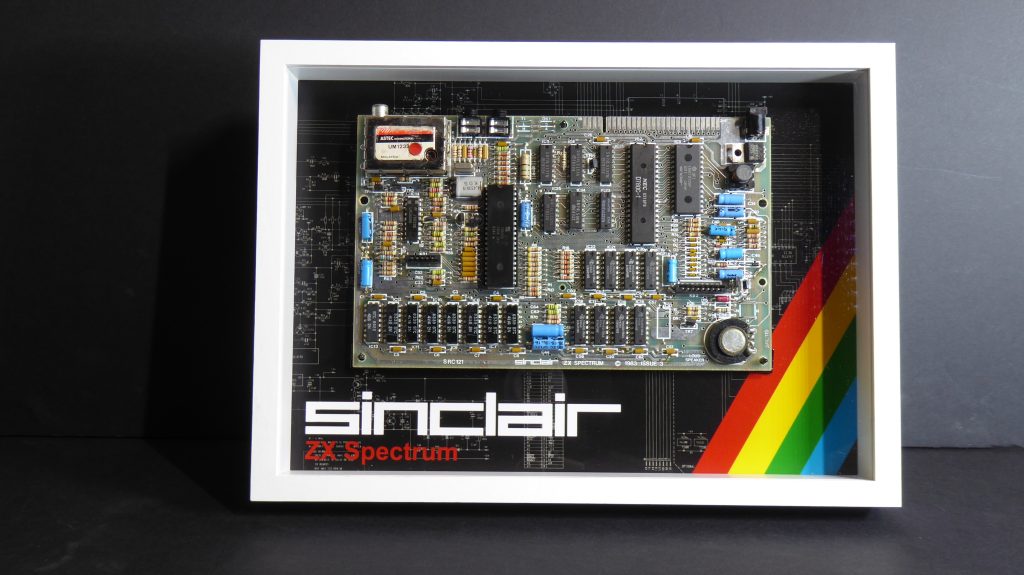
For my design I wanted to have a Spectrum circuit in the background with the four colour stripes and the Sinclair logo. The motherboard would be mounted in the upper half of the A4 area so that meant the logo and stripes would need to go into the bottom half. I also wanted the background to be black so that meant inverting the colours in the circuit diagram and fading the lines back a bit so they didn’t detract from the main subject.
This is what I came up with.
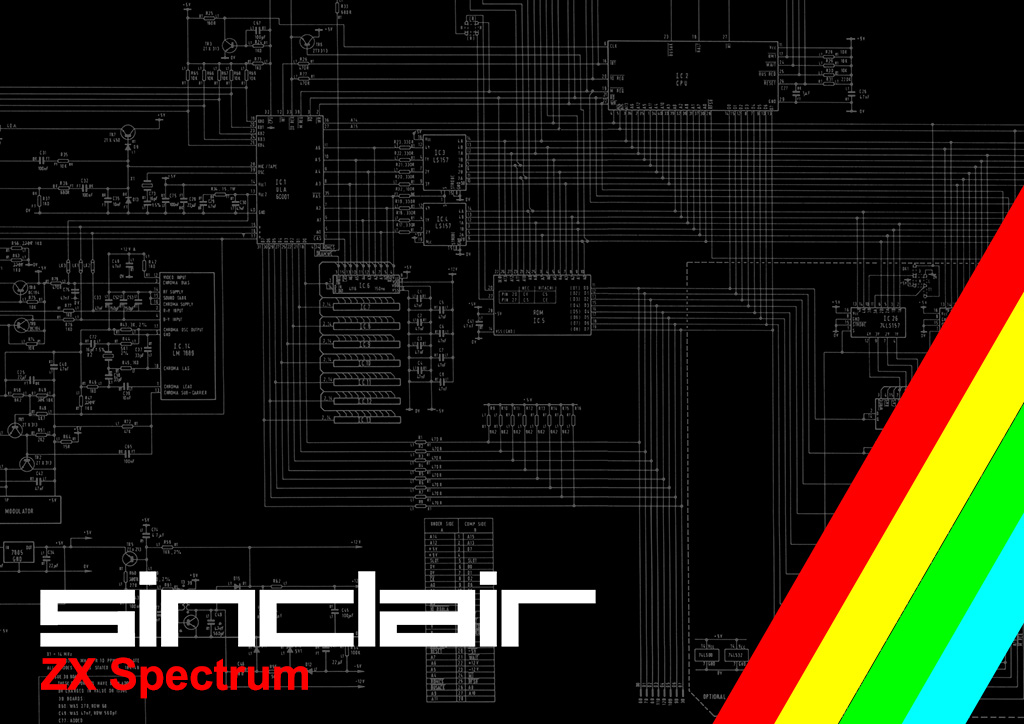
All that was left was to send this off to PhotoBox, one of the online printing services. I ordered the print in both matt and gloss finish so I could see which looked best.
Preparing the Circuit
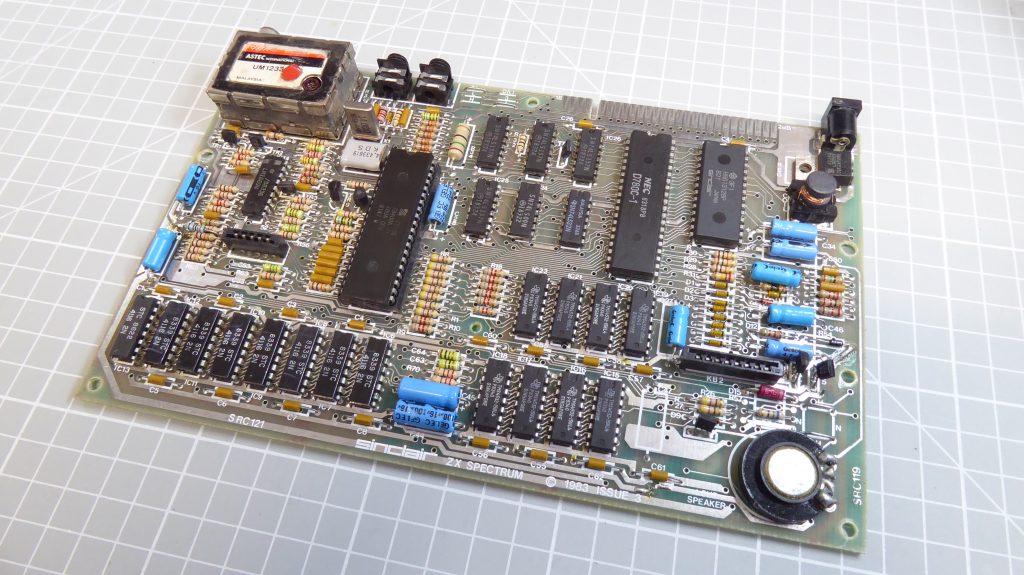
While I was waiting for all the parts to arrive it was time to clean up the motherboard.
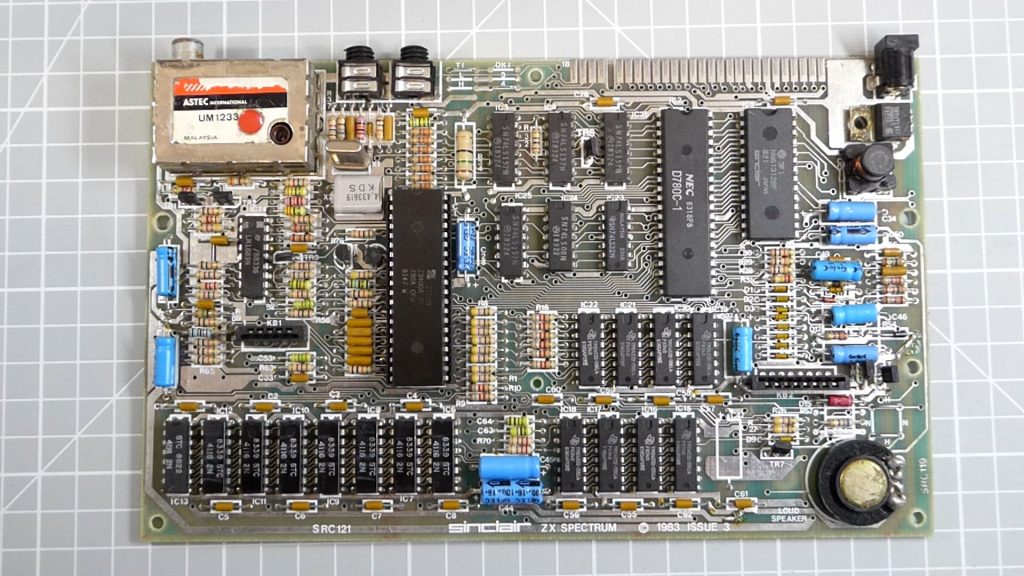
Firstly, most of the for spares parts you’ll get from eBay will be missing the Z80 processor, and potentially some of the other chips so do make sure you either buy a board with them on or source the missing parts. I used to design with Z80s back in the day and happened to have a few lying dormant in my parts bins.
Next we need to clean. Old circuit boards tend to pick up dust and rust over the years so if this was going to be on display I needed to get it looking as good as new. To be fair, my motherboard was in pretty good condition.
The aluminium heatsink was a bit or an eyesore and was covering up some of the interesting electronics so I simply removed that.
Then it was down to some cotton buds (or Q-tips) and 100% alcohol. This is good at dissolving the grime and taking it off without leaving any residue behind. If you are cleaning up a repair job the alcohol also means that the circuit won’t get damaged. The process really is a simple as scrubbing around the board into every nook and cranny you can find until you get it looking as best you can.
My speaker had some corrosion on the magnet. I initially tried with some household scouring cream but that wasn’t going to shift it so I resorted to sone fine sand paper followed by more scouring cream to shine it up and then alcohol to clean away the dust.
Similarly the 5V regulator needed the same sanding process to bring back its metallic shine.
Finally the TV modulator was looking a bit sad. Here the scouring cream worked well to get rid of the surface oxidation and glue from some stickers and polished up the surface really well. There wasn’t much I could do with the label but I guess that adds to the vintage feel of the project.
Assembly
With all that cleaned up all that was left was to put it all together.
The basic construction involved mounting everything onto the back plate of the picture frame. So taking this out of the frame I was able to try out the photo prints to get an idea of the spacing for the circuit board. I had ordered two prints in matt and gloss finishes so it was also an opportunity to work out which one looked better.
I then needed to work out how to mount the circuit board. I decided on using some adhesive PCB standoffs. I already had a good supply but as these where white a needed to spray paint them black.
So this meant that the circuit board was going to be hanging off the photo print. My concern here was that it would drag the picture down and collapse once standing vertically so I needed to get a really good bond between the photo and the backplate. I used some general purpose adhesive for this making sure that I got a very good bond around the edges and especially in the central portion where the standoffs would be transferring the weight to the photo.
So once I’d put a number of thin strips of glue across the backplate I simply needed to glue down the photo and smooth it down with a soft cloth. As you can see I went for the matt finish and the gloss was just a bit too shiny and detracted from the circuit.
Once the glue had cured it was then time to mount the circuit board to the backplate. The motherboard had a few screw holes around the edge and the smaller ones were just the right size for the standoffs. So I added three standoffs and then positioned the board onto the photo. Once I was happy with the layout it was then just a matter of peeling off the backing strips on the standoffs and sticking the board into position.
All that’s left now is to mount the assembly into the frame. People on Amazon had complained about the protective sheets on the Perspex sheet but I found that working around the edge while pressing down on the sheet stopped it from catching on the wood and the sheets peeled off very easily.
Then it was a simple matter of fitting the backplate back into the frame and securing the holding tabs into place.
And that’s the finished artwork.
Parts Used
Background image – A4 – click to download
Motherboard from eBay
Picture frame : https://amzn.to/3O8OUYw
PCB standoffs : https://amzn.to/3tYIx2Y


