The Best Computer Language for Beginners
8th November 2020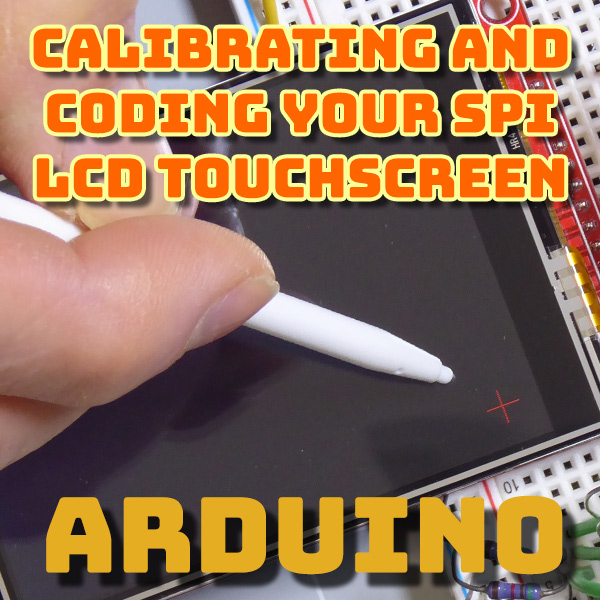
Calibrating and Coding Your Arduino Touchscreen
2nd December 2020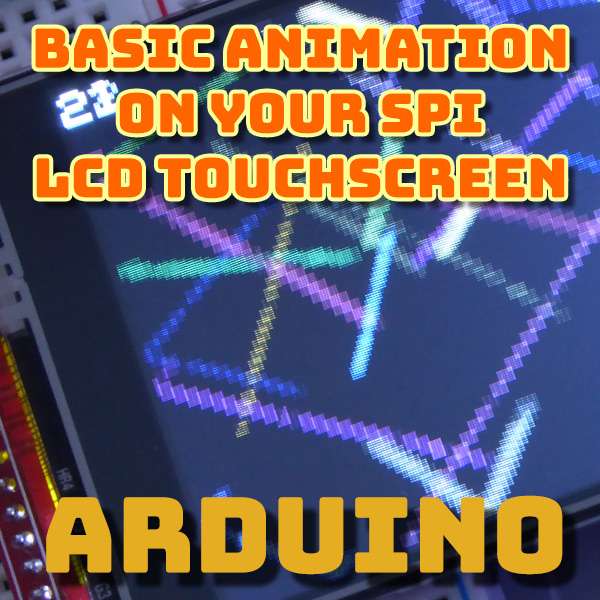
Basic Animation on Your SPI TFT Touchscreen and Arduino
Basic Animation on Your SPI TFT Touchscreen and Arduino
Note : If you haven’t yet got your touchscreen connected and working make sure you have a look at my LCD touchscreen setup tutorial here.
Adding an LCD screen and touch panel to your Arduino project opens up a vast range of possibilities for both displays and control input. You can create animations for games, digital instrumentation, graphics etc. The Adafruit GFX library has a full set of graphic functions to let you build your display using graphic primitives such as lines, circles, rectangles, etc. as well as some bitmap graphics handling functions so you can render images on the screen. Have a look at their tutorial for the library here.
The best way to find out what the library has to offer is to look in the header file that you import at the top of your own project file.
#include "SPI.h"
#include "Adafruit_GFX.h"
#include "Adafruit_ILI9341.h"
#include "XPT2046_Touchscreen.h"
To view this file you’ll need to go to the Arduino folder in your documents folder (Windows and Mac), then look in the libraries folder and then the Adafruit GFX folder. You won’t be able to open this directly in your Arduino IDE as it will only open header files that are in the same directory as your project file, so use any text editor to view the contents. You’ll see all the function prototypes laid out for you – just open the dropdown below to see the code.
#ifndef _ADAFRUIT_GFX_H
#define _ADAFRUIT_GFX_H

#if ARDUINO >= 100
#include "Arduino.h"
#include "Print.h"
#else
#include "WProgram.h"
#endif
#include "gfxfont.h"

/// A generic graphics superclass that can handle all sorts of drawing. At a
/// minimum you can subclass and provide drawPixel(). At a maximum you can do a
/// ton of overriding to optimize. Used for any/all Adafruit displays!
class Adafruit_GFX : public Print {

public:
Adafruit_GFX(int16_t w, int16_t h); // Constructor

/**********************************************************************/
/*!
@brief Draw to the screen/framebuffer/etc.
Must be overridden in subclass.
@param x X coordinate in pixels
@param y Y coordinate in pixels
@param color 16-bit pixel color.
*/
/**********************************************************************/
virtual void drawPixel(int16_t x, int16_t y, uint16_t color) = 0;

// TRANSACTION API / CORE DRAW API
// These MAY be overridden by the subclass to provide device-specific
// optimized code. Otherwise 'generic' versions are used.
virtual void startWrite(void);
virtual void writePixel(int16_t x, int16_t y, uint16_t color);
virtual void writeFillRect(int16_t x, int16_t y, int16_t w, int16_t h,
uint16_t color);
virtual void writeFastVLine(int16_t x, int16_t y, int16_t h, uint16_t color);
virtual void writeFastHLine(int16_t x, int16_t y, int16_t w, uint16_t color);
virtual void writeLine(int16_t x0, int16_t y0, int16_t x1, int16_t y1,
uint16_t color);
virtual void endWrite(void);

// CONTROL API
// These MAY be overridden by the subclass to provide device-specific
// optimized code. Otherwise 'generic' versions are used.
virtual void setRotation(uint8_t r);
virtual void invertDisplay(bool i);

// BASIC DRAW API
// These MAY be overridden by the subclass to provide device-specific
// optimized code. Otherwise 'generic' versions are used.

// It's good to implement those, even if using transaction API
virtual void drawFastVLine(int16_t x, int16_t y, int16_t h, uint16_t color);
virtual void drawFastHLine(int16_t x, int16_t y, int16_t w, uint16_t color);
virtual void fillRect(int16_t x, int16_t y, int16_t w, int16_t h,
uint16_t color);
virtual void fillScreen(uint16_t color);
// Optional and probably not necessary to change
virtual void drawLine(int16_t x0, int16_t y0, int16_t x1, int16_t y1,
uint16_t color);
virtual void drawRect(int16_t x, int16_t y, int16_t w, int16_t h,
uint16_t color);

// These exist only with Adafruit_GFX (no subclass overrides)
void drawCircle(int16_t x0, int16_t y0, int16_t r, uint16_t color);
void drawCircleHelper(int16_t x0, int16_t y0, int16_t r, uint8_t cornername,
uint16_t color);
void fillCircle(int16_t x0, int16_t y0, int16_t r, uint16_t color);
void fillCircleHelper(int16_t x0, int16_t y0, int16_t r, uint8_t cornername,
int16_t delta, uint16_t color);
void drawTriangle(int16_t x0, int16_t y0, int16_t x1, int16_t y1, int16_t x2,
int16_t y2, uint16_t color);
void fillTriangle(int16_t x0, int16_t y0, int16_t x1, int16_t y1, int16_t x2,
int16_t y2, uint16_t color);
void drawRoundRect(int16_t x0, int16_t y0, int16_t w, int16_t h,
int16_t radius, uint16_t color);
void fillRoundRect(int16_t x0, int16_t y0, int16_t w, int16_t h,
int16_t radius, uint16_t color);
void drawBitmap(int16_t x, int16_t y, const uint8_t bitmap[], int16_t w,
int16_t h, uint16_t color);
void drawBitmap(int16_t x, int16_t y, const uint8_t bitmap[], int16_t w,
int16_t h, uint16_t color, uint16_t bg);
void drawBitmap(int16_t x, int16_t y, uint8_t *bitmap, int16_t w, int16_t h,
uint16_t color);
void drawBitmap(int16_t x, int16_t y, uint8_t *bitmap, int16_t w, int16_t h,
uint16_t color, uint16_t bg);
void drawXBitmap(int16_t x, int16_t y, const uint8_t bitmap[], int16_t w,
int16_t h, uint16_t color);
void drawGrayscaleBitmap(int16_t x, int16_t y, const uint8_t bitmap[],
int16_t w, int16_t h);
void drawGrayscaleBitmap(int16_t x, int16_t y, uint8_t *bitmap, int16_t w,
int16_t h);
void drawGrayscaleBitmap(int16_t x, int16_t y, const uint8_t bitmap[],
const uint8_t mask[], int16_t w, int16_t h);
void drawGrayscaleBitmap(int16_t x, int16_t y, uint8_t *bitmap, uint8_t *mask,
int16_t w, int16_t h);
void drawRGBBitmap(int16_t x, int16_t y, const uint16_t bitmap[], int16_t w,
int16_t h);
void drawRGBBitmap(int16_t x, int16_t y, uint16_t *bitmap, int16_t w,
int16_t h);
void drawRGBBitmap(int16_t x, int16_t y, const uint16_t bitmap[],
const uint8_t mask[], int16_t w, int16_t h);
void drawRGBBitmap(int16_t x, int16_t y, uint16_t *bitmap, uint8_t *mask,
int16_t w, int16_t h);
void drawChar(int16_t x, int16_t y, unsigned char c, uint16_t color,
uint16_t bg, uint8_t size);
void drawChar(int16_t x, int16_t y, unsigned char c, uint16_t color,
uint16_t bg, uint8_t size_x, uint8_t size_y);
void getTextBounds(const char *string, int16_t x, int16_t y, int16_t *x1,
int16_t *y1, uint16_t *w, uint16_t *h);
void getTextBounds(const __FlashStringHelper *s, int16_t x, int16_t y,
int16_t *x1, int16_t *y1, uint16_t *w, uint16_t *h);
void getTextBounds(const String &str, int16_t x, int16_t y, int16_t *x1,
int16_t *y1, uint16_t *w, uint16_t *h);
void setTextSize(uint8_t s);
void setTextSize(uint8_t sx, uint8_t sy);
void setFont(const GFXfont *f = NULL);

/**********************************************************************/
/*!
@brief Set text cursor location
@param x X coordinate in pixels
@param y Y coordinate in pixels
*/
/**********************************************************************/
void setCursor(int16_t x, int16_t y) {
cursor_x = x;
cursor_y = y;
}

/**********************************************************************/
/*!
@brief Set text font color with transparant background
@param c 16-bit 5-6-5 Color to draw text with
@note For 'transparent' background, background and foreground
are set to same color rather than using a separate flag.
*/
/**********************************************************************/
void setTextColor(uint16_t c) { textcolor = textbgcolor = c; }

/**********************************************************************/
/*!
@brief Set text font color with custom background color
@param c 16-bit 5-6-5 Color to draw text with
@param bg 16-bit 5-6-5 Color to draw background/fill with
*/
/**********************************************************************/
void setTextColor(uint16_t c, uint16_t bg) {
textcolor = c;
textbgcolor = bg;
}

/**********************************************************************/
/*!
@brief Set whether text that is too long for the screen width should
automatically wrap around to the next line (else clip right).
@param w true for wrapping, false for clipping
*/
/**********************************************************************/
void setTextWrap(bool w) { wrap = w; }

/**********************************************************************/
/*!
@brief Enable (or disable) Code Page 437-compatible charset.
There was an error in glcdfont.c for the longest time -- one
character (#176, the 'light shade' block) was missing -- this
threw off the index of every character that followed it.
But a TON of code has been written with the erroneous
character indices. By default, the library uses the original
'wrong' behavior and old sketches will still work. Pass
'true' to this function to use correct CP437 character values
in your code.
@param x true = enable (new behavior), false = disable (old behavior)
*/
/**********************************************************************/
void cp437(bool x = true) { _cp437 = x; }

using Print::write;
#if ARDUINO >= 100
virtual size_t write(uint8_t);
#else
virtual void write(uint8_t);
#endif

/************************************************************************/
/*!
@brief Get width of the display, accounting for current rotation
@returns Width in pixels
*/
/************************************************************************/
int16_t width(void) const { return _width; };

/************************************************************************/
/*!
@brief Get height of the display, accounting for current rotation
@returns Height in pixels
*/
/************************************************************************/
int16_t height(void) const { return _height; }

/************************************************************************/
/*!
@brief Get rotation setting for display
@returns 0 thru 3 corresponding to 4 cardinal rotations
*/
/************************************************************************/
uint8_t getRotation(void) const { return rotation; }

// get current cursor position (get rotation safe maximum values,
// using: width() for x, height() for y)
/************************************************************************/
/*!
@brief Get text cursor X location
@returns X coordinate in pixels
*/
/************************************************************************/
int16_t getCursorX(void) const { return cursor_x; }

/************************************************************************/
/*!
@brief Get text cursor Y location
@returns Y coordinate in pixels
*/
/************************************************************************/
int16_t getCursorY(void) const { return cursor_y; };

protected:
void charBounds(unsigned char c, int16_t *x, int16_t *y, int16_t *minx,
int16_t *miny, int16_t *maxx, int16_t *maxy);
int16_t WIDTH; ///< This is the 'raw' display width - never changes
int16_t HEIGHT; ///< This is the 'raw' display height - never changes
int16_t _width; ///< Display width as modified by current rotation
int16_t _height; ///< Display height as modified by current rotation
int16_t cursor_x; ///< x location to start print()ing text
int16_t cursor_y; ///< y location to start print()ing text
uint16_t textcolor; ///< 16-bit background color for print()
uint16_t textbgcolor; ///< 16-bit text color for print()
uint8_t textsize_x; ///< Desired magnification in X-axis of text to print()
uint8_t textsize_y; ///< Desired magnification in Y-axis of text to print()
uint8_t rotation; ///< Display rotation (0 thru 3)
bool wrap; ///< If set, 'wrap' text at right edge of display
bool _cp437; ///< If set, use correct CP437 charset (default is off)
GFXfont *gfxFont; ///< Pointer to special font
};

/// A simple drawn button UI element
class Adafruit_GFX_Button {

public:
Adafruit_GFX_Button(void);
// "Classic" initButton() uses center & size
void initButton(Adafruit_GFX *gfx, int16_t x, int16_t y, uint16_t w,
uint16_t h, uint16_t outline, uint16_t fill,
uint16_t textcolor, char *label, uint8_t textsize);
void initButton(Adafruit_GFX *gfx, int16_t x, int16_t y, uint16_t w,
uint16_t h, uint16_t outline, uint16_t fill,
uint16_t textcolor, char *label, uint8_t textsize_x,
uint8_t textsize_y);
// New/alt initButton() uses upper-left corner & size
void initButtonUL(Adafruit_GFX *gfx, int16_t x1, int16_t y1, uint16_t w,
uint16_t h, uint16_t outline, uint16_t fill,
uint16_t textcolor, char *label, uint8_t textsize);
void initButtonUL(Adafruit_GFX *gfx, int16_t x1, int16_t y1, uint16_t w,
uint16_t h, uint16_t outline, uint16_t fill,
uint16_t textcolor, char *label, uint8_t textsize_x,
uint8_t textsize_y);
void drawButton(bool inverted = false);
bool contains(int16_t x, int16_t y);

/**********************************************************************/
/*!
@brief Sets button state, should be done by some touch function
@param p True for pressed, false for not.
*/
/**********************************************************************/
void press(bool p) {
laststate = currstate;
currstate = p;
}

bool justPressed();
bool justReleased();

/**********************************************************************/
/*!
@brief Query whether the button is currently pressed
@returns True if pressed
*/
/**********************************************************************/
bool isPressed(void) { return currstate; };

private:
Adafruit_GFX *_gfx;
int16_t _x1, _y1; // Coordinates of top-left corner
uint16_t _w, _h;
uint8_t _textsize_x;
uint8_t _textsize_y;
uint16_t _outlinecolor, _fillcolor, _textcolor;
char _label[10];

bool currstate, laststate;
};

/// A GFX 1-bit canvas context for graphics
class GFXcanvas1 : public Adafruit_GFX {
public:
GFXcanvas1(uint16_t w, uint16_t h);
~GFXcanvas1(void);
void drawPixel(int16_t x, int16_t y, uint16_t color);
void fillScreen(uint16_t color);
void drawFastVLine(int16_t x, int16_t y, int16_t h, uint16_t color);
void drawFastHLine(int16_t x, int16_t y, int16_t w, uint16_t color);
bool getPixel(int16_t x, int16_t y) const;
/**********************************************************************/
/*!
@brief Get a pointer to the internal buffer memory
@returns A pointer to the allocated buffer
*/
/**********************************************************************/
uint8_t *getBuffer(void) const { return buffer; }

protected:
bool getRawPixel(int16_t x, int16_t y) const;
void drawFastRawVLine(int16_t x, int16_t y, int16_t h, uint16_t color);
void drawFastRawHLine(int16_t x, int16_t y, int16_t w, uint16_t color);

private:
uint8_t *buffer;

#ifdef __AVR__
// Bitmask tables of 0x80>>X and ~(0x80>>X), because X>>Y is slow on AVR
static const uint8_t PROGMEM GFXsetBit[], GFXclrBit[];
#endif
};

/// A GFX 8-bit canvas context for graphics
class GFXcanvas8 : public Adafruit_GFX {
public:
GFXcanvas8(uint16_t w, uint16_t h);
~GFXcanvas8(void);
void drawPixel(int16_t x, int16_t y, uint16_t color);
void fillScreen(uint16_t color);
void drawFastVLine(int16_t x, int16_t y, int16_t h, uint16_t color);
void drawFastHLine(int16_t x, int16_t y, int16_t w, uint16_t color);
uint8_t getPixel(int16_t x, int16_t y) const;
/**********************************************************************/
/*!
@brief Get a pointer to the internal buffer memory
@returns A pointer to the allocated buffer
*/
/**********************************************************************/
uint8_t *getBuffer(void) const { return buffer; }

protected:
uint8_t getRawPixel(int16_t x, int16_t y) const;
void drawFastRawVLine(int16_t x, int16_t y, int16_t h, uint16_t color);
void drawFastRawHLine(int16_t x, int16_t y, int16_t w, uint16_t color);

private:
uint8_t *buffer;
};

/// A GFX 16-bit canvas context for graphics
class GFXcanvas16 : public Adafruit_GFX {
public:
GFXcanvas16(uint16_t w, uint16_t h);
~GFXcanvas16(void);
void drawPixel(int16_t x, int16_t y, uint16_t color);
void fillScreen(uint16_t color);
void byteSwap(void);
void drawFastVLine(int16_t x, int16_t y, int16_t h, uint16_t color);
void drawFastHLine(int16_t x, int16_t y, int16_t w, uint16_t color);
uint16_t getPixel(int16_t x, int16_t y) const;
/**********************************************************************/
/*!
@brief Get a pointer to the internal buffer memory
@returns A pointer to the allocated buffer
*/
/**********************************************************************/
uint16_t *getBuffer(void) const { return buffer; }

protected:
uint16_t getRawPixel(int16_t x, int16_t y) const;
void drawFastRawVLine(int16_t x, int16_t y, int16_t h, uint16_t color);
void drawFastRawHLine(int16_t x, int16_t y, int16_t w, uint16_t color);

private:
uint16_t *buffer;
};

#endif // _ADAFRUIT_GFX_H
All of these class methods can be called from within your project code after you’ve instantiated your main object.
// Use hardware SPI (on Uno, #13, #12, #11) and the above for CS/DC/RST
Adafruit_ILI9341 tft = Adafruit_ILI9341(TFT_CS, TFT_DC, TFT_RST);
tft.begin();
tft.fillScreen(ILI9341_BLACK);
Each function prototype shows you what parameters it requires and the names are fairly self explanatory. Note that the colour values used by the screen are not standard RGB values. You need to convert your colour to a 16 bit value with 5 bits representing the red, 6 bits for green and 5 bits for blue. this gives a 565 layout of bits in the 16 bit value – RRRRRGGGGGGBBBBB.
The Adafruit ILI9341 library header has a few colours pre defined for you, e.g. ILI9341_BLACK, ILI9341_RED, etc. Or you can create your own colour values using a simple RGB to TFT colour function.
word RgbToTft( byte R, byte G, byte B)
{
// TFT needs an 16 bit colour value 5 bit red, 6 bit green, 5 bit blue - RRRRRGGGGGGBBBBB
return ( ((R & 0xF8) << 8) | ((G & 0xF4) << 3) | (B >> 3) );
}
The best way to get to grips with the library is to have play with the functions to see what they do. The ones you’ll need to master that might not be obvious are :
begin() : you need to call this before you start using the library as it gets the screen set up and ready for use.
setRotation(int r) : this sets the rotation of the screen. You can use 0 – 3 to get the screen orientated correctly for your project.
width() and height() : get the pixel dimensions of the screen. Make sure you use these after setting the rotation.
SPI Screen Speed
The major drawback of these SPI screens is speed. Drawing to the screen requires each pixel you want to change to be sent over the SPI interface. Even running at 20MHz this can take some time for large blocks of data. For example the fillScreen function can be used to clear the whole screen but it takes around half a second to complete.
Frame by frame animation (where you draw a frame, clear the screen, draw the next frame) isn’t feasible. You need to get down to the actual graphic object level and do the redrawing there.
What I mean by this is if you want to have a rectangle moving across the screen you need to draw the rectangle, pause (so your eye can see it), rub it out, move it, redraw the new position, etc. In the video above I take you through this process.
But even doing this has its limitations. Larger blocks of image can still take some time to render, reducing your overall frame rate. Again in the video I show this in action and cover various ways of improving performance. In general you’ll need to design your code to reduce the number of pixels you need to write to the screen.
- Reducing the size of moving objects is the most obvious way of doing this.
- Reducing the frequency you have to move an object is another way. Especially for larger objects if you only redraw them when absolutely necessary you’ll speed up the movement of other objects on the screen. This might make their movement less smooth, but overall the display will work better.
- Only draw fixed sections of the screen once. For dials, decorations on screen, and stationary objects you only need to draw them once. As long as you don’t draw over the top of them, you won’t need to update their display.
Conclusion
These SPI screens are great. They are cheap, easy to use, only require a few I/O pins and provide a full graphic display with touch screen input for your Arduino project. With some thought in how you code the display you can create impressive animated screens for displaying information or gaming.
Make sure you check out the next LCD tutorial where I’ll show you a full Breakout / Arkanoid game running on the panel.
Multiple Rectangle Animation Code
#include "SPI.h"
#include "Adafruit_GFX.h"
#include "Adafruit_ILI9341.h"
#include "XPT2046_Touchscreen.h"

// For the Adafruit shield, these are the default.
#define TFT_CS 10
#define TFT_DC 9
#define TFT_MOSI 11
#define TFT_CLK 13
#define TFT_RST 8
#define TFT_MISO 12

#define TS_CS 7

#define ROTATION 3


// Use hardware SPI (on Uno, #13, #12, #11) and the above for CS/DC/RST
Adafruit_ILI9341 tft = Adafruit_ILI9341(TFT_CS, TFT_DC, TFT_RST);
XPT2046_Touchscreen ts(TS_CS);
#define TIRQ_PIN 2

word RgbToTft( byte R, byte G, byte B)
{
// TFT needs an 16 bit colour value 5 bit red, 6 bit green, 5 bit blue - RRRRRGGGGGGBBBBB
return ( ((R & 0xF8) << 8) | ((G & 0xF4) << 3) | (B >> 3) );
}

class Rectangle{
public:
int x;
int y;
int oldX;
int oldY;
int vx;
int vy;
int width;
int height;
int colour;

Rectangle(){
width = random(5,10);
height = random(5,10);
x = random(0, tft.width()-width);
y = random(0, tft.height() - height);
oldX = x;
oldY = y;
vx = random(1,5);
vy = random(1, 5);
byte R = (byte)random(64, 255);
byte G = (byte)random(64, 255);
byte B = (byte)random(64, 255);
colour = (int)RgbToTft(R,G,B);
}

void move(){
x += vx;
y += vy;
if ((x <= 0) || (x >= tft.width() - width)) {
vx = -vx;
}
if ((y <= 0) || (y >= tft.height() - height)) {
vy = -vy;
}
}

void render(){
tft.fillRect(oldX, oldY, width, height, ILI9341_BLACK);
tft.fillRect(x, y, width, height, colour);
oldX = x;
oldY = y;
}
};

int numRectangles = 40;
Rectangle rects[40];

void setup() {
pinMode(TS_CS, OUTPUT);
digitalWrite(TS_CS, HIGH);
pinMode(TFT_CS, OUTPUT);
digitalWrite(TFT_CS, HIGH);
delay(10);
tft.begin();
tft.setRotation(ROTATION);
tft.fillScreen(ILI9341_BLACK);
delay(10);
ts.begin();
ts.setRotation(ROTATION);
delay(10);

// create rectangles
for(int rectCount = 0; rectCount < numRectangles; rectCount++){
rects[rectCount] = Rectangle();
}
}


unsigned long lastFrame = millis();
int frameDisplayTimer = 20;

void loop(void) {

frameDisplayTimer --;
if (frameDisplayTimer == 0) {
frameDisplayTimer = 20;
// print frame time
tft.fillRect(0, 0,30,15,ILI9341_BLACK);
tft.setCursor(0,0);
tft.setTextSize(2);
tft.setTextColor(ILI9341_WHITE);
tft.print(millis() - lastFrame);
}


while((millis() - lastFrame) < 20);
lastFrame = millis();

for(int rectCount = 0; rectCount < numRectangles; rectCount++){
rects[rectCount].move();
rects[rectCount].render();
}

}
Links
LCD module – Amazon
https://amzn.to/35quUJF
LCD eBay
https://rover.ebay.com/rover/1/710-53481-19255-0/1
ILI9341 Library
https://github.com/adafruit/Adafruit_ILI9341
XPT2046 Library
https://github.com/PaulStoffregen/XPT2046_Touchscreen
Adafruit GFX Library
https://github.com/adafruit/Adafruit-GFX-Library
Adafruit LCD tutorial
https://learn.adafruit.com/adafruit-2-8-and-3-2-color-tft-touchscreen-breakout-v2/spi-wiring-and-test
Adafruit GFX Library Tutorial
https://learn.adaruit.com/adafruit-gfx-graphics-library/overview