How To Load Images Onto Your Arduino LCD Screen From an SD Card
9th April 2021
Increase the Frame Rate on Your Raspberry Pi LCD Screen – SPI based LCD Panels
24th April 2021
How To Decode and Display Bitmap Images Using an Arduino – Write Your Own Code
Once you add an SD card reader to your Arduino you are able to read and write files of any format – as long as you have to code to do it! In a previous tutorial I showed you how to use ready made image libraries to display bitmap images. This is the quick and easy way.
In this tutorial I’ll show you how to write your own image handling code. We’ll look at the bitmap file format, work out how to read the header data and translate it into meaningful information about the image. Then how the pixel data is encoded and how to read that and create graphics that can be displayed on the LCD panel. Once you’ve handled on file format you’ll be ready to tackle them all!
Connecting up the Hardware
To get started you’ll need to connect up and add some driver software for the LCD panel and SD card reader. I’ve covered this in previous tutorials so please have a look at these.
Connecting your LCD Touchscreen
Connecting your SD card reader
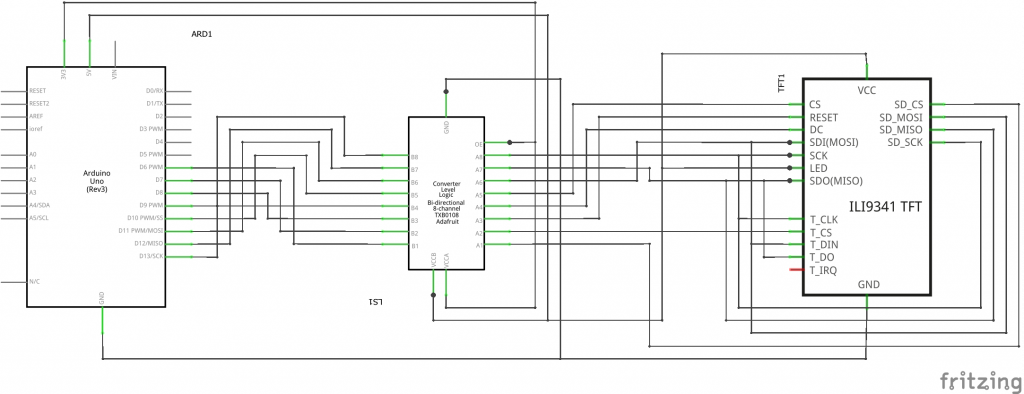
Circuit Diagrams for SPI LCD Touchscreen and SPI SD Card Reader
Breadboard Layout
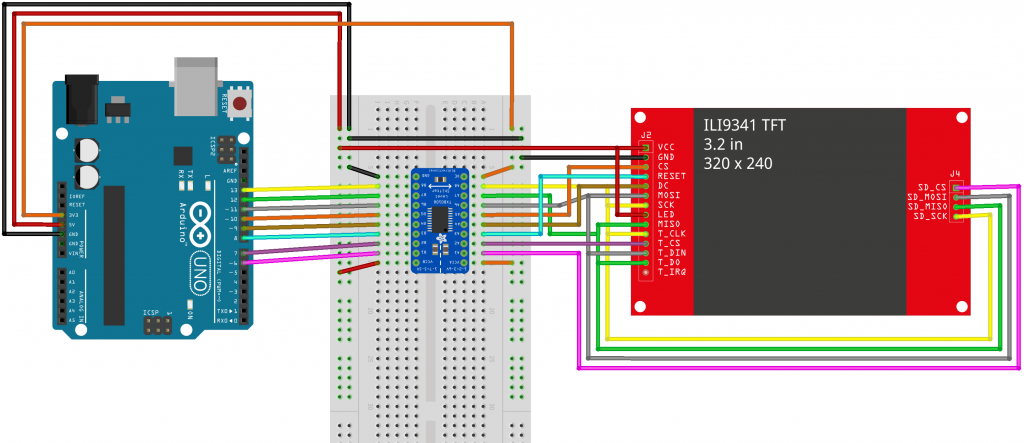
Circuit Diagram